JamMK header

JamMK header

Friday, 23 September 2022

Getting Your Child Equipped For University on a Budget

By some strange set of circumstances, in the past fortnight I have packed both my daughters off to university for the first, leaving me suddenly with an empty nest. An emotional shock to the system, for sure, and also a financial challenge. Oh, and shall we throw the words "cost of living crisis" and "energy price hike" into the mix too?! But, amazingly, we managed to do it without breaking the bank so I thought I would share my tips for anyone looking to get their children off to university in the near future.

It is a bit weird, what with my two girls being 21 months apart in age, that they should both leave home for university at the same time. Because the eldest was born in October and the youngest in July, they ended up only being one school year apart, something we have become used to over their 13 years in school. However, with the pandemic and the distruption to university life, my eldest decided she didn't want to start university in 2021, whilst a lot of lectures were still being held remotely. Instead she spent a year, living a home but commuting into London to complete a one year Art Foundation course. In the meantime, my youngest completed year 13 and so it came about that they both started their degrees in September 2022, fortunately a week apart so we were able to help both of them move.


Having realised in September 2021 that this scenario was going to play out, I also realised that if I were going to send them both off with all the necessary equipment and living essentials I would have to start working on that straight away. So, should you have a child in Year 13 or college then I would recommend planning and acting early.

One of the first things that I would recommend, if you haven't got these things in place already, is to make sure you have supermarket reward cards, a Nectar card and other point earning schemes in place on anything that you already use. I mean, if you are already spending money in a particular way, in a particularly place, then you may as well earn some rewards from it, and it is suprising how well these things accumulate into useful amounts. 

For example, we have a Tesco loyality card and credit card so that just earns us Tesco points without us trying and these can be spent on useful things such as a student railcard, should you not get one as a perk from opening a student bank account (e.g. like you do with the Santander student account). Even if you can't find a reward like that to spend it on, then you can spend the points in store on anything you can buy in a supermarket (which is quite a lot of varied stuff). Having accumulated lots of points over the years I was able to buy them each a pack of 3 pans for £10 and £25 worth of essentials such as foil, sandwich bags, kitchen towel and toilet paper, all paid for with my Tesco vouchers and therefore costing nothing.


Similarly, I have my Nectar card linked to my ebay account, my energy bill and Avanti Trains so you can imagine that those points accumulate well too, especially during the year that my daughter was commuting into London 3 days a week. As it happens I ended up cashing those in as part payment on a new washing machine after our last one broke, but given that you can spend them in Argos, Sainsbury and ebay, that gives quite a bit of scope for getting more student essentials for nothing.

The next thing I would recommend is joining Freecycle or Freegle, or Olio, or Facebook Marketplace, or whatever local groups you have where people give away stuff they no longer want for free. I started to keep a keen eye open on these groups right from last September and over time I managed to pick up crockery, cutlery, kitchen utensils and airers for no money and as much effort as it took me to drive over to pick the stuff up. 


I would also recommend asking your family if they have any spare bits and pieces, and also to have a good rummage in your own cupboards. It is easy to accumulate stuff over the years, some of which you never or hardly use. After 19 years of being a parent, it is hard to imagine how your house will work when there are less people in it, but you just won't need as much stuff so it is worth viewing it as a good opportunity to have a bit of a sort out and declutter. My two took frying pans, knives and a few other bits from the kitchen. It's when you realise they already have a preferred sharp knife that you realise they are very much becoming adults! In addition, my mum and their elder sister found things in their kitchens to donate, and my mum gave them bedding and towels and over-purchased cleaning supplies too. Not only did this benefit my daughters but it helped with decluttering too so it was win, win.


Despite all this, I realised that there would be a few things that we would need to buy new so I viewed Christmas as another opportunity to boast their equipment. No 18/19 year old wants their Christmas to be dominated with boring domestic equipment so I didn't make it their main presents. Instead, I made them an advent calendar. These days there are all kinds of novelty adult advent calendars you can buy containing everything from socks to beer so I decided to make them a university kit advent calendar instead and gave them things such as potato peelers, mini air freshener (for those trips to the shared bathroom facilities), bottle openers etc. I confess that neither them found it very exciting to open their advent calendars last Christmas but they told to me that it all made sense and that it was all useful stuff when we got it all out again at the beginning of September ready for packing.

Also at Christmas they received a voucher for The Natural Collection website from their aunt and uncle. They had received the same vouchers the year before and it had been a bit of struggle for them to find things they wanted to buy that year but, having familarised ourselves with the website previously, I decided to pin the vouchers on the noticeboard for a few months (they were valid until December 2022), and we came back to it in August when they used them to buy dried food goods, stocking up on lots of pasta, rice, sauces and soups. I wouldn't necessarily recommend The Natural Collection as a go-to student website as it is all ethical, eco and organic so pricer than the usual student food of choice, but I would suggest that if you have any influence over what gifts your relatives give at Christmas/birthday then vouchers that could be used in this way are a good idea.

Oh, and a final thing to suggest, is that a few weeks before the move date you start saving boxes and maybe jars too. It can be handy to decant a small amount of spice or flour or whatever into a jar from the family stocks rather than buying them their own whole container. And you are going to need boxes for all their stuff!


So off they went with everything (and possibly more!) that they need to become independent and it had cost us very little. Not only financially savvy but environmentally friendly and immensely satisfying. And you know what, should any of it get broken or stolen this coming year, none of us are going to cry about it.

Tuesday, 26 April 2022

Growing Turmeric

It was several years ago that Laurence, from Wharf Distillery, gave me some turmeric root. Before then I had only ever thought of turmeric as a dried, ground powder in a jar, although since then I have seen the root become more readily available in specialist food shops. It is a knobbly rhizome that very much resembles root ginger, which is hardly surprising as they are related. 

I didn't know what to do with the bit of turmeric root that Laurence gave me so I decided to plant it. I had previously planted root ginger and, after some delay when I figured it was dead, that had grown. Indeed, it had grown very large, very quickly and buckled the flower pot it was in as it formed new root. Then, all of a sudden, it died back. It turned out this was quite normal and meant that the root was ready to harvest, which I did. A proud moment - harvesting my own homegrown root ginger.

In contrast, the turmeric root started to grow much more quickly. It soon became an attractive, slightly jungle-like house plant. And over time, it grew quite well. It had a tendency for the ends of the leaves to brown so I realised I wasn't watering it enough. Soon I was watering it every few days and it become a lush looking house plant. And it has continued to grow on my window sill ever since.

Well, it had, until this winter when it started to die back. I thought I was neglecting it so I upped the watering but it continued to die so I figured maybe I had over-watered it so I cut back and it still continued to die.  So then I wondered if it was just too cold, although it had previously survived winters in the same place. Then I figured maybe the compost in the pot was just exhausted as I hadn't repotted it for years and I usually neglect to add fertiliser to my house plants. 

So last weekend I decided to tip it out and see what was going on and maybe repot it in fresh compost if there was anything there that looked viable. To my surprise, I found some very healthy looking rhizomes that smelt amazing so I decided to take a harvest and to put some of the roots in fresh compost to see if they would grow again.

Although several years have past since I was first given the root, I still have no idea how I would use fresh turmeric. I'm sure that if I was into curries or other spicy food, I could probably grate it into a dish and use it that way. But I'm not. Indeed, the only reason I have turmeric in my cupboard is because I use it fairly often in chutney recipes and occasionally as an amazing yellow natural dye. 


It was at this point that I decided to see if it was possible to make ground turmeric at home from fresh turmeric. A bit of Googling later and I had learnt a few things, including finding out that the die back is part of the natural process of the plant and it occurs when the rhizomes are reclaiming the nutrients from the plant. I guess in more tropical conditions this would happen as part of a short cycle over several months, in much the same way as the root ginger had, but on my cool window sill it had taken several years for the process to complete.

The next step was the wash and peel the turmeric and then I used a potato peeler to par the root into thin slices. These I laid out in my dehydrator and after just a few hours they had turned very dry and brittle. Next I put it into my handheld food processor and blitz away until it formed a powder. And there it was - 8g of homegrown turmeric powder. And it smells amazing too - so fresh and spicy.

I'm not sure how the economics of this stack up, given that I have created about 15p of turmeric powder over about 4 years but it is one of those things that amuses and interests me. First there was the "I wonder" moment when I stuck it in a pot of compost and then there was the joy of the plant growing and thriving, and finally another "I wonder" moment when I managed to create my own dried spice.

Never let economical good sense get in the way of the wonder of growing.

P.S. Should you ever try this - wear gloves!


Tuesday, 18 January 2022

Passionfruit Curd And Other Delights

My eldest loves passion fruit, although she complains about the flavours that it is often paired with. It is true that it is hard to find it unaccompanied by mango, and she strongly believes that dark chocolate is too strong a flavour to put with it, preferring white chocolate. And so, despite her love of passion fruit, it is hard to find things of that flavour that she actually wants.

A while back she asked me to make some passion fruit curd so I duly obligued but we all found it a little bland. Despite using six or seven fruit, the flavour really was quite subtle so I gave up on that as an idea. However, just before Christmas, I received five passion fruits in my Odd Box delivery. It being so close to Christmas, there were other festive bakes that needed to be made so I knew we wouldn't have the capacity to eat a passion fruit dessert as well. So instead I decided that preserving them was the best thing to do and curd was the most logical option.

This time, however, I took the delicate flavour of the passion fruit into account and decided to modify my lemon curd recipe to suit and, success! A beautiful light orange curd with a distinct passion fruit flavour, if maybe a little too sweet.

With the curd made and the fruit temporarily preserved, we got on with Christmas and all that that entails. Then, on New Year's Eve I made a passionfruit cheesecake, or rather a plain cheesecake that I topped with passion fruit curd. And this weekend, I stirred some passion fruit curd into my white chocolate mousse recipe to make a white chocolate and passion fruit mousse. Surprisingly, there is still some curd left so I think next week it might make the filling of a Victoria Sandwich Cake.

Passion Fruit Curd

35g butter, melted
200g granulated sugar
2 eggs
5 passion fruit, juice/pulp only

Put the melted butter in a dish suitable for going inside a pressure cooker, then use a whisk to stir in the sugar. Add the eggs, one at a time, ensuring that it is thoroughly mixed in. Sieve the passion fruits and add the juice/pulp to the mixture and stir well. Put two cups of water into the pressure cooker then place the container on a trivet inside the pressure cooker and seal. Cook on high pressure for 15 minutes then allow it to naturally release pressure. Remove, whisk well to recombine then ladle into warmed jars and seal.

Passion Fruit Cheesecake

For the base
150g digestive biscuits, crushed
75g butter, melted

For the topping
200g white chocolate
30g butter
1/4 vanilla pod
250g cream cheese
90ml whipping cream

Passion fruit curd

For the biscuit base combine the crushed biscuits and the melted butter in a bowl then press into the greased base of a 20cm circular tin or dish. Place in the refrigerator for at least half an hour to solidify. Next, melt the chocolate, butter and the seeds from the vanilla pod in a bowl over a pan of simmering water. Leave to cool. In another bowl, mix together the cream and cheese and beat until smooth. Once the chocolate mix is suitably cool add it to the cream mix and stir thoroughly. Spoon onto the biscuit base. Return to the refrigerator to chill for a few hours or over-night then spoon on passion fruit curd on top before serving.


White Chocolate and Passion Fruit Mousse

2 gelatine leaves
200g white chocolate
300ml double cream
2 tbsp yoghurt
2- 3 generous tbsp passion fruit curd

Put the gelatine in a small sauce pan with some water and leave to soak for a few minutes. In the meantime, break up the white chocolate and melt it over a pan of hot water. Remove from the heat and squeeze the water out of the gelatine then use the residual heat of the hob to melt the gelatine in the pan. Add a little double cream to the gelatine and leave on the hob a little longer as this will make it easier to pour out of the pan later. Whisk the remaining double cream in a large bowl then stir in the yoghurt. Pour in the gelatine and then the melted chocolate and fold in. Spoon in the curd and stir through then taste, adding more curd if necessary but being cautious about making it overly sweet. Spoon the mixture into glasses or other suitable containers then refrigerate for a few hours before serving. It should make 8 servings.


Monday, 17 January 2022

Cheese & Pumpkin Flapjacks

I cut into the biggest of our homegrown pumpkins yesterday. It did appear to be storing perfectly even though it was harvested three months ago but at some point it will start to rot and I wanted to use it whilst still in good condition. Of course, once you cut into a pumpkin you have to use it up quickly so I already had plans to make a couple of chutneys and some other delights.

Late on Sunday afternoon, as I washed up the chutney pan, I began to contemplate packed lunches for Monday. We have our shopping delivered on Tuesdays so the hideous Hovis white bread that my eldest chooses to eat is always a bit iffy for sandwiches by Monday so if possible Monday packed lunches don't feature sandwiches.

I was just contemplating whipping up a batch of couscous when I remembered the savoury flapjacks I had made last year. I couldn't remember the recipe so I had a quick Google. That failed to find the recipe I was thinking of but threw up a whole bunch of other savoury flapjack recipes and that led me to start conjuring up my own ideas.

Just in time for the Sunday roast to go in, the flapjacks came out of the oven. We each had a small taster piece on our plates at dinner time just to check that they would meet with approval and then this morning they were duly packed into lunchboxes.

Cheese & Pumpkin Flapjacks

100g butter
1 generous tbsp Bovril (or Marmite)
250g porridge oats
250g raw pumpkin, grated
2 tbsp milled flaxseed
100g mature Cheddar, grated
2 large eggs, beaten
Dried herbs
2 tbsp sunflower seeds

Preheat the oven to 180°C, gas 4 and grease and tin a 20 cm square baking tin.  Melt the butter in a large bowl in the microwave for 30 seconds then add the Bovril and microwave for another 30 seconds. Add the oats, flaxseed, and grated pumpkin and stir to combine. Add the cheese, eggs, herbs and seeds and stir again until well mixed. Tip into the tin and press down with wetted fingers to level out. Bake for 25 to 30 minutes until golden. Leave to cool in the tin then cut into 12 pieces.


Monday, 27 September 2021

Sweet Potato & Courgette Bake

I got some sweet potatoes in my Oddbox order recently but I wasn't really sure what I wanted to do with them. As it is also courgette season, I decided to do a search on the internet for sweet potato and courgette recipes and came across a sweet potato and courgette bake that sounded interesting. It didn't seem like something Steve would like to eat so I figured it might make a nice lunch or dinner for my daughter when we were eating something she didn't fancy. 

Well, she's not a huge fan of lamb so when Steve and I decided to have a rack of lamb for our Sunday dinner last night, it seemed like the perfect opportunity to make the bake - just ram it in the oven with everything else that was cooking.

With the recipe to hand, I started by getting some sweet potato on to boil to make some mash. Then I finely sliced the remaining sweet potato and the courgette. It was now time to start assembling the bake but to be honest it all suddenly seemed a bit bland. As it happened, my daughter was in the kitchen, getting herself a glass of water and she asked what I was making. I explain, as I layered the courgette into the bottom of the dish, that I was making the sweet potato and courgette bake but I was thinking of adding a few more flavours. With that, I poured a little passata over the layer of courgette and sprinkled on some dried Italian herbs and dried onion flakes.

"It needs cheese sauce," she commented. 

My shoulders slumped. I had been gardening all afternoon, it was getting late, I had roast potatoes to prepare and get into the oven, a rack of lamb to cook and I wanted to fit in a bath before it was all cooked too. I did not have time nor energy for a cheese sauce.

"It's OK," she said, "I'll make it."

So as I prepared the roast potatoes, she put together the ingredients I would have used to make a cheese bechemel sauce but instead of making a roux, adding the milk and then the cheese, she just bunged it all into a sauce pan and stirred. 

"That's really not how to make a cheese sauce," I said, as she stirred the unconvincing lumpy ingredients together.

"Oh, isn't it?" she asked, frowning, "but it worked the last time I did it like this."

And to my surprise, a few minutes later she had a cheese sauce. She poured this over the layer of sweet potato and we continued to layer up the bake, finishing with the mashed sweet potato and cheese.

By this point the potatoes were in the oven so I went off for a quick bath whilst things cooked. And upon my return, she had a beautiful bubbly bake, ready to serve. Definitely a lot tastier than the original recipe and full of her favourite flavours.

Sweet Potato & Courgette Bake (serves 1)

1 sweet potato
1 small courgette
300 ml vegetable stock
100ml passata
Dried onion
1 tsp Italian seasoning
25g butter
25g flour
Dash of mustard
100ml milk
Cheddar
Salt & pepper

Preheat oven to 180°C and grease a small ovenproof dish. Peel the sweet potato then cut in half. Cut one half of the sweet potato into small chunks and boil in a pan with the vegetable stock until soft. Drain, but keep the vegetable stock. Season the potato lightly then mash. To make the cheese sauce, put the butter, flour, mustard and milk into a small pan and heat gently. Stir constantly until it forms a smooth sauce then grate in Cheddar to taste. Thinly slice the remaining half of the sweet potato and then do the same to the courgette. Starting with the courgette, layer up the bake ingredients. On top of the courgettes, add some passata, Italian seasoning and dried onion, then layer sweet potato on top and spread on a layer of cheese sauce. Repeat until you have used up all the sliced vegetables. Carefully pour vegetable stock down the edge of the dish until you can see it amongst the layers but without disturbing them. Put the mashed sweet potato on top and finish with a little grated Cheddar. Bake for 1 hour or until golden and bubbling.


Tuesday, 29 June 2021

Ramped Up Strawberries and Cream

We are reaping the rewards this year of the work we put into sorting out the strawberry patch last year and we are getting a pretty decent crop. Mind you, the recent weather hasn't been helping and the rain, drizzle and general dampness means that some of the fruit are going mouldy. Although some are beyond help, others have just a patch that could be cut out if tackled immediately.

With this is mind, back in the kitchen I set about processing the strawberries that I had picked that morning. First I sorted them into perfect and imperfect and then I cut up the imperfect ones, removing the areas of damage. I allocated 300g of the better ones for strawberry cheesecake, which I would make the next day. The cut strawberries needed to be eaten within hours to avoid further spoilage. So, I used 100g of them straight away to make strawberry and vanilla muffins. 

Strawberry and Vanilla Muffins (makes 8-9)

175g self-raising flour
85g caster sugar
2 eggs
2 tbsp sunflower oil
150ml natural yoghurt
2 tsp vanilla extract
100g strawberries, chopped

Preheat oven to 200°C and line a muffin tin with 9 cases. Place all the ingredients, except the strawberries, into a bowl and mix until just combined. Add the strawberry pieces and gently mix in. Spoon the mixture evenly into the muffin tin then bake for 15 to 20 minutes. Cool on a wire rack.


That left about another 100g. These I mixed with some strawberry jam. Then I whipped up some cream and layered them into tumblers. These went into the fridge and after dinner I served them up with a cherry on top and some chocolate sauce. Strawberries and cream - just ramped up! 

A quick and easy dessert and coincidently the colours of the England flag, just in time for match day, or failing that, the perfect accompaniment to Wimbledon!

Ramped Up Strawberries and Cream (makes 4)

100g strawberries, chopped
50g strawberry jam
200ml whipping cream
50g icing sugar
85g dark chocolate
50g water
4 glace cherries

Add the icing sugar to the cream and whisk until thick. Spoon a third of the mixture evenly between 4 glasses. Mix the jam and strawberries and spoon half of this on top of the cream. Add another third of the cream on top of the strawberries, then add the remaining strawberries and jam before topping with the rest of the cream. Chill until ready to serve. Over a pan of boiling water, melt together the chocolate and the water then pour into a small jug and leave to cool to room temperature. To serve, top with a cherry and pour over the chocolate sauce.


Wednesday, 23 June 2021

Variations on the Victoria Sandwich Cake

When I was a child, we would visit my grandparents about once a month for a weekend. On departure we would be loaded up with goodies. There would be pocket money and sweets pushed into the hands of my brother and me, and a box of food for my parents. My grandad was not only an extremely generous man who would give you the shirt off his back if he felt that you needed it, but he was also a pastry chef. When he had signed up during World War II, he had requested to be a mechanic... so they had assigned him to the catering corps. After the war, with this training behind him, he had been in continual employment as a baker and pastry chef. Therefore, staples in the food parcel would be his amazing steak pie and his strawberries and cream sandwich cake, made with a filling of fresh whipped cream and slices of strawberries. I don't know whether it came frozen or whether my mum dealt with the vast quantities of generosity by slicing it and freezing it, but I have memories of eating slices of the cake, not quite thawed out in the middle, the cold cream still slightly resisting my teeth. Happy memories.

I'm in no way a pastry chef but I have been making Victoria Sandwich cakes for years now. Like scones, people seem to have preferrence for either strawberry or raspberry jam in the middle of their cake, but, in the absence of my grandad's cake, I have always preferred raspberry jam, especially as my version is seedless. 

I make a cake once a week generally and we eat some every afternoon as a snack. It might be fairy cakes or muffins or fruit cake or layer cake but there is always something in the cake tin. In order to decide what to bake each week I have a scan around the kitchen, seeing what's in the fruit bowl in need of using up or what else we seem to have too much of. Currently, we have too much jam. 

Inevitably, when I make a batch of jam, there is always a bit at the end that doesn't make a whole jar full. This I decant into lidded plastic pots and, under normal circumstances, I use these as my taster samples at events. Or, when my daughter eats porridge at the weekend, I stir in some jam to flavour it. But, I'm not attending events currently and even if I were, tasters would not be allowed. And, my daughter has decided that porridge for breakfast is too filling.

So, in order to find ways of using up jam, I have been making various sandwich cakes, based around a basic Victoria sandwich cake recipe, and inspired by the flavour of the jam I have to hand and anything lurking in my fruit bowl. It has been a fun and tasty experiment and I share the recipes below. And now, come June, I finally have fresh strawberries to pick so a chance to relive my childhool memories.

Basic Victoria Sandwich Cake Recipe

225g butter or margarine
225g caster sugar
4 eggs
225g self-raising flour
Pinch of salt
Raspberry jam
100g unsalted butter
225g icing sugar
1/2 tsp vanilla extract

Preheat oven to 180°C and grease and line two 20cm sandwich cake tins. Cream together the butter (or margarine) and the sugar then stir in the eggs one at a time. Add the flour and salt and stir until it forms a cake batter. Divide the batter between the two tins and level out then bake for 25 minutes. Once cooked, remove from the tins and leave to cool completely on a wire rack. Soften the butter then slowly mix in the icing sugar and vanilla to create butter icing. Spread one cake with jam and the other with butter icing then sandwich them together.


Plum & Orange Sandwich Cake Recipe

225g butter or margarine
110g caster sugar
110g plum jam
1 orange (zest and juice)
4 eggs
225g self-raising flour
Pinch of salt
Plum jam
100g mascapone
2 tbsp honey

Preheat oven to 180°C and grease and line two 20cm sandwich cake tins. Cream together the butter (or margarine) and the sugar then stir in jam, followed by the zest and juice of half an orange. Next add the eggs one at a time. Add the flour and salt and stir until it forms a cake batter. Divide the batter between the two tins and level out then bake for 25 minutes. Once cooked, remove from the tins and leave to cool completely on a wire rack. Stir the remaining orange juice and zest and the honey into the mascapone. Spread one cake with jam and the other with mascapone icing then sandwich them together.


Toffee Apple Sandwich Cake Recipe

225g butter or margarine
110g caster sugar
110g apple jam (preferrably Toffee Apple Jam)
1 apple
A little brown sugar
1/2 tsp cinnamon
4 eggs
225g self-raising flour
Pinch of salt
Toffee Apple jam
100g mascapone
2 tbsp honey
1 tsp cinnamon

Preheat oven to 180°C and grease and line two 20cm sandwich cake tins. Peel, core and slice the apple then toss in a little brown sugar and cinnamon. Scatter this into the base of one of the cake tins. Cream together the butter (or margarine) and the sugar then stir in jam. Next add the eggs one at a time. Add the flour and salt and stir until it forms a cake batter. Divide the batter between the two tins and level out then bake for 25 minutes. Once cooked, remove from the tins and leave to cool completely on a wire rack, making sure that the apple layer is facing up. Stir the honey and cinnamon into the mascapone. Spread one cake with jam, then carefully spread the mascapone icing on top. Place the apple cake on top, with the apple layer forming the top of the cake.


Rhubarb & Ginger Sandwich Cake Recipe

225g butter or margarine
110g caster sugar
150g rhubarb
2 tbsp of giner syrup from a jar of stem ginger
4 eggs
225g self-raising flour
1 tsp mixed spice
Pinch of salt
Rhubarb & Ginger Jam
100g unsalted butter
225g icing sugar
1/2 tsp ground ginger or two drops of ginger extract

Preheat oven to 180°C and grease and line two 20cm sandwich cake tins. Chop the rhubarb and put in a small saucepan with the ginger syrup. Cook with the lid on for a few minutes until the rhubarb has broken down and gone mushy. Set aside to cool. Cream together the butter (or margarine) and the sugar then stir in the rhubarb.. Next add the eggs one at a time. Add the flour, mixed spice and salt and stir until it forms a cake batter. Divide the batter between the two tins and level out then bake for 25 minutes. Once cooked, remove from the tins and leave to cool completely on a wire rack. Soften the butter then slowly mix in the icing sugar and ginger to create butter icing. Spread one cake with jam and the other with butter icing then sandwich them together.


Chocolate Orange Sandwich Cake Recipe

225g butter or margarine
110g caster sugar
1 orange - juice and zest
4 eggs
225g self-raising flour
25g cocoa powder
Pinch of salt
Orange curd

Preheat oven to 180°C and grease and line two 20cm sandwich cake tins. Cream together the butter (or margarine) and the sugar then stir in the orange juice and zest. Next add the eggs one at a time. Add the flour, cocoa and salt and stir until it forms a cake batter. Divide the batter between the two tins and level out then bake for 25 minutes. Once cooked, remove from the tins and leave to cool completely on a wire rack. Spread one cake with orange curd then sandwich them together.


Strawberries & Cream Victoria Sandwich Cake Recipe

225g butter or margarine
225g caster sugar
4 eggs
225g self-raising flour
Pinch of salt
Strawberry Jam
100g mascapone
50g icing sugar
1/2 tsp vanilla extract
A few fresh strawberries, sliced

Preheat oven to 180°C and grease and line two 20cm sandwich cake tins. Cream together the butter (or margarine) and the sugar then stir in the eggs one at a time. Add the flour and salt and stir until it forms a cake batter. Divide the batter between the two tins and level out then bake for 25 minutes. Once cooked, remove from the tins and leave to cool completely on a wire rack. Slowly mix the icing sugar and vanilla into the mascapone to create a creamy texture. Spread one cake with jam and the other with the mascapone. Layer the slices of strawberries on top of the mascapone then sandwich the two cakes together. Finish with a dusting of icing sugar if you like.


Friday, 28 May 2021

Rhubarb Mousse

Rhubarb is a peculiar thing - peculiarly English too. You just don't see it used much in other countries and I have struggled to explain what rhubarb jam is to non-native customers at my stalls over the years.

I have always regarded it as a cheap food too - something so easy to grow that you can plant it once and just let it get on with its own thing from then on. Certainly I imagine that everyone who was "Digging For Victory" back in the day must have had some on their plot. 

Having never felt the need to buy rhubarb before I really couldn't have told you how much it would cost but this week, out of curiousity, I looked it up on both the Tesco and Ocado supermarket sites and found that it was £6.88 per kilogram on that particular day. Having already harvested 3kg of rhubarb this year, I realised that would have set me back about £21! Astonishing, especially as there is still time to pick some more this season.


So, was I wrong all along to think of rhubarb as a cheap food? Well, with fresh raspberries coming in at roughly £12 per kilogram, it certainly doesn't compete with those price-wise. But then again, rhubarb isn't as squishy and hard to transport as raspberries so maybe that isn't a fair comparison. What about the other stems that we eat? 

Celery comes in at roughly £3 per kilogram so in comparison, rhubarb is something of a luxury food! And, remarkably, on the day I was checking prices, asparagus was being sold for £6.59 per kilogram. So, like for like, asparagus and rhubarb are the same price. And yet I would have considered asparagus to be... a bit posh!


Having discovered that I should be showing more respect to my rhubarb, I decided that I needed to elevate it further than the humble crumble. As such, I combined it with some double cream and some fancy ruby chocolate to create Rhubarb and Ruby Chocolate Mousse, and scattered some homemade granola on top as a nod to rhubarb crumble. There you go, rhubarb, the fancy dessert you deserve!

Rhubarb and Ruby Chocolate Mousse (makes 6)

150g rhubarb
1 tbsp caster sugar
1 tbsp water
2 gelatine leaves
150g natural yoghurt
200g ruby chocolate (use white chocolate if your prefer)
300ml double cream
Granola or similar to scatter

Cut the rhubarb into pieces and place in a small pan with the sugar and water. Cook gently with the lid on for several minutes until very soft. Leave to cool then use a stick blender to puree. Next, cover the gelatine with water for a few minutes to soften. Put the chocolate in a small bowl over a pan of hot water to melt. Next, squeeze the water out of the gelatine then put it in small pan over a low heat until melted. Add a little of the cream to the gelatine and heat gently to incorporate the two as this will make the gelatine easier to pour. Whisk the remaining double cream in a large bowl until thick. Add all the ingredients to the cream (apart from the granola) and gently fold together until mixed. Spoon into suitable containers/glasses and put in the fridge to set. When ready to serve, scatter the granola on top if using.


Thursday, 20 May 2021

Potato Bread

Sometimes we make too much mashed potato to go with our sausages. There are, of course, plenty of things you could do with leftover mashed potatoes, including making bubble and squeak or fashioning it into potato cakes. One of my favourites is to use it as an excuse to make mashed potato doughnuts (as previously blogged). However, when my husband makes mash potato, he tends to season it quite heavily, including adding celery salt and garlic powder and these residue flavours aren't really what you want in your freshly fried doughnuts!

So, having gathered a small box of mashed potatoes from the dinner plates last night, today I decided the best use to put it to would be in a loaf of bread. I usually make bread on a Thursday anyway as Friday is the only day of the week where my daughter has lessons in the afternoon and can't come home from sixth form at lunch time, thus she is in need of bread fresh enough to take as a sandwich.

Once the bread is cooked, you would scarcely notice that it has potato in it. I find it tends to rise enthusiatically and it has a lovely soft texture and I guess that has something to do with the starches from the potato. It is a very satisfying way to make use of waste food.
Potato Bread

225g water
3 tbsp sunflower oil
425g white bread flour
75g malted bread flour (or use a total of 500g white flour if preferred)
175g cold cooked mashed potato
1 1/2 tbsp skimmed milk powder
1 tsp salt (add an extra half a teaspoon if there isn't salt in your mashed potato)
1 1/2 tsp sugar
1 1/2 tsp easy blend yeast

Load the ingredients into your bread machine and set to dough. Alternatively, mix by hand and knead for 10 minutes or use a dough hook on a food processory. Leave to prove for one hour. Knock back and shape dough to fit into a 2lb loaf tin then cover with greased Clingfilm and leave to prove for half an hour. Preheat oven to 190°C. Slash the top of the bread with a knife several times then put the tin in the oven. Through some water into the bottom of the oven to create steam and shut the oven door. Cook for 45 minutes until golden brown and it sounds hollow when tapped. Leave to cool on a wire rack.


Thursday, 15 April 2021

The Endless Loop of Leftovers

Sometimes I find myself in a endless loop of leftovers. I make something, which leads to leftovers and then I find a way to make that into something else, but it leads to more leftovers and on it goes.

I had a meat delivery last week. Mostly I just bag it all up into suitable portions and get it into the freezer to last a few weeks. However, I turned the 700g of stewing steak into steak pies before freezing them, cooking up the pie filling that afternoon and adding some puff pastry once cooled. The pies had circular lids so I was left with some offcuts of puff pastry. 

The meat box was also supposed to contain 12 sausages, which I would normally divide into 8 and 4. We eat 8 sausages between us as one meal, and the other 4 I might turn into sausage egg muffins or add them to a mixed grill. However, I only received 1 pack of 6 sausages, which doesn't work for me in terms of numbers. Fortunately, there was a rather delicious sausage pasta bake recipe in the BBC Good Food Magazine this month that feeds four with 6 sausages so I bought some mozzerella and made that. That left a little bit of mozzerella that I boxed up and popped in the fridge.


Later, I added to the off-cuts of puff pastry when I made a batch of sausage rolls (also destined for the freezer). One tray of sausagemeat only needs three quarters of a sheet of puff pastry, leaving an odd bit. Sometimes I make this into 3 or 4 cheese straws just to be done but this time I added it to the offcuts from the pies. But what to do with the puff pastry?

I had seen a recipe for Homity Pie in the BBC Good Food Magazine too and I wondered if it might be nice to replace some of the Cheddar in it with my leftover mozzerella and maybe give it a lid of puff pastry instead of shortcrust. It certainly seemed like the perfect way to use up some of the rubbish potatoes from our allotment, along with some onions and leeks from my Oddbox delivery. However, it did mean I had to buy a pot of double cream.

With the double cream purchased, I re-read the recipe and realised it was more a tart than a pie, being without a lid, so that ruled out using up the puff pastry. I also decided that Cheddar would work much better than mozzerella in terms of flavour so I didn't use that either. The pie was really delicious, and definitely one to add to my favourites, especially at this time of year when potatoes, onions and leeks are seasonal stars.


I tried it out as a lunchtime dish for my youngest daughter and me as we like being guinea pigs for new recipes but my husband was so taken with the thin slither he tried that he decided to eat some of it for his dinner.  And the remaining two portions, my youngest and I ate for lunch on Sunday. All good, except it only used half a pot of double cream so I had to think of something to do with that now.

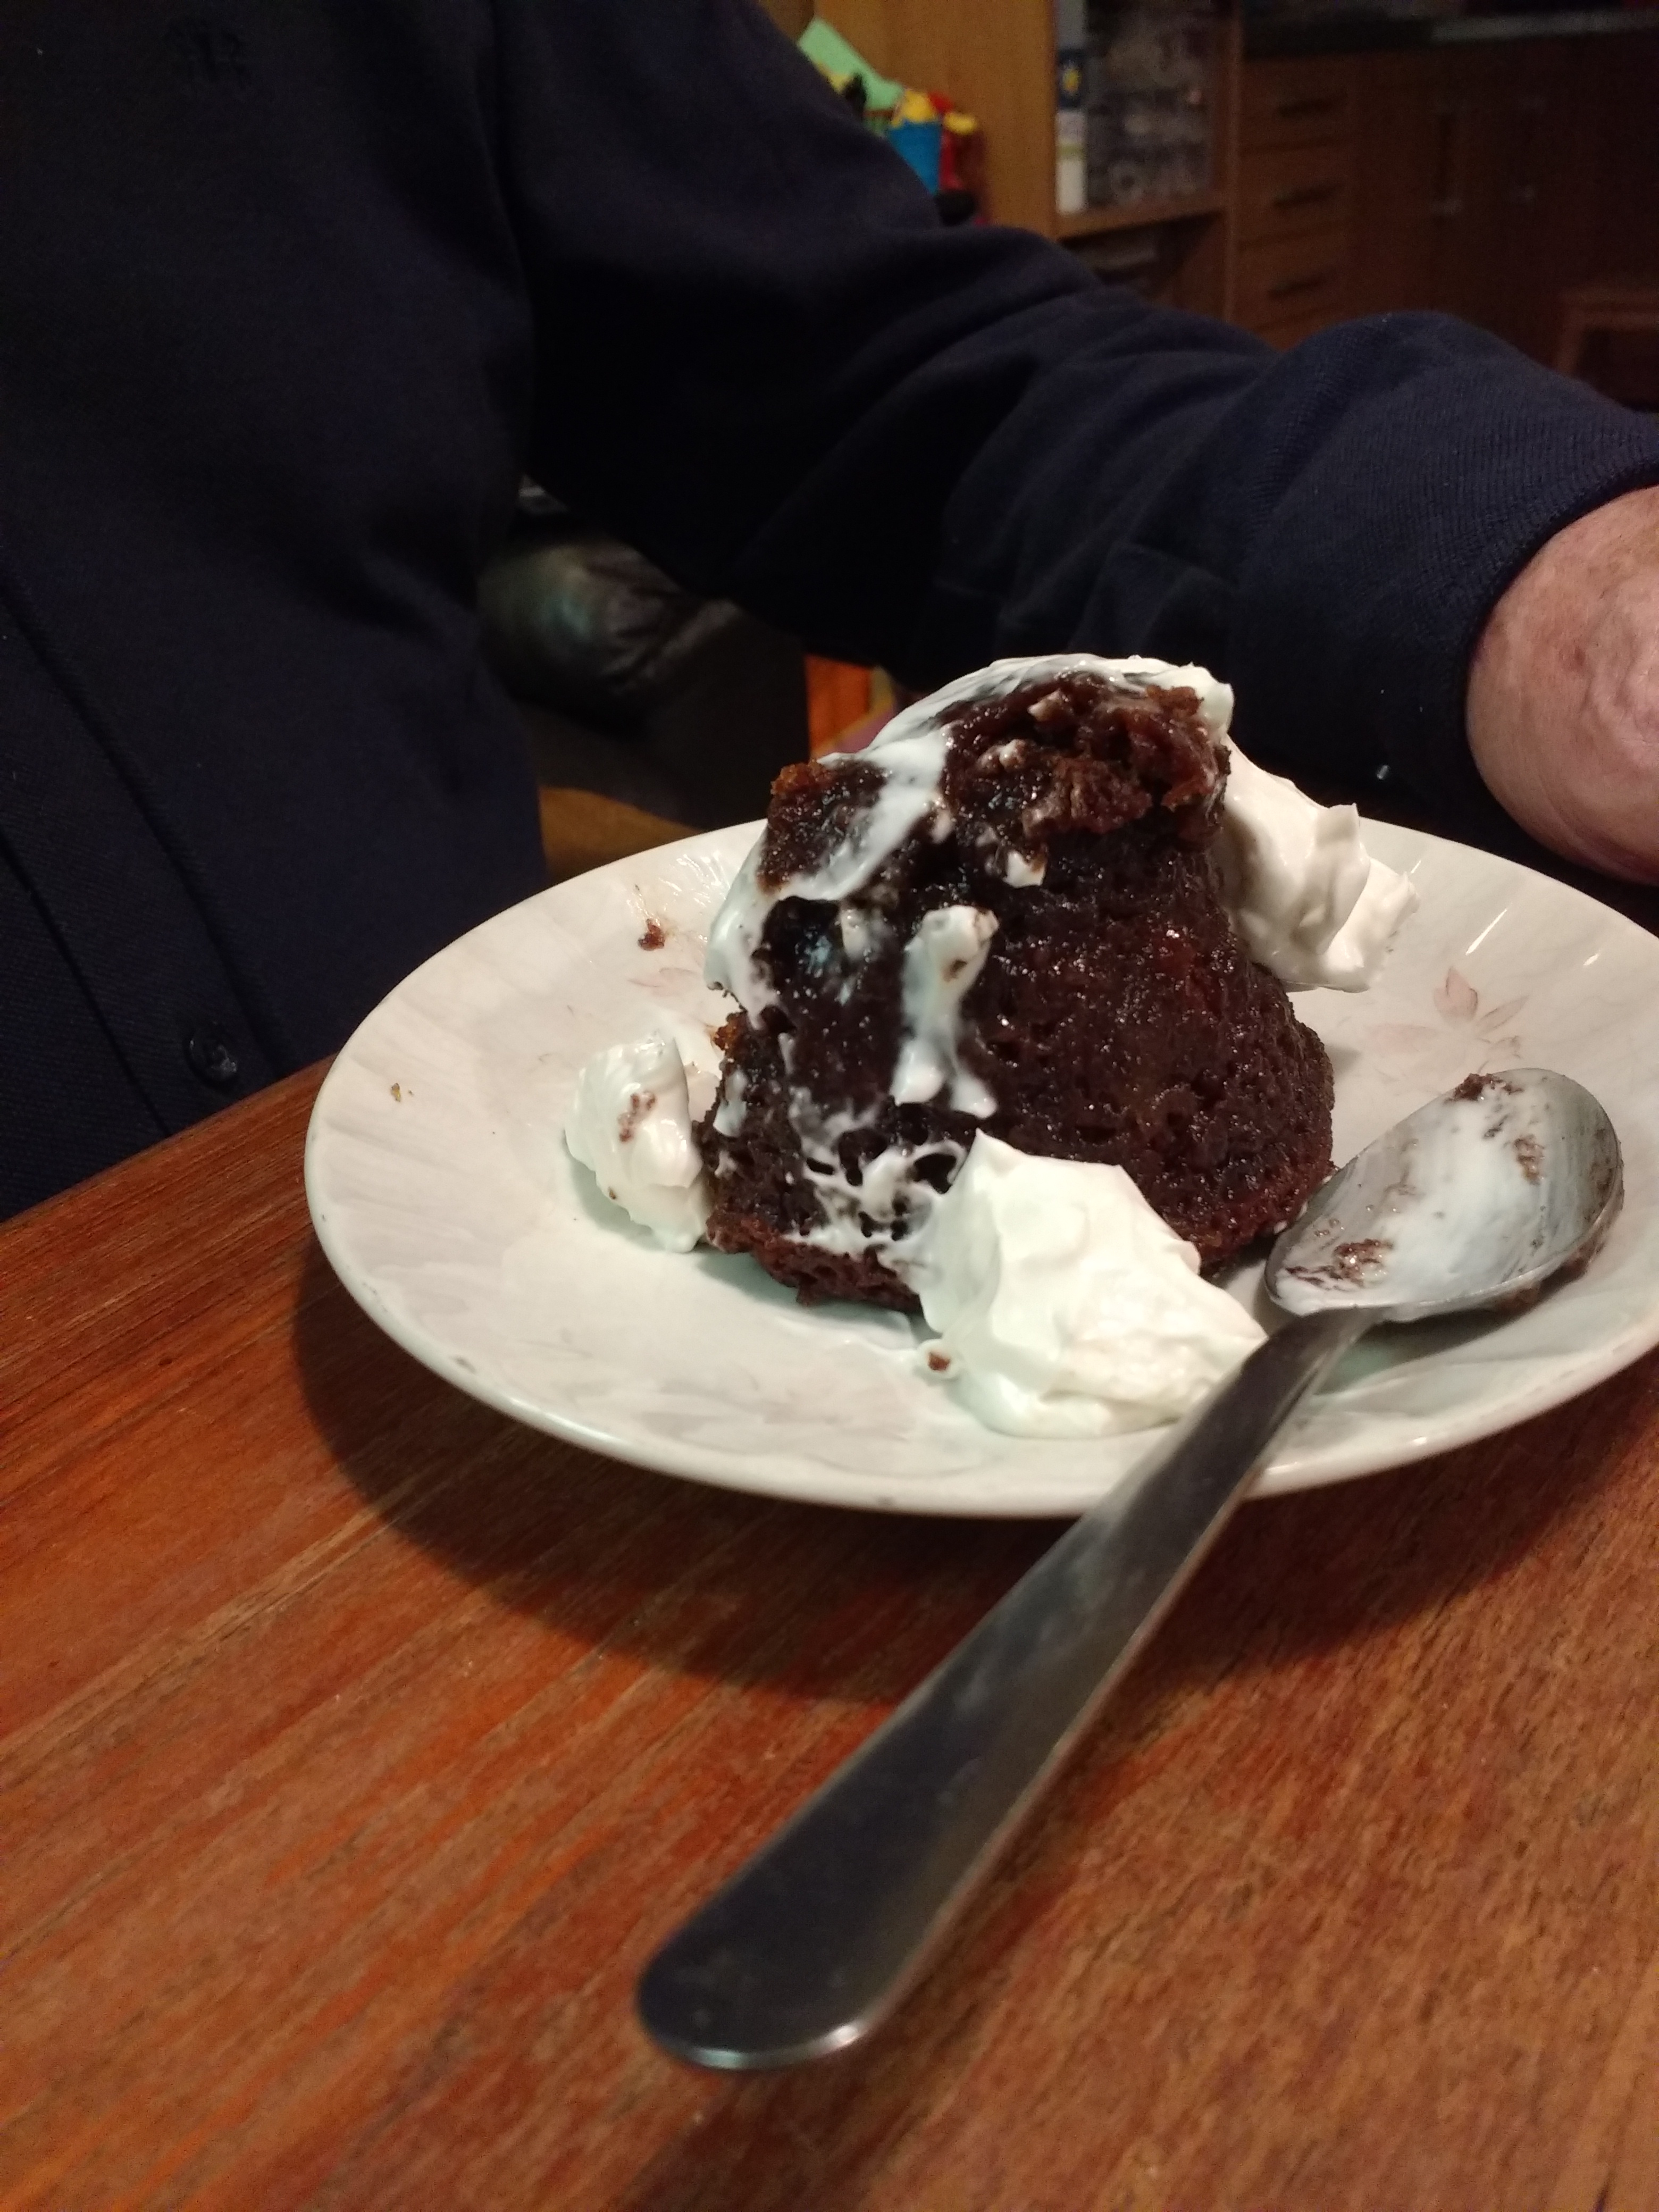
Looking around the kitchen for inspiration, my eyes fell upon some tired looking apples in the fruit bowl so I typed "apple pudding" into Google and found a recipe for Sticky Toffee Apple Pudding, served with cream. I whipped this up on Sunday afternoon and put it into the oven to cook once I had served up the roast dinner. Despite the moment of doubt as I pour sugar water over the top of the cake batter before it went into the oven, it turned out beautifully, creating its own lovely toffee sauce at the base. And it was particularly tasty served with cream. I just had the headache of trying to fit a half eaten pudding into the fridge where a pot of double cream had previously been!


Fortunately, we reheated the apple pudding after dinner on Monday and finished off the last of the cream with it too so that at least was now out of the fridge. We had had leftover pork from the Sunday roast for dinner too so it was a good day for eating leftovers. In addition, I had a moment of inspiration Monday morning and decided to turn the puff pastry and mozerella into a mozerella and courgette tart for lunch for my youngest daughter and me. This also used up half an OddBox courgette but it meant I opened a jar of red pesto but didn't use all of it! 


So on Tuesday I decided to try cooking up some Pasta 'ncasciate. I thought this would not only use up the aubergine I had just bought but maybe the tired looking mushrooms, the half courgette and the red pesto. I found a recipe and set about making it, realising it didn't contain either mushrooms or courgettes and that red pesto wasn't really the right thing to use for the sauce either. It turned out to be a very tasty dish and I'm pleased to have found another way to eat aubergine. 


However, it made way more than I needed and once again I found myself scratching my head, wondering how to fit the leftovers in the fridge! Still, that's lunch sorted on another day, and you know what, I might even cook up the half a courgette and tired mushrooms and add the red pesto to it when I serve it up this time!

Thursday, 1 April 2021

A Vegan Birthday Feast

It was my step-daughter's birthday on Saturday so I cooked her up some of her favourite food. She loves Japanese food and she loves sticky toffee pudding, so that's what went on the menu. As she is vegan, she obviously required that all her food was vegan but she also requested that the whole meal was vegan, i.e. that we all partook. 

The main meal was a buffet of different Japanese foods. I cooked sticky rice in my Instant Pot, baked a nasu dengaku aubergine, fried some shop bought vegan gyoza, and whilst she stir fried some tofu and veg noodles, I deep fried some tempura - pumpkin, mushroom and onion. The other addition at the table was a jar of radishes that I had pickled the weekend before. 

I had received some radishes in my first Oddbox veg delivery. Despite being one of the easiest things to grow, we don't usually bother because no one really likes them. So I figured I may as well try pickling them to see if that made them more palettable. After all, my step-daughter is generally a fan of pickled things and she likes pickled diakon, and diakon (or mooli) are just very large radishes. I have to say, after they turned a pretty pink colour during the course of the week, I was actually quite excited to try them. Yes, definitely nicer pickled and definitely a very similar taste to pickled diakon.


Pickled Radish

1 bunch of radish
175ml cider vinegar
175ml water
2 tsp salt
3 tbsp maple syrup (or honey if not for a vegan)
1/4 tsp chilli flakes
5 garlic cloves (whole)
1 tsp mustard seeds
1 tsp peppercorns

Wash the radish and pat dry then slice very thinly. Separate the slices as you drop them into a suitable jar. Add all the other ingredients and put the lid on then slosh it about a bit to mix. Leave for 1 week before eating. Eat within 3 weeks.


I have made vegan sticky toffee pudding a few times over the years and, in fact, I think I prefer it to conventional sticky toffee pudding because it is soft and gooey and satisfying without being overly heavy. Usually I make it as a single cake in a square cake tin and I have even made it in a hemisphere cake tin at Christmas to look like a Christmas pudding. However, on this occasion I decided to use some individual pudding tins from Lakeland. Normally I glaze the cake with some pear jam or similar but on this occasion I started by putting some of my pear sauce in the bottom of each pudding tin. To serve, I topped with a bit more pear sauce and a dollop of Oatly Oat Fraiche, although vegan custard, cream or ice-cream would have worked well too.


Sticky Toffee Pudding (makes 8)

250g dates
2 tbsp linseed breakfast topper
300ml soya milk
200ml vegetable oil
175g dark muscovado sugar
200g self-raising flour
Pinch of salt
1 tsp bicarbonate of soda
1 tsp ground mixed spice
100-200 g pear sauce or golden syrup or date syrup or jam

Put the dates, linseed and milk in a saucepan and simmer for 2-3 minutes until soft. Use a stick blender to blitz until smooth. Preheat the oven to 180°C. Put the dry ingredients into a large bowl and mix well, breaking up any lumps in the sugar. Add the date mixture, the oil and 50 g of jam/sauce. Stir well to form a batter. Pour more sauce/syrup into the bottom of each individual pudding tin then dollop in the cake mixture until about three quarters full. Put the tins onto a baking tray and bake for 30-35 minutes until springy to the touch. To serve, run a knife around each pudding and tip into a serving bowl/plate then heat each one for 30 seconds in the microwave. Add more syrup to the top if necessary and serve with creme fraiche, custard, cream or ice-cream.


Monday, 15 March 2021

Cooking with Honey

I have known Carol for probably getting on for ten years now. We met because I was looking for some local honey to go into local food hampers I was putting together but we quickly became friends and I thoroughly enjoy standing on the doorstep nattering for an hour. Yes, I would invite her in but she always insists she won't stop! 

Carol's honey is an essential ingredient in my Honey & Lemon Marmalade and during February's monthly orders I sold all the stock I had of that and I could have sold more. So I emailed Carol to ask to buy another jar so that I could make a fresh batch. To my surprise she rung me up to say that she had some honey that would be suitable for cooking that I could just have.

The smell and flavour of honey varies tremenously depending on what the bees forage from. This is why Scottish Heather Honey is so prized, of course, but sometimes the foraging isn't quite so desireable. Honey foraged from ivy, for example, can have a flavour that no everyone likes. Carol didn't know what the bees had foraged on for this particular batch but it had an unusual smell that she felt some people wouldn't like and, although it tasted nice, she thought a customer opening a jar and getting that aroma might be put off.

A short while later she dropped off half a bucket of the honey and said I was welcome to have it for cooking. She also gave me a sample of some flapjacks she had made with it to demonstrate that the flavour wasn't unusual when used in cooking.

With good quality honey being a relatively expensive commodity, I was excited to have a larger than expected quantity available to me and an invitation to use it in cooking. Normally I would use a cheap supermarket honey in cooking and even then be fairly sparing with it.

I sniffed it and tasted it and, although I could see Carol's point about the smell being slightly odd, it wasn't unpleasant. In fact, it reminded me of the complex floral notes you get when sniffing real ale. From my experience with that I know that what I can smell bears very little resemblance to the flavours I taste, and so it was with the honey, which was very mild and just generally pleasant.

Happy with my tests, I used some to make the batch of Honey and Lemon Marmlade. After that it was time to experiment. 

The first new recipe was steamed honey puddings for dessert on Saturday. I made individual puddings that we served with custard and it was a delightful, light sponge.

On Monday, whilst my youngest daughter filled some time before her return to school, she made a honey cake to refill the cake tin for the week. We ate a slice in the afternoon as a snack. It was a little underdone in the middle, which was my fault as I had judged it cooked. However, the gooey middle was like a sticky sauce, similar to the "sauce" in a chocolate fondant. Later, when I came back from a walk to the postbox, my eldest asked what the cake was. She'd had helped herself to a slice whilst I was out and had puzzled over the flavour as it was almost like a ginger cake but she had liked it, unlike ginger cake. It is true, the complex flavours in the cake are deceptive, and suggest that a subtle combination of spices were used. She also said that the gooey middle was the best bit!

On Thursday I made some honey biscuits to have with my elevenses and for my husband to enjoy was his after dinner cup of tea. These proved to be soft and chewy, again with hard to pindown flavours.  Over dinner my eldest told me she liked the biscuits I had made, which puzzled me as I didn't know she had tried one. Turns out that she had seen the photo I had posted onto Instagram and had fancied eating one, then gone into the kitchen whilst I had been answering the door! 

After that she asked if I could made some honey flapjacks - nice thick and properly sweet ones, not like the "healthy" ones I often make. So on Friday afternoon I whipped up a batch of flapjacks too! 

Wow! What a sweet week but a lovely week of experimenting and creating.


Individual Steamed Honey Puddings 

(makes 6)

100g plus 12 tsp honey
100g unsalted butter, softened.
100g caster sugar
3 eggs
110g self-raising flour
Pinch of salt
1 tsp baking powder

Butter 6 mini pudding basins. Put two teaspoons of the honey into the bottom of each pudding basin. Cream together the butter and sugar then stir in the 100g of honey and then the eggs, one at a time. Add the dry ingredients and stir well until a smooth batter in formed. Divide the mixture evenly between the six pudding basins. Put the lids loosely on the basins or cover with foil then stack on a trivet inside a pressure cooker, with two cups of water in the base. Put the lid on and bring to pressure then cook for 40 minutes. Leave for the pressure to release naturally then remove the puddings to cool. When ready to serve, reheat in the oven for 30 seconds for each pudding and serve with hot custard.


Honey Cake

250g honey plus extra for glazing
225g unsalted butter
100 dark muscovado sugar
3 eggs, beaten
300g self-raising flour

In a pan, melt together the butter, honey and sugar over a low heat. Once melted, increase the heat and boil for 1 minute then set aside and leave to cool for 20 minutes. Preheat then oven to 170°C and line a circular cake tin. Pour the cooled mixture into a large bowl then beat in the eggs. Add the flour and stir until it forms a smooth batter. Pour into the cake tin then bake for 50 minutes to an hour, until a skewer comes out clean. Leave the cake to cool in the tin for 10 minutes or so then turn out onto a wire rack. Glaze the top of the cake with honey until sticky. 


Honey Biscuits (makes 10-12)

100g unsalted butter, softened
50g light brown sugar
25g caster sugar
2 tbsp of honey
1 egg yolk
1 tsp mixed spice
150g self-raising flour
30g oatbran

Preheat the oven to 180°C and line a baking sheet. Cream together the butter and the sugars then mix in the honey and the egg yolk. Add the dry ingredients and mix to form a soft dough. Use an ice-cream scoop to remove a ball of dough then place it on the baking tray. Don’t squash it flat. Repeat with the rest of the dough then bake for 10 to 15 minutes. Leave to cool on the tray for a few minutes then transfer onto a cooling rack to cool completely.


Honey flapjacks (makes 12)

200g unsalted butter
200g light brown sugar
200g honey
400g oats
Pinch of salt
50g sunflower/pumpkin seeds

Preheat the oven to 180°C and grease a 20 by 30 cm tin. In a saucepan, melt together the butter, sugar and honey. Remove from the heat and add the oats, salt and seeds. Stir well then spoon into the tin and level out. Bake for 15 minutes then turn out the oven and leave for another 5 minutes in the oven. Remove from the oven and cut out 12 bars then leave to cool in the tin.


Wednesday, 3 March 2021

Over ripe Bananas

Normally I buy 5 bananas a week and my youngest eats one banana every day at break when at school. I know that it became a bit of a joke during Lockdown 1 that everyone was making sourdough and banana bread, but I just stopped buying bananas and we didn't have any over ripe bananas to worry about. However, in Lockdown 3, my daughter decided to make herself elaborate breakfasts of chopped fruit in natural yoghurt, flavoured with vanilla extract and maple syrup. As such, I bought different combinations of fruit each week, including blueberries, nectarines, grapes, melon and bananas.

My husband likes a banana too... occasionally. Mostly he doesn't eat bananas and then suddenly he will fancy one - particularly if the bananas in the fruit bowl are the perfect ripeness for his tastes. This, as you might imagine, is hard to cater for. When I only buy 5 bananas during school times, he knows that if he eats one our daughter will go without at break time. However, if I buy extra, especially for him, he may not fancy one at all during the time that they are in the fruit bowl.


One week recently, I bought five bananas and he decided he fancied eating bananas again, so that week we had eaten all the bananas before the end of the week. As such, the following week I decided to buy 10 bananas... but that week he didn't really fancy any and then they went overly brown and he definitely doesn't like an overripe banana - or banana bread for that matter.

As you can imagine, it has been very hard to buy the correct number of bananas during Lockdown 3 and as such I have had over ripe bananas to deal with on numerous occasions. Yeah, I have a banana bread recipe but I don't make that very often because I have other recipes I prefer - banana and fudge yoghurt cake, banana and carrot cake, banana and maple muffins, chocolate banana loaf cake, and so on. Usefully the muffins and the yoghurt cake freeze particularly well so I can make them before the bananas go completely to mush and freeze them for another day regardless of what we already have in the cake tin.

In fact, in the middle of last week, my daughter made a chocolate banana loaf cake using three over ripe bananas, leaving 2 in the fruit bowl, demanding attention. As we already had the chocolate cake to be eating, I figured I would make a banana and mincemeat loaf cake at the weekend and stick it in the freezer until the chocolate cake was finished. 

It seemed a particularly useful recipe because it would also get the half a jar of mincemeat off the work surface that had been knocking around since Christmas. So that's what I did, except I forgot to freeze it and two days later we had finished the chocolate cake anyway so we went straight on to eating the mincemeat one. Probably just as well, as I still have 24 muffins and a loaf cake in the freezer anyway!

Banana & Mincemeat Loaf Cake

150g unsalted butter, softened
90g caster sugar
2 eggs, beaten
150g self-raising flour
1 tsp baking powder
1 tsp mixed spice
Pinch of salt
2 over ripe bananas, mashed
150g mincemeat

Preheat the oven to 180°C and line a 2lb loaf tin. Cream together the butter and sugar then add the eggs, one at a time. Put in the dry ingredients, then the bananas and the mincemeat then give it a thorough stir until well combined. Spoon into the tin and bake for 1 hour. Test with a skewer and leave to cool in the tin for 10 minutes before turning out onto a wire rack to cool completely.


Chocolate Banana Loaf Cake


3 over ripe bananas
3 eggs
100ml sunflower oil
175g caster sugar
175g self-raising flour
1/2 tsp bicarbonate of soda
Pinch of salt
4 tbsp cocoa powder
100g dark chocolate chips

40g softened butter
1 tbsp cocoa powder
1 tsp vanilla extract

Preheat oven to 160°C and line a 2lb loaf tin. Put the mashed bananas, eggs and oil into a large bowl. Add 1 whole egg and 2 egg yolks to the mixture in the bowl. In a small bowl, whisk the two egg whites until stiff. Add the dry ingredients to the mixture in the large bowl and combine until just mixed. Fold in the egg whites. Spoon into the loaf tin and backe for 1 hour 10 minutes. Cool in the tin for a few minutes then turn out onto a wire rack to cool completely. In the meantime, make the butter icing with the butter, remaining cocoa powder and vanilla extract. Once the cake is cool, thinly ice the top of the cake with the butter icing. 


Carrot & Banana Cake

150g sunflower oil
150g light muscovado sugar
2 eggs
225g self-raising flour
2 tsp baking powder
Pinch of salt
50g sultanas
2 over ripe bananas, mashed
100g carrots, grated

Preheat the oven to 180°C and lightly grease and line the bottom of a 20cm square tin. Add all the ingredients in the order listed, stirring where appropriate. Once completely combined, spoon the batter into the tin and bake for 50-60 minutes.


Banana & Fudge Yoghurt Cake

2 pots of self-raising flour
1/2 pot of light muscovado sugar
1/2 pot of sunflower oil
1 pot of natural yoghurt
2 eggs
4 tsp maple syrup
1 over ripe banana
50g vanilla fudge, cut into small pieces

For this recipe you will need a 120g pot of natural yoghurt and then you will need to use the yoghurt pot as the measure. Preheat the oven to 180°C and line a 2lb loaf tin. Put all the ingredients in a bowl and stir until well combined. Spoon the batter into a loaf tin and bake for 45 to 60 minutes.


Banana & Maple Muffins (makes 12)

115g softened butter
115g caster sugar
2 eggs
2 tbsp maple syrup
2 over ripe bananas, mashed
225g plain flour
3 tsp baking powder
Pinch of salt

Preheat oven to 190°C and put paper cases into a muffin tin. Cream together the butter and sugar then add the eggs, one at a time, followed by the syrup. Stir in the bananas. Add the dry ingredients and stir until just combined. Spoon into paper muffin cases and bake for 15 minutes. Cool on a wire rack.