JamMK header

JamMK header

Sunday, 23 December 2012

Christmas Puddings on Sticks

OK, there is no jam mentioned in this recipe but it is fun and Christmasy!

Christmas Puddings on Sticks - makes about 8

100g milk chocolate
70g chocolate chip biscuits
30g ginger biscuits
80g mixed dried fruit
20g glace cherries (finely chopped)
100g white chocolate
Holly shaped cake decorations

Plus 8-10 skewers or cake-pop sticks

Gently melt the milk chocolate in a bowl over a pan of boiling water. Blitz the biscuits in a food processor until crumbed. Add the biscuit crumbs, dried fruit and cherries to the melted chocolate and stir thoroughly. Mould spoonfuls of the mixture into balls, place on a plate and carefully insert a stick into each one. Refrigerate for a couple of hours until firm. Melt the white chocolate in a bowl over a pan of boiling water. Dip each biscuit ball into the white chocolate in turn and hold upright so that it dribbles down the sides. Place each stick into a cup once coated in white chocolate. Finally, press a holly decoration into the white chocolate then leave to set. Enjoy!

Saturday, 8 December 2012

Homegrown Marmalade

I remember years ago sitting behind my table of jams and chutneys at some Christmas fair when a rather harassed lady rushed up to my stall, glanced over the array of jars then asked, "Do you have any marmalade?" To this I replied, "Er, no, I don't grow oranges." She didn't stop on her manic Christmas shopping to think about this and no doubt continued her marmalade hunt elsewhere. However, it was a serious point. For people who make jams and preserves, it is often the "homemade" bit that is most important to them. But for me it is the "homegrown" bit that I'm most passionate about. Short of building an orangery, how could I make marmalade using Milton Keynes grown produce?

Giving this some thought and poring through recipe books, the following year I had marmalade on offer. It was my All Hallows Marmalade. Why "All Hallows"? Well, because it is made using pumpkin. Yeah, I could have called it "Orange and Pumpkin Marmalade" but how many people would buy that? There is something about the word pumpkin that just puts some people off but the marmalade itself is actually lovely. The pumpkin doesn't contribute to the flavour, which of course is dominated by the oranges that also go into the recipe, along with rather lovely warming undertones from grated root ginger. Instead, the pumpkin gives the marmalade a beautiful smooth background texture. All in all it is a tasty autumnal marmalade and the name "All Hallows" really rather suits it. But most importantly, with the use of pumpkin, I was able to offer a marmalade where a good bulk of the ingredients were homegrown.

There is no doubt that marmalade is a popular food with a definite fan club. Some people would really rather have marmalade on their breakfast toast than jam so this year I have given more attention to this preserve to expand my range. First came "Jamdelade". I invented this when presented with a rather large bag of crabapples. It is in essence, crabapple and orange jelly with pieces of peel suspended in it. Sweeter than a normal marmalade, it is the missing link between jam and marmalade and makes a good "trainee" marmalade for those who prefer sweet to bitter. Next came Lemon & Lavender Marmalade, made using the lavender that grows in my front garden. Forget soap, this marmalade taste of lemons but with a more complex flavour that is hard to pinpoint without the clues from the label.


Later, Laura found a recipe for Orange and Rhubarb Marmalade in her grandmother's old recipe books. What a find that was - a very popular marmalade that sells from the name alone, but it stands up to taste testing too with it sherbetty-orange zing. Then in the autumn, with the apple harvest, I tried an Apple & Ginger Marmalade recipe. It is a joy to make as it well behaved and sets beautifully and again it is a popular choice. Finally, I adapted the Apple & Ginger Marmalade recipe to try a flavour combination suggested by Lisa on my Facebook page - Strawberry & Lime marmalade. Wow! What a revelation that was! It is made using limes, lemons, apples and strawberries and if you shoved a whole pack of Fruit Pastilles in your mouth in one go you would get a close approximation of the flavour of this marmalade.


For many home-made preserve makers, there will be growing anticipation as we approach the long awaited Seville orange season early in the new year. Not so for me. Seville orange season will once again wash over me and instead I shall be making a steady stock of marmalades throughout the year as the different fruits come into season. And with such an amazing selection of flavours on offer, who would be satisfied with a jar of plain old Orange Marmalade anyway?


Saturday, 24 November 2012

Fluffy Ideas

One of the things I really love about being part of the Milton Keynes foodie scene is meeting other foodie people and being introduced to new foods. Sometimes these foods are familiar in idea but are made from superior ingredients and with gentle methods and result in an end product far removed from a commercially made version. Sometimes, the foods are things I have never come across before.

Recently, my friend Laura has started a business selling handmade gourmet marshmallows. These are one of those things that when made commercially can actually be pretty grim. Overly soft, overly sweet and with an odd after-taste that raises suspicions about what the ingredients are. Stark contrast to the lovely things that Laura makes - plump, delicately flavoured and offering just the right amount of resistance as you bite into them. And if that wasn't enough, she makes them in several delicious flavours too - vanilla, lemon, raspberry and chocolate chip. Yes, chocolate chip marshmallows - yum! There will probably be other flavours with time as she works on product development, which is just fine by me as I'm always available as a taste-tester!


In conversation Laura mentioned that she also makes marshmallow fluff. This isn't something I had come across before but it sounded intriguing and I was more than willing to experiment with it. Unlike conventional marshmallows which come in little pillows you can hold in your fingers, marshmallow fluff comes in a jar and is soft, creamy and spreadable. Laura tells me that some people do just spread it on toast or in a sandwich, sometimes with jam and/or peanut butter, and it can, of course, be licked straight off the spoon.


When Laura gave me a jar of marshmallow fluff this week I instantly could see its potential as an ingredient in home baking. That afternoon whilst munching on a mini jam tart I realised that it could be jazzed up a bit with a blob of fluff on top so gave it a go and got a 10 out of 10 mark from my youngest daughter! This weekend I made a batch of basic biscuits and had a go at making sandwich biscuits. A biscuit base, a thin smear of raspberry or strawberry jam, a splodge of fluff and a biscuit on top - simple.


Then, another variation, a biscuit base, a smear of jam, a dollop of fluff and a sprinkle of dessicated coconut; a bit like a naked Tunnocks Tea Cake.


And for a bit of fun - iced gems - mini biscuits, a blob of fluff and a sugar flower on top.


Well, I don't know how much effort it is for Laura to make a batch of fluff but once made it is a brilliant, easy to use ingredient to add a touch of creaminess or fluffiness to biscuits and cakes. Great fun!

For more info have a look at Laura's facebook page http://www.facebook.com//Milton-Mallows

Basic Biscuit Recipe:


4 oz (110g) butter
2 oz (55g) caster sugar
1 teaspoon vanilla extract
3 oz (85g) plain flour
2 oz (55g) wholemeal flour
1 oz (25g) oat bran
¼ teaspoon baking powder

Preheat oven to 180°C, gas 4 and grease a large baking sheet. Cream together the butter and the sugar until light and fluffy. Add the vanilla extract and stir well. Add the flours, oat bran and baking powder and combine to form a soft dough. Roll out the dough on a floured surface and use pastry cutters to cut out biscuits. Bake for 10 to 15 minutes until golden brown then cool on a wire rack.


Sunday, 4 November 2012

Remembrance Biscuits

Next Sunday is Remembrance Day and once again paper poppies are being worn to show support for members the armed forces who have died in the line of duty.

Here's an idea you could use to help raise funds for this cause - Remembrance Biscuits. Cook a batch or two and ask for a donation to the British Legion in exchange for a biscuit.

Remembrance Biscuits:

8 oz (225g) self-raising flour
4oz (110g) butter
4 oz (110g) caster sugar
Milk
Natural red food colouring
Dark jam such as Blackcurrant or Blackberry

Preheat oven to 190°C/gas 5 and grease a baking tray. Rub the butter and flour together until it resembles breadcrumbs. Mix in the sugar. Mix plenty of food colouring into a small amount of milk then use this to bind together the mixture until to forms a soft dough. Roll the dough into a fat tube then slice it into about 12 pieces. Place the slices onto the baking tray then use the end of a wooden spoon to make an indentation in the centre of each biscuit. Spoon a little jam into the indentation. Bake for 10 to 15 minutes then cool on a wire rack.


Saturday, 27 October 2012

How to Carve A Halloween Pumpkin

With just a few days to go until Halloween, you may well be making plans for what to do on the day. The most obvious thing is to take your kids Treat or Treating, dressed up in appropriate fancy dress costumes. If you don't have children of your own at home then maybe you would like to have some treats ready for children who may come to door. It is readily accepted in many neighborhoods that Trick or Treaters will only call on houses that show a sign that they are welcome and the most usual sign for this is a carved Halloween pumpkin.

If you have never carved a pumpkin before, it really isn't as difficult as you might imagine and it is a great activity to do with your kids. Last week I read an article which said that children could be involved in the selecting of a design for the lantern but they mustn't help more than that because it is dangerous. After my last blog rant about kids and knives, you'll not be surprised to hear me say that I don't agree with this and that once again children can be involved if they are properly supervised, have the correct tools and are shown properly how to help.

So, the first task is to select your pumpkin. Children tend to go for the largest they can find but small ones are a lot quicker and easier to carve and look great too. All pumpkins have "sides" to them because they grow resting on the ground so one side is always flatter and rougher than the rest of it so decide which side is best to carve. To get started, cut a rough hexagonal shape around the stalk to make a removal lid. This can be done with a large, pointed and sharp kitchen knife in a series of stabbing cuts downwards through the flesh and into the void in the centre of the fruit. I would recommend that this bit is done by an adult. Once cut, the lid can be removed but there will be some resistance because the gooey stuff inside will be holding it down but gentle tugging and twisting should release the lid.


Now the gooey stringy stuff and seeds needs to be removed and this is definitely a job everyone can get involved in. Hands are by far the best tools for this job and great fun can be had just because it is all so slimy and gross! Once the majority of the icky stuff is removed, use metal spoons to scrape away some of the flesh of the pumpkin, concentrating particularly on the side that will be carved to thin the wall here to make it easier to carve. Save the pumpkin flesh for cooking later.


The next step is to decide on the design to go on the pumpkin. There are lots of images on the web and you can also buy template books, or you can just draw a design. If you feel particularly confident, draw the design directly onto the pumpkin with a suitable pen. Otherwise, tape a printed version of your design to the pumpkin and use a sharp point such as a drawing pin to prick points along the lines of your design to create a dot-to-dot pattern in the skin of the pumpkin to use as a guide one the printed design is removed.

The best tools to use for cutting a pumpkin are in fact pumpkin carving tools, which are readily available to buy these days in supermarkets and online. The small, serrated saw-like knifes cut through the pumpkin perfectly and are easy to use and change direction as you are cutting. If you have a tool like this then you should be able to let your child from about the age of 7 or 8 use it safely. If you don't and are using a kitchen knife then you'd better do the curving yourself as the knife will be more inclined to slip. So, using your tool, carefully cut out the shapes on your design, putting the pieces of removed pumpkin to one side to cook later. If your pumpkin wall is very thick, you may need to remove more pumpkin flesh from the inside of your pumpkin as you go.


If you would like to keep your pumpkin lantern for a few days then smear the inside and all the cut edges of the design with petroleum jelly to help keep the moisture in and the mould out. I have also found with experience that the heating that occurs when a tealight is lit inside the pumpkin is enough to encourage a growth of furry mould so using a battery powered tealight is better for the health of your lantern as well as for safety. If using a tealight, always leave the lid off when the candle is lit. If using a battery powered one you can put the lid back on.


With the bits of pumpkin that you have saved from your lantern you can make a yummy batch of Pumpkin Muffins, which make a lovely afternoon snack after all your hard work!

Pumpkin Muffins


1 lb (450g) pumpkin
3¼ oz (90 g) wholemeal flour
6½ oz (180g) self-raising flour
½ teaspoon mixed spice
¼ teaspoon grated nutmeg
3¾ oz (95g) dark brown sugar
2 oz (55g) sultanas
2 eggs
4 fl oz (115 ml) sunflower oil
4 fl oz (115 ml) whole milk
1 teaspoon vanilla extract

Peel, chop and steam the pumpkin for 20 to 30 minutes until very soft.  Squash until smooth then allow to cool. Refrigerate overnight if desired.  Preheat oven to 210°C, gas 7.  Sift the flours and spices into a bowl, adding any bran remaining in the sieve.  Whisk the eggs, oil, milk and vanilla together and add to the dry mix then add the pumpkin.  Combine until just mixed.  Spoon into paper cases in a tin.  Bake for 20 to 25 minutes until a skewer comes out clean.  Cool on a wire rack.


Sunday, 21 October 2012

Kids, Kitchens and Knives

We are all familiar with the story of Sleeping Beauty. Like so many fairy tales, there is a moral to it but it is parents who can learn from it. So terrified of the curse put upon their daughter, the king and queen burnt all the spinning wheels in the kingdom in order to prevent Sleeping Beauty ever coming into contact with one. Surely, if they had left the textile industry intact and merely explained to their daughter about the curse she would have known to have steered well clear of the spinning wheel in the tower.

I know what you're thinking, what's this got to do with anything jam related? Well, as you'll know I have two young apprentices (my 8 and 10 year old daughters), who when in the right mood, can be rather helpful in the kitchen. But for many people kids and kitchens don't mix. It is certainly true that most accidents happen in the home and of all the rooms in the home, the kitchen is the most dangerous. It is little wonder then that people choose to keep their kids well clear. However, it is my belief that children can and should be part of the kitchen, just suitably educated on the dangers to help them stay safe.

6 and 4 years old, already helping in the kitchen
The main dangers in the kitchen are of course the oven/hob and knives. When my children were babies and toddlers I had a stair gate across the middle of kitchen so that they could not get anywhere near these dangers. They were simply too young to understand the dangers. But as they have grown up I have allowed them into the kitchen, explaining along the way what the dangers are and why. The stair gate is long gone and  they have been using the hob and knives under supervision for several years now. In my opinion, the biggest danger in the kitchen is ignorance. Showing them how to do things safely is the way forward.

When my eldest daughter was in Year 2 (6-7 year olds), I ran the Let's Get Cooking club at her school. Each week I had a group of 6 children to teach cooking skills to. Using the hob and knives were an important part of this club. It was heartening to be allowed in a school situation to teach these useful skills and for health and safety to not be so over the top as to block this.

When my daughter entered Year 3 she moved to the next school up and spent the first 6 weeks of the autumn term learning how to make a sandwich in her DT lessons. How exasperating! Sandwiches?! This is a child who can make a Victoria sandwich cake! The same child who made Piccalilli from scratch as a Christmas gift to her teacher the same year.

Making Piccalilli aged 8
I know, teaching a child one to one at home how to use a knife safely is something far removed from trying to do it with a class of 30. But, hey, I used to be a secondary Science teacher and used to have classes of  30 hormonal teenagers using Bunsen burners, chemicals and scalpels! Seven years of teaching and no one ever ended up in hospital. We really do need to have faith in our children and allow them to learn how to do things safely rather than just not allowing them to do it for fear of injury.

So, given that knife skills is not something children are likely to learn in school, take the opportunity to teach them to your children if you can. I'm not talking about chefy knife skills - you know, that super quick chopping thing they do - just basic correct handling of a knife and safe chopping.

Here is my list of key points for children for being safe with knives.

1. Never use a knife unless there is an adult with you.

2. Choose the correct knife for the job - not too big or too small, and not too sharp or too blunt for the task.

3. When carrying a knife always hold it down by your side, pointing towards the floor.

4. Always use a chopping board to protect both the work surface and the knife blade.

5. Make sure your work area is tidy so that you can move freely without knocking things over.

6. Make sure your hands are clean and dry so that you have a firm grip.

7. Use the correct grip (claw or bridge) on the food to keep your fingers away from the knife blade and re-position them as necessary as you work.

Bridge

Claw


8. Watch what you are doing at all times, concentrate and take your time.

9. Never put your knife into a bowl of washing up. Instead, keep hold of it and carefully wipe the blade clean with a brush or sponge.

With a little practice you too could have a useful, trustworthy kitchen helper and someone set up with some really important life-skills.

Friday, 12 October 2012

Making the best of the end of the season

As much as we would like summer to go on forever, it is now very definitely autumn and the end of the growing season. With nothing much growing from now until the rhubarb season, it is important to gather in the last of the crops and make the most of them.

There is always a frost in October and frosts damage the non-hardly plants. In particular, this means things such as tomatoes, peppers, cucumber, courgettes, squash, pumpkins, runner and French beans, and sweetcorn. So rather than leaving these late crops outside to be damaged, gather them in beforehand and get them stored and preserved.

It doesn't matter too much if the crops that are harvested now are not quite ripe because many of them will continue to ripen when picked or they can be used as they are. Green tomatoes can be used to make Green Tomato Chutney (see recipe below). This is a favourite of mine because it was something my grandma would make every year and I grew up with cheese and chutney sandwiches. It is a very handy way to use up unripe tomatoes that would otherwise have no purpose. It is true that many green tomatoes will remain green and never ripen, but others will ripen if left in a suitable place for a week or too. A warm, sunny place, such as a windowsill, greenhouse or conservatory is ideal. To help them ripen, place a ripe fruit such as an apple or banana near them. This will slowly release ethylene which will cause the tomatoes to ripen.


Similarly, peppers will ripen fully if they are picked as they are just beginning to turn, although of course they can be used green anyway. Pumpkins and squash can be picked green too and they will gradually ripen. It is important to cut them with a few inches of dried stem left on, otherwise rot will get in. If intact, they should store nicely until the end of the year.


Courgettes and cucumbers store surprisingly well in open cupboard boxes in a cool place such as a shed or garage for several weeks. In fact, they seem to survive better like this than refrigerated. Again they need to have a bit of stem attached and be free from blemishes so they don't rot. With time the skins toughen so you may like to peel them before using them and cucumbers will continue to "ripen" too, eventually turning yellow and bitter.


All these crops are perfect for making into chutney, along with other stored ingredients such as apples, onions and garlic. So, between October and December, work your way through these stores, making a variety of different chutneys and by Christmas you'll have converted your stored vegetables into a cupboard full of delicious chutneys that should last you all the way to the next end of season.

Grandma's Green Tomato Chutney


Ingredients (makes 2-4 jars)
2lb (900 g) green tomatoes
1lb (450 g) cooking apples
8 oz (225 g) onions
1 oz (25 g) salt
4 oz (110 g) sultanas
1 pint (600 ml) malt vinegar
½ tsp ground ginger
1 tbsp pickling spice (e.g. cloves, cinnamon, allspice berries)
8 oz (225 g) light brown sugar
1 tbsp black treacle

Method
Coarsely chop the tomatoes then peel, core and chop the apples (weigh after preparation).  Peel and chop the onions and tie the spices in a piece of muslin.  Mix all the ingredients except the sugar in the preserving pan and bring to the boil. Drop in the spices. Simmer gently, uncovered, until the pulp is tender (20 to 30 minutes). Add the sugar and stir well until it has completely dissolved.  Bring back to the boil and continue to boil until thick. Pour into warm jars and seal immediately.


Saturday, 8 September 2012

Raspberry Cordial

Earlier this week I ran out of Raspberry Cordial. By the end of the week I had made some more as I really didn't want to be without this surprisingly useful ingredient for long.


So what can you do with Raspberry Cordial?

Firstly, you can drink it - either diluted with water as a soft drink, or splashed into alcoholic drinks as a mixer. On the drinking theme, you can also put a little into milk to make a lovely raspberry milkshake. This is perhaps how I use up most of my stocks.

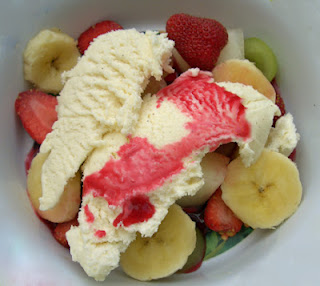
Along similar lines, it can be used to flavour plain yoghurt or rippled through ice-cream. A little dish of it is lovely to use as a dip with other fruit such as slices of apple or banana or even just mini doughnuts or biscuits. And a drizzle of it can lift a fruit salad.

I have in the past also made a very quick and easy cheesecake by mixing it with some marscarpone - and we all know how much I love cheesecake!

Mmmm... did someone say cheesecake?

The front cover of the August Good Food Magazine has on it a Peach Melba Cheesecake and it has been taunting me all month. Peach Melba - a dish traditionally consisting of peaches, vanilla ice-cream and raspberry sauce... So, having re-stocked with Raspberry Cordial, I now had an easy way to adapt the recipe to make it even easier to make.

Peach Melba Cheesecake

55g melted butter
55g digestive biscuits
55g ginger biscuits
300g soft cheese
55g icing sugar
1 tsp vanilla extract
150ml double cream
Raspberry Cordial
200g diced peaches

Line the base of a loose bottomed circular tin. Blitz the biscuits in a food processor and mix thoroughly with the melted butter. Press into the bottom of the tin and chill in the refrigerator. In a bowl, combine the cheese, sugar and vanilla. Add the cream and whisk until thick. Drop in half the peaches and several splashes of raspberry cordial then spoon the mixture onto the base, allowing the peaches and cordial to slightly mix in as it does in. Smooth the cheesecake level and refrigerate for several hours or overnight. To serve, cut into slices and drizzle a little raspberry cordial on to each slice and spoon on a few chunks of peaches.


Raspberry Cordial


2 lb (900g) raspberries
1 pint (660ml) red grape juice
Granulated sugar

Gently heat the raspberries in the red grape juice in a large pan for a few minutes until the raspberries have broken up. Strain the liquid through a nylon (not metal) sieve. For every pint of liquid, weigh out 8 oz granulated sugar. Clean the pan and return the liquid to it, along with the sugar. Bring to the boil, stirring to dissolve the sugar then remove from the heat. Pour into warmed bottles and seal. Refrigerate once cooled.

Saturday, 1 September 2012

Individual Strawberry Cheesecakes

Thumbing through the August edition of the Good Food magazine, I came across a recipe for Little Strawberry Cheesecakes with the subtitle "The cutest cheesecakes you'll ever make". Yes, they did look lovely in the photo and as they required strawberry jam they seemed irresistible to me!

So this morning I made a batch of Summer Fruit Jam with some of the lovely Grenadier apples Laurence from Virtual Orchard had given me earlier in the week and some strawberries and raspberries from the freezer. OK it's not strawberry jam but it's just as good so this afternoon I made individual strawberry cheesecakes with some slight modifications from the Good Food recipe. And they turned out to be just the ticket for dessert after an epic 4 hour bike ride this afternoon!

Individual Strawberry Cheesecakes - makes 7

55g (2oz) butter
6 digestive biscuits
250g tub ricotta
55g (2oz) icing sugar
1 egg
1/2 teaspoon vanilla extract
150ml (4 fl oz) double cream
7 teaspoons Summer Fruit or Strawberry Jam
4 strawberries

Preheat an oven to 150°C, gas mark 2 and put 7 paper cases into a muffin tin. Melt the butter then blitz the biscuits in a food process and mix with the butter. Press the biscuit mix into the bottom of each paper case. Chill these whilst you prepare the filling. In a bowl, combine the ricotta, sugar, egg and vanilla. Whisk the double cream until it just holds its shape then stir into the the ricotta mix. Spoon the filling into the paper cases and smooth. Bake in the oven for 30 minutes then turn off the oven and leave the cheesecakes inside to cool completely. Later, chill the cheesecakes. When ready to serve, remove the cheesecakes from the muffin tray and carefully pull off the paper cases. Place on a small dish and top with 1 teaspoon of jam and half a strawberry.

Saturday, 25 August 2012

Fudge Ideas

Whenever I see fudge on sale at a show or fete, I will always buy some. I have successfully made fudge myself in the past but to be honest I would rather let someone else do it - the way some people feel about jam!

Anyway, when I came across The Fudge Lady on facebook a few months ago I was really pleased to find someone in Milton Keynes making fudge and I instantly thought that I would like to offer her fudge along side my Jammy Cow products. I have visions of gift bags and hamper boxes at Christmas filled with Jammy Cow preserves, homemade biscuits and fudge - a lovely mix of local, tasty foodie gifts.


With the Woburn Abbey Garden Show last weekend, I thought I would try out The Fudge Lady's fudge on my Jammy Cow table to see how it went. So, I happily accepted 10 bags each of Vanilla, Milk Chocolate and Rum and Raisin Fudge from her on the Friday and put them on sale over what turned out to be the hottest weekend of the year! Even so, I sold most of the bags and was left with about 8 bags in a mixture of the flavours.


I am a sucker for fudge and could very probably have eaten my way through all 8 bags within a fortnight but that would probably not have been a good idea. Instead, when my husband asked if I would make cakes for him to take into work for this birthday on Thursday I saw an opportunity to try out some fudge recipes. The Vanilla fudge went into Banana Fudge Muffins, the Milk Chocolate fudge went into Poptastic Popcorn, and the Rum and Raisin into Rum and Raisin fairy cakes. Needless to say, what with a batch of Rhubarb & Ginger jam tarts and my Cherry Bakewells, Steve did not have any cakes left at the end of the day to bring home.

Banana Fudge Muffins (makes 12)

250g self-raising flour
1 teaspoon baking powder
60g fudge
75g light brown sugar
75g butter
125ml milk
1 teaspoon vanilla extract
2 medium eggs
2 medium over-ripe bananas
Runny honey

Preheat the oven to 190°C, gas mark 5 and line a muffin tin with 12 paper cases. Sift the flour and baking powder into a bowl. Cut the fudge into small pieces and drop into the flour. Add the sugar and stir. Melt the butter in a pan over heat or in the microwave then add the milk, vanilla and eggs to it and beat to combine. In another bowl, mash the bananas. Pour the wet mix into the dry mix and add the bananas then mix quickly until just combined. Spoon the mixture into the paper cases and bake for 20 minutes. Cool for 5 minutes then  coat the tops of each muffin with runny honey.


Poptastic Popcorn (makes 12)

45g popping corn
A little vegetable oil
120g marshmallows
60g milk chocolate fudge, cut into small pieces

Heat the oil in a medium saucepan then add the popping corn, put on the lid and wait for the corn to pop, swirling the pan occasionally. Remove the popcorn from the pan and place in a bowl. Reserve 20g of marshmallows (cut into small pieces if necessary). Place 100g of the marshmallows in the pan and heat gently, stirring constantly, until the marshmallows have melted. Tip the popcorn, fudge pieces and marshmallow pieces into the melted marshmallows and stir well until well coated. Pull out portions of the mixture, mould into rough balls and place into paper cases then allow to cool completely.


Rum and Raisin Fairy Cakes (makes 12)

60g raisins
2 tablespoons dark rum
90g soft margarine
90g caster sugar
2 medium eggs
90g self-raising flour
20g cocoa powder
60g butter
50g icing sugar
10g cocoa powder
60g rum and raisin fudge

Put the raisins in a jar with the rum and leave to soak over night or longer. Preheat the oven to 190°C, gas mark 5 and line a fairy cake tin with paper cases. In a large bowl, cream together the margarine and sugar then add the eggs one at a time. Sift in the flour and cocoa powder and stir until well combined. Next, dab the raisins dry on kitchen paper then add to the batter. Spoon the batter into the paper cases then bake for 15 minutes. Cool on a wire rack. In the meantime, cream together the butter, icing sugar and cocoa powder to make butter icing. When the cakes are cool, dollop the butter icing onto the top of each cake. Cut the fudge into 12 pieces and place a piece of fudge on top of each cake.


Tuesday, 21 August 2012

Exceedingly Good Cherries

Whilst I was away on holiday, Laura went along to The Strawberry Farm in Aspley Guise. Despite it's name, they sell cherries there to the public during the summer, harvested from their 1000 trees. She came home with several pounds of beautiful dark cherries and amazingly managed to resist scoffing the lot, instead making them into batches of Cherry Jam and Cherry & Almond Jam for Jammy Cow.


I have been making Cherry & Almond Jam from the cherries that grow in my garden for years now and when people ask me about it I always say that it tastes like cherry bakewell. Weirdly, however, I've had very little experience with cherry bakewells - beyond eating them! I have to confess that Mr Kiplin's individual ones are the ones filed as my mental image. I have never, ever had a go at making a cherry bakewell and didn't actually know what went into them until I did a recipe search on the internet. You know, the only cherry that goes into a cherry bakewell is the half a one on top! Even the jam used usually is strawberry or raspberry!


Well, with a fresh batch of Cherry & Almond Jam at my disposal I decided it was time to make my own version of a cherry bakewell - only this time with ingredients that have actual cherries in!

Individual Cherry Bakewells

1 sheet of Jus-Rol sweet all butter shortcrust pastry
1 x 110g Jammy Cow Cherry & Almond Jam

3 oz (85g) self-raising flour
2 oz (55g) butter at room temperature
2 oz (55g) caster sugar
1 large egg
2 drops of almond extract
4 oz (110g) icing sugar
6 glace cherries

Preheat oven to 190°C. Cut out 12-16 pastry circles and place them into aluminium cases in a suitable baking tin. Blind bake the cases for about 10 minutes. Allow to cool for a few minutes then put about half a teaspoon of jam into the bottom of each pastry case. Cream together the butter and sugar then mix in the egg and almond extract. Sift in the flour and mix to form a batter. Place a teaspoon of the mixture on top of the jam and bake for 10 to 12 minutes until risen and golden. Cool on a wire rack. Mix the icing sugar with a tiny amount of water until to forms a stiff, gloopy icing. Dollop icing on top of each cake and finish with half a glace cherry on each tart.


Saturday, 21 July 2012

Coping with the glut

With the best will in the world, at this time of year it is very tricky to keep up with all the fruit that is ready to be harvested. Finding the time to pick it all is one thing and turning it straight into jam is another.


I met a fellow allotment holder coming out of the gates yesterday, a bag stuffed to overflowing with broad beans. "Lovely broad beans, John," I said, "Are you going to freeze them?"

"Me hunter gather," he replied, "the wife does the freezing bit."

Ah yes, that rings true. Whereas a man can leave the allotment, sweaty and muddy, and head straight for a soak in a warm bath to ease his achy muscles, the woman has to deal with whatever harvest she has just brought home before considering a quick shower.


When fruit is harvested it is important to deal with it quickly to keep it at its best. If you leave it just for a few minutes it will attract fruit flies - not something you really want in your kitchen. And within a few hours it will be oozing and by the next day it may even be furry! So either it needs to be parked in a the fridge for a while or turned straight into some culinary delight or put in the freezer.

Obviously, when you freeze fruit it is never the same again upon thawing. However, it can still be used perfectly well for any cooking purposes so all is not lost. It is certainly absolutely fine for jam making and in fact makes jam making easier as it is already softened by the freezing and needs less cooking time.

Before freezing consider how you wish to use the fruit in the future and prepare the fruit ready for this purpose. For example, for soft fruit, top and tail it first, and for stone fruit, cut it in half, remove the stone and chop it into smaller pieces if necessary. Apples and pears are best peeled, cored, sliced and lightly cooked first. Next, think about the amount you will need. For jam making I freeze everything in bags of 1lb of fruit as that makes it easier. For other uses, such as for cheesecakes or cakes, I freeze in whatever quantity the recipe requires and label the bag appropriately - e.g. 6oz raspberries for cheesecake. Sometimes it is just as easy to go the whole way and make the end product first and then freeze it - such as when I'm making crumbles. A batch of cooked apples and some blackberries, say, will make 4 crumbles which I can freeze for later and cook from frozen in 20 minutes - lovely! If you're not sure how you might use the fruit in the future then place it in a single layer on a tray to freeze and then the next day decant it into bags. The fruit should be individually frozen and not stuck together in some difficult blob. However you freeze it, remember to label it clearly as things can look different once frozen and you could soon end up with a freezer full of UFOs - that's Unidentified Frozen Objects!


Sunday, 15 July 2012

The Moos at Ten

Last night was the 2012 Midnight Moo - an all ladies 10 mile walk through Milton Keynes. The herd set off a midnight and whilst they were busy striding through the early miles, Jammy Cow and her heifer friends were busy preparing the final mile for their welcome home.

At the beginning of mile 10, ready to greet the herd for their final mile was the very professional Moos at Ten Cow, Mavis.  She is a very sensible and reliable cow and in stark contrast to the next cow round the first corner. Silly Cow, Connie giggled her way through the night.

Those of you who walked the 10 miles will know that most of mile 10 is uphill so the Moos at Ten team were ready to add that extra bit of encouragement as the herd came through. Having said that, Bossy Cow's version of encouragement is about as friendly as bootcamp with her strident, "Keep moooving!" shout. It is at this point in the early hours of the morning that you realise exactly how far 10 miles is to walk. "Holy cow, aren't we there yet?" you may mutter as you pass the pious Holy Cow, Mary. 


Continuing up Midsummer Boulevard, the end is near and breakfast at Pret A Manger awaits, a thought not lost on the perpetually hungry Fat Cow, Victoria as she patiently waved the crowds through. 


Normally, Hetty the Mad Cow stands out as a bit odd but last night she was in good company with lots of ladies suitably dressed up for the night.


Through Witan Gate underpass and by now there is less than half a mile to go. Bed is calling and lucky you, you'll soon be home and tucked up. Lucy, the Lucky Cow was there, cheering you on for the final push. And only another 50 calories left to burn, something Clover, the Skinny Cow was quick to point out.


Nearly at the end of mile 10 now and so very close to achieving your aim. A point to feel proud and to reflect upon why you are doing this. Willen Hospice is a fantastic cause and everyone is impressed by your fundraising efforts. Remember those Concrete Cows you passed in mile 7, well one makes a final appearance here to salute your efforts on behalf of Milton Keynes.


And there, with the end in sight, Jammy Cow welcomes you to the end of mile 10 and congratulates you on completing the Midnight Moo. A big cheer, breakfast, bath and bed. 


So can you work out how many cows there were on mile 10 of the Midnight Moo? If you can and you are local to Milton Keynes then why not enter our competition to win a fabulous hamper of goodies. Visit www.themoosatten.co.uk or email your answer to enquiries@jammycowmk.co.uk 

Thursday, 5 July 2012

Article in Shenley Church End Parish Newsletter July 2012


The Milton Keynes Tourist

2012 is a very special year for the UK and “staycations” are being promoted as the new way to holiday, yet can you imagine Milton Keynes being a tourist destination?  It is always hard to step back and view your hometown with the fresh eyes of a visitor but Milton Keynes particularly does not seem like the obvious place for a holiday.

I was born and bred not a million miles away in Bedford and moved to Milton Keynes in 1996. Since then I have fallen in love with the place. There are numerous green spaces, a road system that makes getting about easy, every shopping outlet you could wish for and increasingly more and more places of entertainment. What’s not to love?

Sadly, some people would argue that there is not a lot to love about Milton Keynes. “The Concrete City” where even the cows are concrete, apparently. These do tend to be people who have never visited the place or who have spent very little time here. Still, for someone like me, trying to make a living out of selling home made preserves, it is obvious that Milton Keynes is not the tourist magnet that say, Cornwall is.

Back in January 2011 I was sat around drinking coffee with friends and bemoaning the fact that I lived in Milton Keynes and not Cornwall. Nothing wrong with MK you understand, just if I lived in Cornwall I could make my jam as usual but market it as “Cornish Jam” and sell it in the nearest gift shop to the tourists. To my surprise my friends suggested that the same thing was possible within Milton Keynes and perhaps with even more of a novelty value just because Milton Keynes is not considered such a tourist hot spot.

This hit me like a lightning bolt of inspiration. What better way to make the point that Milton Keynes is not all concrete cows and roundabouts than by selling jams and chutneys made in Milton Keynes from only fruit and vegetables grown in Milton Keynes. And so Jammy Cow was born, with an honorary nod towards our famous concrete cows.

Having established the brand, I then went in search of the market. I was somewhat surprised to learn that about 3 million tourists visit Milton Keynes every year for business and leisure purposes and from all over the world. I soon found out that there are over 20 hotels within Milton Keynes too, as well as B&Bs.  I’m pleased to say that already Jammy Cow products are available in several of these hotels.

But what of the other little gems that we so enjoy when on holiday? You know, gift shops and quaint little cafes serving coffee and sandwiches or cream teas. Well, I’m pleased to say that such places do exist within Milton Keynes and are well worth searching out. From the garden centres of Woburn Sands to the listed buildings of Stony Stratford there are independent shops and cafes that have all the charm of anything you would find in Cornwall. And it’s not only the older parts of MK that hide these gems. You will find lovely places such as Squeaks in Broughton, Yenna Bean on Grange Farm and The Coffee Boutique in Oxley Park. All excellent little places to pop into for a drink and a bite to eat with friends and family.


So no need to count the days until your next holiday. Instead, make the most of what Milton Keynes has to offer and treat yourself to a holiday-style day out without the hassle of packing a bag and getting stuck in traffic. And if you fancy a souvenir to remind you of what a special place Milton Keynes is, don’t forget to pick up a jar of Jammy Cow – Milton Keynes grown and made.

*****

For more information about Jammy Cow please get in touch. We would love to hear from you. At this time of year we are on the hunt for surplus fruit and veg to go into our preserves. If you have any spare perhaps you would like to swap it for a jar or two of our lovely jams and chutneys.

www.jammycowmk.co.uk www.facebook.com/jammycow
Or contact Hazel: Email: enquiries@jammycowmk.co.uk Twitter: @jammycow
Tel:01908 673013

Tuesday, 3 July 2012

Making the most of herbs

My herb garden is growing like mad right now and threatening to close up the garden footpath and prevent people reaching the front door. Fortunately, Steve has been out with a hedge cutter and trimmed it right back, leaving a nice clear route for the postman and a big pile of gorgeous herbs.


Now, the thing about herbs is, you only need to use a little at a time and using too much can be counterproductive. Fortunately, they are very easy to preserve if you have a sudden glut. Two weeks hanging in a warm space such as your airing cupboard or dangling in your greenhouse is all that is needed to dry them. Then scrunch them in your hands and decant them into a plastic bag or glass jar for storage.

Alternatively, chop your freshly cut herbs finely, sprinkling into ice-cube trays and fill with water before freezing then just drop a herby ice-cube into your food whilst cooking. I also like to make a few herby end products to freeze too. Sage is perfect for turning into stuffing. Use a food processor to turn a slice of bread into crumbs then to chop an onion and finely to chop the sage then mix the lot together in a bowl. A little seasoning and few drops of water are needed and then the lot can be squished together in your hands to form stuffing. This can either be moulded into stuffing balls or just suitable sized portions then put on a tray for freezing. Perfect for stuffing the crop of a chicken or other bird. 

I had a bit of rolled lamb shoulder to roast the other day so I made a different variation of stuffing to suit the flavour of lamb. Made in the same way as the standard sage and onion, this one was made with rosemary, thyme and marjoram (or oregano), onion and a clove of garlic, along with the bread and water. I took the lamb out of it elasticated netting, unrolled it, put in the stuffing and rolled it up again before returning the netting.  And this week we bought a piece of pork from M&S which had a layer of herby butter smeared between the cracking and the meat. The butter had within it chopped up thyme, parsley, garlic and a small amount of lemon zest. Very easy to duplicate at home and herb butter can be frozen in portions until required.

Another lovely way to flavour meat with herbs is by making a herb mustard. Again, a little bit of fiddling around with the ingredients can create mustards suitable for different meats. This weekend I made Cider and Sage Mustard with some fresh sage from my garden and Virtual Orchard cider. This mustard is divine if smeared on pork chops or a joint of pork before cooking. Later this month when the garlic is ready to harvest I shall make some Garlic and Ale mustard with Concrete Cow Brewery beer. This one is perfect for beef. For lamb Rosemary Mustard is perfect.


Finally, from of my herb garden this week I have harvested a bunch of lavender. This is currently in my greenhouse drying. In previous years I have used dried lavender at Christmas to make little lavender bags and lavender bath bombs to give as socking fillers. However, this year I have decided that I shall dabble in lavender flavoured food. I've always been of the opinion that lavender food tastes like soap but from reading around the subject, it would seem that food only tastes like soap if too much lavender is used. In subtle quantities the results are, apparently, sublime. So, look out, lavender flavours will soon be added to the Jammy Cow range.

Wednesday, 27 June 2012

Pizza for dessert?

It's my youngest daughter's birthday on 9th July and this year we are doing a little lunchtime party with a pizza theme. The plan is to invite over a couple of her friends and for me to help them create their own pizzas for the birthday tea.

I confess that I secretly love planning parties - as long as they are on a small manageable scale. The main thing I love is the challenge of a theme. So what could I think of for a pizza theme? Well, this week I have enjoyed finding 4 melamine plates shaped and decorated like pieces of pizza, and gummy sweets in the shape of piece slices and neatly packed in their own mini pizza boxes. I even managed to find make your own pizza kits which I thought would make nice party bag gifts for the girls to take home. There was a slight flaw with these, however, as when they arrived the instructions were written in Italian! Fortunately, my friend who now lives in Italy was able to translate them for me. I did at one point ponder pizza bunting as I realised bunting flags were the same shape as pizza slices (getting obsessed by now??). Sadly I couldn't find any for sale on the internet (a hole in the market, if you ask me!) so I have persuaded the girls to create some out of paper.

So in my perfect pizza party what should be for dessert? Pizza of course!

There I was standing in the supermarket contemplating custard and ice-cream cones when I spotted a box of mini flan cases and suddenly I saw them in a whole new light - sweet pizza bases. The complete concept fell into my brain and later that afternoon the girls and I tested out dessert pizza. 

Onto the flan case we spread some strawberry jam as the "tomato sauce".


This was followed by a couple of spoonfuls of custard for the "cheese". And then, as with pizza, we chose our toppings - pieces of fruit and some mini marshmallows on this occasion. It was a lovely, simple activity to do with the girls and it made a great afternoon snack and will definitely feature as dessert at the pizza party. 


Thursday, 21 June 2012

How to get strawberry jam to set

It is June. It is strawberry season. It is time to make strawberry jam.


It is funny how popular strawberry jam is. It seems that we were all brought up eating strawberry jam and it is the one that is most likely to be in our cupboards and the one offered with a scone for cream tea. It is of no surprise to me that by the time strawberries are ready again in June I have back ordered for strawberry jam and I know however many strawberries I harvest I will sell out before next June.

For many people strawberry jam is the first jam that they have a go at making - maybe at the request of their family or after an over-enthusiastic trip to a pick-your-own farm. However, this is perhaps a little unfortunate as it is probably the trickiest jam to make. It all comes down to strawberries being a low pectin fruit. Pectin is the "magic ingredient" in fruit that causes a jam to reach a setting point. Some fruit, such as strawberries, some cherry varieties and pears are low in pectin, whilst other, such as blackcurrants, gooseberries and apples are high in pectin. The higher the pectin the easier it is to get a successful set. My advice, if you fancy having a go at making jam wait until July and try blackcurrant jam.

Should you decide to make strawberry jam then here are my tips for attaining a successful set.

1) Use some unripe fruit: The riper fruit gets, the lower the pectin levels in it. At the same time, the riper the fruit gets, the better the flavour becomes. When making a jam try to use a mixture of nice ripe fruit and some slightly underripe fruit for both flavour and set.

2) Add a lemon: Most strawberry jam recipes recommend the use of lemon juice, added at the same time as the sugar. The idea behind this is that the acidity in the lemon helps to extract the pectin in the fruit. My experience has shown that if the lemon juice is added right at the beginning of the whole process it is easier to   reach a good set. Make sure it is freshly squeezed lemon juice.

3) Add pectin: All commerically produced jam and a lot of homemade jam use added pectin to help to reach a good set. Even River Cottage's Pam the Jam does this. One argument for doing this is that it is likely to reach the setting point sooner than it would without the added pectin and if a jam is boiled for too long it darkens and losing some of the fruitiness in the flavour. Pectin can be added in a variety of ways. Jam sugar has pectin added to it and is used as a direct replacement for granulated sugar. Liquid pectin can be bought in bottles and added as instructed. It is also possible to make your own pectin stock by boiling up apple cores, pips and peel. I do this when I'm making a batch of something with apples such as jam, chutney or crumble. Once it has been boiling for an hour or so, strain the liquid out and test a small sample of it with a few drops of methylated spirits. If you have a good pectin stock a small springy ball should form in the liquid. Note methylated spirits is poisonous so dispose of this test sample carefully. The stock can then be frozen in ice cube trays and the ice cubes of pectin can be dropped into your jam as needed when the sugar is added. I use apple pectin stock for getting pear jam to set but have never actually found it necessary to add pectin to strawberry jam.

4) Combine the strawberries with a high pectin fruit: Life is a lot easier if rather than trying to make pure strawberry jam, the strawberries are combined with a high pectin fruit such as gooseberries. Strawberry and gooseberry jam is very easy to set yet the dominant flavour is strawberry.


5) Be patient and check for set thoroughly: Strawberry jam will set eventually if boiled for long enough so be patient. I would also recommend stirring it occasionally to check that it isn't overcooking at the bottom and beginning to burn because that will ruin the whole batch and you will cry! Although jam is supposed to set at 104°C, don't totally rely on a thermometer to be sure it has set - instead put a little on a cold saucer and push it with your finger. If it wrinkling the jam is set. If it doesn't then boil it for longer.

If you get to the stage where you have bottled your jam and it is still runny, do not despair, the whole lot can be emptied back into your preserving pan and boiled up again until the setting boil is reached. This is not ideal as it is more time consuming and you have to wash the jars up before they can be refilled but it will not damage the jam so is useful to know. Failing that, just use your jam differently. Rather than trying to balance it on your toast, use it as a flavouring in yoghurt or ice-cream, use it has a sauce with cheesecake or mix it with milk and call it milkshake!