Last week I found myself making a rather delicious beef stew for dinner. It is, after all, the ideal dish for this time of year - warming and satisfying and making the most of the winter allotment veg. It was, however, something that rather alarmed my 11 year old daughter. Her distress was mainly caused because I had decided that we were all going to eat the stew for dinner and she didn't fancy it in the slightest. As I stood, stirring the gently bubbly pot full of meatiness, she looked at me sadly and declared, "When I'm an adult, I'm never going to make stew."
I looked back at her and understood exactly where she was coming from as I too would have thought the same thing at her age. At 11 I didn't much care for most vegetables so the thought of having a one-pot meal in which vegetables lurked mysteriously within a thick gravy, so well camouflaged that they were hard to spot and almost impossible to identify even when located, somewhat killed my appetite. I could not have imagined back then that one day I would wilfully create such a dish myself. I have a distinct memory too of deciding that I would never be able to bring myself to stuff a chicken. Yet, here I was in my late 30s, with dozens of stuffed chickens behind me, stirring a beef stew and actively enjoying the delicious aromas that were wafting up from the pot.
"Ah, well," I explained, "you may say that now, but sometime over the age of 30 you will find yourself cooking a stew for dinner. I don't know why it happens, but it happens to us all."
"It's a sign you are turning into an old granny," she declared and stalked out of the kitchen in disgust.
Well, I'm pushing 40 now so yes, I suspect from an 11 year old's perspective I'm well on my way to old age. I'm waiting for the moment when I realise that, if I'm going to continue to live, I shall have to have a sit down and a cup of tea. A year or so from now I shall be dozing off in front of daytime telly I suspect.
But you do have to wonder how you can come from a point of view of not even wanting to eat stew to cooking a stew up for the family in a little more than 20 years. I know not every one is the same; my 9 year old daughter loves vegetables and is enthusiastic about the stew and some people will never, even when they are an old granny, want to eat beef stew. It is just amazing that for me, and many others, tastes change so much as we grow up.
Maybe it comes down to that idea that you have to taste something 10 times before you like it. I guess I've just been exposed to vegetables enough now to like them. Ha! I don't think so, I'm never going to like broccoli!
Maybe it's because I'm in control of the ingredients - I know what has gone into the pot and I know I like everything that it is in. I chose to put those ingredients together and to put them, cooked up, onto my plate. It wasn't forced upon me by some well-meaning but misguided adult, willing me to like it.
Ultimately it doesn't matter. I'm just glad that I'm now "adult" enough to eat beef stew without fishing out the swede and I hope that one day, as my daughter approaches middle-age she'll find herself eyeing up a pack of beef shin and wonder, shall I have stew for dinner?
Beef Stew (serves 4 but you could double the amount and freeze half for a quick second helping)
400g beef shin (ideally, but stewing steak will do)
3 tbsp flour
Salt & pepper
3 tsp mustard powder
A little fat/oil for frying
2 medium onions or 1 large one
1 small stick of celery, finely chopped
2 large carrots, finely chopped
Some finely chopped swede or turnips
1 pint of beef stock
10 fl oz of ale
2 bay leaves
Cut the beef into large chunks. Put the flour, salt & pepper and mustard onto a plate then place the beef pieces into the floury mix and coat well. Heat the fat/oil in the bottom of a large saucepan then fry the beef (in batches if necessary) until brown. Set aside. Next fry the onions and add to the beef. Pour a little of the stock into the bottom of the pan and scrap the pan with a wooden spoon or spatula to deglaze it. Return the meat and onions to the pan then pour in the remaining stock and ale and add the vegetables and bay. Bring to the boil then turn down and simmer, with the lid on, for 3 hours until the meat is very tender and the vegetables are well cooked. Stir occasionally and add more water if needed. If it looks a little too liquid towards the end then take of the lid for the last 15 minutes to reduce. Taste and add more seasoning if necessary then serve hot with potatoes.
For the potatoes, you might like to try this. Preheat oven to 190°C, gas 5. Finely slice 4 medium to large potatoes into thin rounds then rinse them in a bowl to remove the excess starch. Drain the water then pour in a little oil (or melted duck/goose fat) and add salt & pepper to season. Stir well until the potatoes are all coated in the seasoned oil. Carefully stack the potatoes on their edges into a suitable ovenproof dish. Place the dish in the microwave for 5 minutes to start the cooking and to evaporate off the remaining rinse water. Place the dish in the oven and cook for an hour until the top edges of the potatoes are brown and crisp.
A range of handmade preserves made in Milton Keynes from fruit & vegetables grown in Milton Keynes.
JamMK header
Friday, 24 January 2014
Friday, 20 December 2013
Don't Buy It - Make It
I came across a page on facebook the other day called "Don't Buy It - Make it" and it appealed to me. The page is all about sharing ideas and, as the name suggests, making things rather than buying them and that is exactly what I like to do, especially if it means I can share the process with my girls. Although it is possible to get a buzz from shopping, there is a more satisfying feeling to be had from creating something yourself. I often find that when I'm out on the High Street or at craft fayres, I'm shopping just as much for ideas I can take home as for physical products.
Although I would encourage you too to keep your eyes open and look for ideas when out and about I would say that it is important not to vocalise your intentions when at a craft fayre as this may cause offence. I have been on the other side of this so know how insulting it can seem, even if it is not intended. Having someone glance at your products, toss their nose in their air and say, "No, we don't need jam, I make that myself," quite frankly makes me feel like I was some kind of idiot even to think I should offer my jams for sale. Or, having inspected some crafty wares, if a person were to say, "We could make that ourselves for half the price," it can easily be misinterpreted by the stallholder.
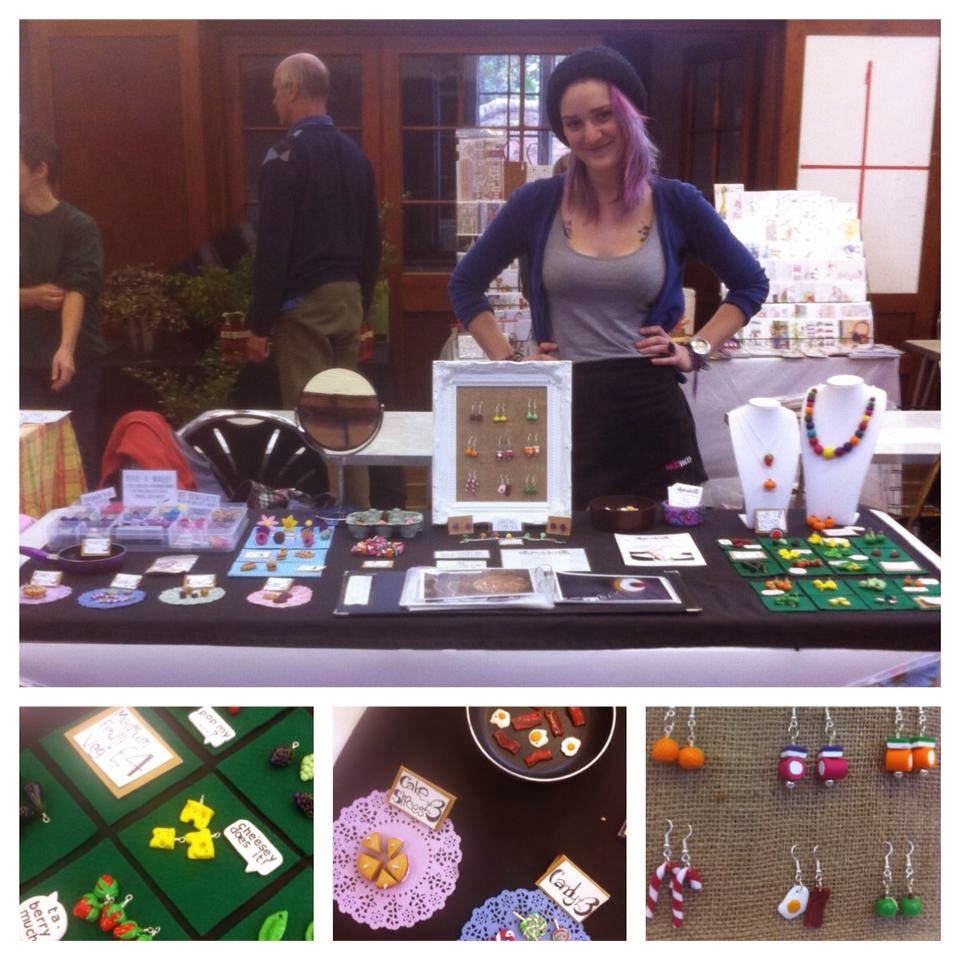
I am sure, on the other hand, that the same stallholders would be pleased to know that their products have inspired someone to try and make something similar at home. I, for example, share my experiences and recipes in books, blogs and talks and am really pleased when someone is inspired by my words, tips and advice to have a go. Similarly when my girls saw Allymadethis at a craft fayre, they were inspired to go home that same afternoon and dig out their Fimo to re-create things they had seen on her stall. I'm pleased to say that Ally liked the photo I sent her of my girls' creations that she had inspired.
You could as a stallholder feel threatened by "inspiration". After all, what is the difference between someone being inspired by your ideas and downright stealing them?! And surely that person who, rather than buying your products has gone home and made their own, is a sale lost. Well, yes, you could see it like that and you could spend your life behind closed doors, protecting your ideas and keeping secrets. But what is to be gained from that? You cannot both promote and market yourself and keep secrets and in trying to do so you lose more than you gain. Not least a loss of sales from not getting your ideas out there, but also the pleasure of sharing and being part of group of like-minded people.
And, you know what, if I didn't share my jam recipes people would still make jam. There will always be other people out there doing similar things to you whether on a commercial basis or as a hobby. And I, on occasions, will dabble now and then into the realms of other people's businesses. I sometimes make fudge, cakes and bread, for example. But just because I can make these things doesn't mean that I don't ever buy them. Sometimes making something makes you really appreciate the products that other people sell. Honestly I can't stand the tension of making fudge, wondering whether it will burn or not set so I'd much rather buy a perfect batch. Similarly, having just dabbled in the world of sourdough bread I now know it takes a week to nurture the starter and then a whole day of proving etc. before one loaf is created. Knowing that means I'm more likely to appreciate why the price of a sourdough loaf is more than a loaf of sliced white supermarket bread. Spend a whole week making a loaf of bread then mess it up at the cooking stage or hand over £2.50 for a perfect loaf? No brainer!
Sometimes creating something as a one off project makes you realise that that particular craft is not for you. As much as I love baking cakes, for example, the thought of endlessly putting in that much effort and energy into a product that I'm not going to eat is too much of a put-off for me to consider cake making as my career. Other people, I know, will occasionally turn their fruit tree glut into a batch of jam and proudly give jars away to friends and family but then feel that their jam making is over for another year. And never mind all the rules and regulations that come with selling food to the public! Back to the day job and leave that to the dedicated crafters and appreciate their efforts all the more for it.
So, I say to you, feel free to browse for ideas and to give it a go. Enjoy the making process and stand back and proudly admire your creations. Then, the next time you're at a craft fayre don't forget to appreciate what these people have managed to achieve and when you are pushed for time or short of energy you'll happily hand over your cash to buy something amazing and really appreciate all that has gone into it.
Here's a Christmas idea I saw on the Don't Buy it - Make it site. It was just a photo so I had to work out a recipe for myself but here's my recipe should you wish to give it a go too.
Reindeer Cupcakes (makes 12)
The snout of the reindeer are made of biscuit. You could buy biscuits for this to save time but they would have to be small biscuits so I'm not sure what brand that might be. Instead, I decided to make gingerbread using the recipe below. It makes considerably more than you need for the reindeer cakes so you could halve or even quarter the quantities. However, gingerbread is a great Christmas recipe anyway and the dough keeps well, wrapped in Clingfilm in the fridge for a few days and the cooked biscuits keep for several weeks so can be turned into gingerbread men, tree decorations, a gingerbread house etc.
For the gingerbread
4 oz (110g) dark brown sugar
4 oz (110g) golden syrup
2 oz (55g) butter
8 oz (225g) plain flour
Pinch of salt
2 teaspoons bicarbonate of soda
1 heaped teaspoon ground ginger
½ teaspoon ground cinnamon
Heat the butter, sugar and syrup in a pan until just melted. Set aside to cool. Sift the flour, spices, salt and bicarbonate of soda into a bowl. Add the melted mix to the dry mix and stir until combined into soft dough. Wrap the dough in Clingfilm and refrigerate for half an hour. Preheat an oven to 190 °C, 375 °F, gas mark 5 and grease a baking tray. Taking small pieces of dough at a time, roll it out. To make suitably small biscuits I used a screw-top wine bottle lid as a pastry cutter. Transfer the biscuits onto the baking tray and cook in the oven for 5 to 10 minutes until the biscuits have browned. Cool on a wire rack then decorate if desired. You will need to make 12 biscuits for one batch of cupcakes but you could make more for future batches whilst you're at it. It is fine to do this step the day before or several days in advance.
For the cupcakes
3½ oz (90g) soft margarine
3½ oz (90g) light brown sugar
2 eggs
3½ oz (90g) self-raising flour
½ tsp ground mixed spice
Although I would encourage you too to keep your eyes open and look for ideas when out and about I would say that it is important not to vocalise your intentions when at a craft fayre as this may cause offence. I have been on the other side of this so know how insulting it can seem, even if it is not intended. Having someone glance at your products, toss their nose in their air and say, "No, we don't need jam, I make that myself," quite frankly makes me feel like I was some kind of idiot even to think I should offer my jams for sale. Or, having inspected some crafty wares, if a person were to say, "We could make that ourselves for half the price," it can easily be misinterpreted by the stallholder.
I am sure, on the other hand, that the same stallholders would be pleased to know that their products have inspired someone to try and make something similar at home. I, for example, share my experiences and recipes in books, blogs and talks and am really pleased when someone is inspired by my words, tips and advice to have a go. Similarly when my girls saw Allymadethis at a craft fayre, they were inspired to go home that same afternoon and dig out their Fimo to re-create things they had seen on her stall. I'm pleased to say that Ally liked the photo I sent her of my girls' creations that she had inspired.
You could as a stallholder feel threatened by "inspiration". After all, what is the difference between someone being inspired by your ideas and downright stealing them?! And surely that person who, rather than buying your products has gone home and made their own, is a sale lost. Well, yes, you could see it like that and you could spend your life behind closed doors, protecting your ideas and keeping secrets. But what is to be gained from that? You cannot both promote and market yourself and keep secrets and in trying to do so you lose more than you gain. Not least a loss of sales from not getting your ideas out there, but also the pleasure of sharing and being part of group of like-minded people.
And, you know what, if I didn't share my jam recipes people would still make jam. There will always be other people out there doing similar things to you whether on a commercial basis or as a hobby. And I, on occasions, will dabble now and then into the realms of other people's businesses. I sometimes make fudge, cakes and bread, for example. But just because I can make these things doesn't mean that I don't ever buy them. Sometimes making something makes you really appreciate the products that other people sell. Honestly I can't stand the tension of making fudge, wondering whether it will burn or not set so I'd much rather buy a perfect batch. Similarly, having just dabbled in the world of sourdough bread I now know it takes a week to nurture the starter and then a whole day of proving etc. before one loaf is created. Knowing that means I'm more likely to appreciate why the price of a sourdough loaf is more than a loaf of sliced white supermarket bread. Spend a whole week making a loaf of bread then mess it up at the cooking stage or hand over £2.50 for a perfect loaf? No brainer!
Sometimes creating something as a one off project makes you realise that that particular craft is not for you. As much as I love baking cakes, for example, the thought of endlessly putting in that much effort and energy into a product that I'm not going to eat is too much of a put-off for me to consider cake making as my career. Other people, I know, will occasionally turn their fruit tree glut into a batch of jam and proudly give jars away to friends and family but then feel that their jam making is over for another year. And never mind all the rules and regulations that come with selling food to the public! Back to the day job and leave that to the dedicated crafters and appreciate their efforts all the more for it.
So, I say to you, feel free to browse for ideas and to give it a go. Enjoy the making process and stand back and proudly admire your creations. Then, the next time you're at a craft fayre don't forget to appreciate what these people have managed to achieve and when you are pushed for time or short of energy you'll happily hand over your cash to buy something amazing and really appreciate all that has gone into it.
Here's a Christmas idea I saw on the Don't Buy it - Make it site. It was just a photo so I had to work out a recipe for myself but here's my recipe should you wish to give it a go too.
Reindeer Cupcakes (makes 12)
The snout of the reindeer are made of biscuit. You could buy biscuits for this to save time but they would have to be small biscuits so I'm not sure what brand that might be. Instead, I decided to make gingerbread using the recipe below. It makes considerably more than you need for the reindeer cakes so you could halve or even quarter the quantities. However, gingerbread is a great Christmas recipe anyway and the dough keeps well, wrapped in Clingfilm in the fridge for a few days and the cooked biscuits keep for several weeks so can be turned into gingerbread men, tree decorations, a gingerbread house etc.
For the gingerbread
4 oz (110g) dark brown sugar
4 oz (110g) golden syrup
2 oz (55g) butter
8 oz (225g) plain flour
Pinch of salt
2 teaspoons bicarbonate of soda
1 heaped teaspoon ground ginger
½ teaspoon ground cinnamon
Heat the butter, sugar and syrup in a pan until just melted. Set aside to cool. Sift the flour, spices, salt and bicarbonate of soda into a bowl. Add the melted mix to the dry mix and stir until combined into soft dough. Wrap the dough in Clingfilm and refrigerate for half an hour. Preheat an oven to 190 °C, 375 °F, gas mark 5 and grease a baking tray. Taking small pieces of dough at a time, roll it out. To make suitably small biscuits I used a screw-top wine bottle lid as a pastry cutter. Transfer the biscuits onto the baking tray and cook in the oven for 5 to 10 minutes until the biscuits have browned. Cool on a wire rack then decorate if desired. You will need to make 12 biscuits for one batch of cupcakes but you could make more for future batches whilst you're at it. It is fine to do this step the day before or several days in advance.
For the cupcakes
3½ oz (90g) soft margarine
3½ oz (90g) light brown sugar
2 eggs
3½ oz (90g) self-raising flour
½ tsp ground mixed spice
Preheat the oven to 190°C, gas mark 5 and put paper cases into each hole in a cupcake tin. Cream together the margarine and the sugar then add the eggs one at a time and mix in well. Sift in the flour and spice and stir until well combined. Spoon the mixture into the paper cases then bake for 15-20 minutes. Remove from the tray and cool on a wire rack
For the decoration
6 oz (175g) icing sugar
1 oz (25g) cocoa powder
Smarties or half glace cherries (for the noses)
Raisins (for the eyes)
Pretzels (for the antlers)
Mix together the icing sugar and cocoa powder in a small bowl with just enough water to form a smooth, spreadable paste. Once the cakes are completely cool, top each cake with a layer of icing. Press a gingerbread biscuit into the icing to form a snout. Stick a Smartie onto each biscuit using a little more icing to form a nose. Add raisins as eyes. Break the pretzels in half (quite tricky!), and press this into the icing to form antlers.
Wednesday, 18 December 2013
Sort out your kitchen for Christmas
There is a lot to do in preparation for Christmas but one thing that should not be overlooked is getting your kitchen ready for the festive season. This is particularly important if you are to host a Christmas meal of some description. You really want to be sure that you have all the food that you need, that you know which bits of equipment you will be using and that you have space to put stuff down. Some of this organisation can be done closer to the time but it worth thinking about this now as, firstly, Christmas supermarket delivery slots need to be booked now if you haven’t already done so, and chances are sometime in the next day or so you will have your last rubbish collection before Christmas so make sure you have thrown out what needs throwing out before that happens.
So, first job, if you usually get your shopping delivered and you haven’t already booked your Christmas delivery slot then do so now. Just bung any old thing into your trolley and check out then come back later and have a proper think about what you need. Before that last shop load of food arrives, make sure that you have somewhere to put it. It is time to sort out your fridge and your food cupboard.
Not only is this a good thing in terms of hygiene, but cleaning your fridge and cupboards will allow you to get everything organised. You can throw out some stuff, rearrange what's left into neat rows and know for sure what you have in there. This will stop you buying stuff that you actually had lurking at the back of the cupboard and make sure you buy stuff that you were sure you still had some left of but actually don't.
I clean the fridge about once a month so I never get too ghastly a surprise but I usually stumble across something like the soggy end of a piece of cucumber or similar that I have missed in the meantime. It is important to keep your fridge clean and I think in many kitchens it probably contains the least wiped down surfaces. When I tackle the fridge cleaning I start at the top and work my way down, placing the contents of each shelf in turn on the worktop, removing the shelf, cleaning it, drying it and returning it before replacing all the food that is still edible. Cleaning the fridge now before it is stacked up with turkey, sausages, ham, sprouts, cheese, trifle etc. will be a lot easier.
I tackle the food cupboard about twice a year and Christmas is one of those times. Again I work from shelf to shelf, top to bottom. Out of date food is thrown away, the shelves are wiped down and things are returned in a lovely ordered arrangement. Oh how I wish my cupboard always looked like this! It also gives me chance to review the odds and ends of jam and chutney that I seem to accumulate throughout the year as I make batches for sale. Although full jars of jam and chutney will keep for about two years unopened, my odds and ends come from scrapping down the pan at the end of a batch and don't fill a jar so are more prone to losing colour or flavour or even going mouldy. Having discarded these I'm left with a lovely selection of chutneys to go with the cheese board, and jams for breakfast. Something to be proud to offer with no embarrassing surprises lurking amongst them.
When deciding what food to throw away and what to keep, bear in mind that if it is past its "use by" date it could potentially cause food poisoning. However, a best before day just means it was probably better before that date. It is "stale" rather than "off" and you can use your own judgement as to whether it should be thrown away or if you can still use it up. Having nearly broken a tooth testing to see if a Liquorice Allsort was still edible, I soon realised what "best before" meant in that case! If you are throwing food away, think about the container it is in and whether it can be re-used or recycled. It does add a bit of time to the process, but spooning the contents into the food bin then washing and re-using or recycling the packaging is better for you and the environment. Saving these containers might be useful for putting leftovers in over the next few days. As you go, don't forget to put things on your shopping list as you think of them.
My final job is to go round to the allotment. Firstly, I can empty my past-their-best vegetables into the compost bin and secondly I can check to see what veg I might have available for the Christmas meal. This year I seem to have a glut of swede and beetroot which might need some creative thought but I'll need to put sprouts on the shopping list. By the end of this process I know exactly what I need to buy at the supermarket and can go back to the random basket full of shopping I'd hurried booked online and adjust it to suit. And when it is delivered it will almost be a joy to put away in my newly organised spaces. For a day or two I shall bask in the organised glory of my kitchen knowing that come Boxing Day it will look like a bomb has dropped.
So, first job, if you usually get your shopping delivered and you haven’t already booked your Christmas delivery slot then do so now. Just bung any old thing into your trolley and check out then come back later and have a proper think about what you need. Before that last shop load of food arrives, make sure that you have somewhere to put it. It is time to sort out your fridge and your food cupboard.
Not only is this a good thing in terms of hygiene, but cleaning your fridge and cupboards will allow you to get everything organised. You can throw out some stuff, rearrange what's left into neat rows and know for sure what you have in there. This will stop you buying stuff that you actually had lurking at the back of the cupboard and make sure you buy stuff that you were sure you still had some left of but actually don't.
I clean the fridge about once a month so I never get too ghastly a surprise but I usually stumble across something like the soggy end of a piece of cucumber or similar that I have missed in the meantime. It is important to keep your fridge clean and I think in many kitchens it probably contains the least wiped down surfaces. When I tackle the fridge cleaning I start at the top and work my way down, placing the contents of each shelf in turn on the worktop, removing the shelf, cleaning it, drying it and returning it before replacing all the food that is still edible. Cleaning the fridge now before it is stacked up with turkey, sausages, ham, sprouts, cheese, trifle etc. will be a lot easier.
I tackle the food cupboard about twice a year and Christmas is one of those times. Again I work from shelf to shelf, top to bottom. Out of date food is thrown away, the shelves are wiped down and things are returned in a lovely ordered arrangement. Oh how I wish my cupboard always looked like this! It also gives me chance to review the odds and ends of jam and chutney that I seem to accumulate throughout the year as I make batches for sale. Although full jars of jam and chutney will keep for about two years unopened, my odds and ends come from scrapping down the pan at the end of a batch and don't fill a jar so are more prone to losing colour or flavour or even going mouldy. Having discarded these I'm left with a lovely selection of chutneys to go with the cheese board, and jams for breakfast. Something to be proud to offer with no embarrassing surprises lurking amongst them.
When deciding what food to throw away and what to keep, bear in mind that if it is past its "use by" date it could potentially cause food poisoning. However, a best before day just means it was probably better before that date. It is "stale" rather than "off" and you can use your own judgement as to whether it should be thrown away or if you can still use it up. Having nearly broken a tooth testing to see if a Liquorice Allsort was still edible, I soon realised what "best before" meant in that case! If you are throwing food away, think about the container it is in and whether it can be re-used or recycled. It does add a bit of time to the process, but spooning the contents into the food bin then washing and re-using or recycling the packaging is better for you and the environment. Saving these containers might be useful for putting leftovers in over the next few days. As you go, don't forget to put things on your shopping list as you think of them.
My final job is to go round to the allotment. Firstly, I can empty my past-their-best vegetables into the compost bin and secondly I can check to see what veg I might have available for the Christmas meal. This year I seem to have a glut of swede and beetroot which might need some creative thought but I'll need to put sprouts on the shopping list. By the end of this process I know exactly what I need to buy at the supermarket and can go back to the random basket full of shopping I'd hurried booked online and adjust it to suit. And when it is delivered it will almost be a joy to put away in my newly organised spaces. For a day or two I shall bask in the organised glory of my kitchen knowing that come Boxing Day it will look like a bomb has dropped.
Saturday, 2 November 2013
Using up the odds and ends
When I make a batch of jam or chutney, it is unusual that it fits perfectly into the a complete number of full jars. As a result, I always have a selection of little tubs of odds and ends of jam and chutney for my family to use up.
A consequence of this is that I usually encourage my children to have something for breakfast that involves jam. Sometimes this is as simple as toast but often I try to make it a bit more interesting
Having made Pear & Chocolate Jam the other day I decided that vanilla waffles would be the best way to make the most of this new invention. Pears have very little pectin and even with added apple pectin the jam sets very lightly. This, however, makes it perfect for dolloping onto waffles.
Vanilla Waffles
250g plain flour
7g baking powder
20g caster sugar
5g salt
475ml milk
2 eggs
30ml vegetable oil
A few drops of vanilla extract
Mix all the ingredients together and leave to stand for a while or overnight. Cook in a waffle maker. Serve hot with jam.
Another breakfast favourite is brioche. Often I just buy a loaf of brioche but occasionally I feel inspired to make some. Sometime back I had the brainwave of putting a teaspoon of jam into the centre of brioche rolls before baking them. My girls liked this but I felt that, although the jammy centre was lovely, there was quite a lot of brioche that didn't have jam with it.
Then the other day I made some Cheddar, beetroot and bacon rolls to have with our dinner. These worked out beautifully and I liked the way the tasty filling was in every bite.
Cheddar, Beetroot & Bacon Rolls (makes 12)
200ml water
50ml milk
300g strong white flour
150g plain flour
1 tsp salt
1 tsp brown sugar
1 1/2 tsp yeast
25g butter
150g cooked beetroot, grated
100g grated Cheddar cheese
40-50g crispy smoked streaky bacon, in small pieces
Place the water and milk into the bottom of a bread machine then cover with the flours. Place the salt, sugar, yeast and butter in separate areas on top of flour. Set the machine to "dough" and start. In the meantime, boil the beetroot if raw and cook the bacon until crispy. When the dough is ready, knock back on a floured surface and roll out into a rough rectangle. Sprinkle over half the cheese then add the beetroot and bacon and then the remaining cheese. Roll the dough up tightly along the longest edge then cut into 12 rolls. Place each roll, cut side up, into a greased muffin tin. Cover with oiled Clingfilm and leave to double in size. In the meantime, preheat oven to 200°C, gas make 6. Cook the rolls for 30 minutes until risen and cooked through. Serve warm.
This made me wonder if the same technique would work for the brioche rolls. That's to say, could the jam be rolled all the way through each bun? Well, the answer was yes. Another jammy breakfast success.
Brioche Jam Swirls (makes 12)
30ml (2 tbsp) milk
2 eggs
225g (8 oz) bread flour
1/2 tsp salt
1 tbsp caster sugar
55g (2 oz) butter
1 1/2 tsp yeast
2-3 tbsp jam
Pour the milk and eggs into the bread machine pan then put the flour on top. Add the salt, sugar, butter and yeast in separate areas on top of the flour then set your machine to the dough setting. When the dough is ready, knock back on a floured surface then roll out into a rough rectangle. Smear the jam over the dough then roll up the dough along the longest length. Cut into roll into 12 pieces and place each piece, cut side up, into greased holes of a muffin tin. Cover with oiled Clingfilm and leave to double in size. In the meantime, preheat the oven to 200°C, gas 6. Bake for 15 minutes until golden and well risen. Serve hot or cold.
A consequence of this is that I usually encourage my children to have something for breakfast that involves jam. Sometimes this is as simple as toast but often I try to make it a bit more interesting
Having made Pear & Chocolate Jam the other day I decided that vanilla waffles would be the best way to make the most of this new invention. Pears have very little pectin and even with added apple pectin the jam sets very lightly. This, however, makes it perfect for dolloping onto waffles.
Vanilla Waffles
250g plain flour
7g baking powder
20g caster sugar
5g salt
475ml milk
2 eggs
30ml vegetable oil
A few drops of vanilla extract
Mix all the ingredients together and leave to stand for a while or overnight. Cook in a waffle maker. Serve hot with jam.
Another breakfast favourite is brioche. Often I just buy a loaf of brioche but occasionally I feel inspired to make some. Sometime back I had the brainwave of putting a teaspoon of jam into the centre of brioche rolls before baking them. My girls liked this but I felt that, although the jammy centre was lovely, there was quite a lot of brioche that didn't have jam with it.
Then the other day I made some Cheddar, beetroot and bacon rolls to have with our dinner. These worked out beautifully and I liked the way the tasty filling was in every bite.
200ml water
50ml milk
300g strong white flour
150g plain flour
1 tsp salt
1 tsp brown sugar
1 1/2 tsp yeast
25g butter
150g cooked beetroot, grated
100g grated Cheddar cheese
40-50g crispy smoked streaky bacon, in small pieces
Place the water and milk into the bottom of a bread machine then cover with the flours. Place the salt, sugar, yeast and butter in separate areas on top of flour. Set the machine to "dough" and start. In the meantime, boil the beetroot if raw and cook the bacon until crispy. When the dough is ready, knock back on a floured surface and roll out into a rough rectangle. Sprinkle over half the cheese then add the beetroot and bacon and then the remaining cheese. Roll the dough up tightly along the longest edge then cut into 12 rolls. Place each roll, cut side up, into a greased muffin tin. Cover with oiled Clingfilm and leave to double in size. In the meantime, preheat oven to 200°C, gas make 6. Cook the rolls for 30 minutes until risen and cooked through. Serve warm.
This made me wonder if the same technique would work for the brioche rolls. That's to say, could the jam be rolled all the way through each bun? Well, the answer was yes. Another jammy breakfast success.
Brioche Jam Swirls (makes 12)
30ml (2 tbsp) milk
2 eggs
225g (8 oz) bread flour
1/2 tsp salt
1 tbsp caster sugar
55g (2 oz) butter
1 1/2 tsp yeast
2-3 tbsp jam
Pour the milk and eggs into the bread machine pan then put the flour on top. Add the salt, sugar, butter and yeast in separate areas on top of the flour then set your machine to the dough setting. When the dough is ready, knock back on a floured surface then roll out into a rough rectangle. Smear the jam over the dough then roll up the dough along the longest length. Cut into roll into 12 pieces and place each piece, cut side up, into greased holes of a muffin tin. Cover with oiled Clingfilm and leave to double in size. In the meantime, preheat the oven to 200°C, gas 6. Bake for 15 minutes until golden and well risen. Serve hot or cold.
Sunday, 15 September 2013
My Love Hate Relationship with Brambles
Brambles have got to be the worst weed in the world. They grow ridiculously quickly, they take root wherever a stem comes into contact with the ground and they are viciously thorny. I sometimes wonder, if humans suddenly died out, how quickly the world would be overgrown with the stuff.
I constantly battle with brambles that sneak in amongst my soft fruit bushes. The lovely redcurrant doesn't have thorns and should be a delight to harvest. But no... I reach in to grab a handful of ripe currants only to snag my hand onto some hideous unseen bramble branch winding its way through the bush. And try as I might, I can't obliterate the stuff from my plot. Even with thick leather gloves on, the thorns can get through, or the stems can swing round and whip me across the face as I try to pull them out. Year after year it grows back despite my efforts.
They are ugly plants too when they invade other shrubbery. Garden hedges interwoven with bramble branches quickly start to look like something more suited to surrounding Sleeping Beauty's castle. The bramble that grows through my neighbour's hedge that overhangs the road scratches my car every time I drive past and threaten to take my eye out when I cycle past. The brambles that grow along the redways grow so quickly and so menacingly that I have been know to carry secateurs especially to chop them off and make the redways safe again.
But just at the point when I'm ready to declare out and out war on this weed, September arrives and the bramble breaks out into fruit and all is forgiven. Suddenly it seems to remind us all that it does deserve a place on the planet after all and out we go with our plastic bags and pick. Blackberrying must be the only form of foraging that every kid in the country as been introduced to at some point. They are the only wild berry that everyone can safely identify. And no autumn would be complete without an apple and blackberry crumble.
This year has been a particularly abundant year for blackberries so there are plenty for everyone. No excuse, get out there and pick yourself some and take advantage of this free food. You may as well because it won't be long before all we are left with are the horrible, invasive, spiky weeds that we all hate.
Just remember to take care because the blackberry may produce lovely fruit but it doesn't give them up without a fight.
Apple & Blackberry Crumble
2 lb (900 g) apples – peeled and sliced
1 oz (25g) soft light brown sugar
1 teaspoon cinnamon
3 oz (85g) blackberries
2 tablespoons water
4 oz (110g) wholemeal flour
4 oz (110g) oats
4 oz (110g) light brown sugar
1 teaspoon baking powder
3 oz (85g) butter
Place the apples, sugar, cinnamon, blackberries and water in a large pan and cook with the lid on for twenty minutes until fluffy – stir occasionally. In the meantime, preheat oven to 180°C (gas 4). In a bowl, add the flour, oats, sugar, baking powder and butter and use finger tips to rub into crumbs. Spoon the apple mix into a suitable ovenproof dish and layer the crumble mix on top. Level it off then bake in the oven for 30 minutes until golden brown. Serve with custard.
I constantly battle with brambles that sneak in amongst my soft fruit bushes. The lovely redcurrant doesn't have thorns and should be a delight to harvest. But no... I reach in to grab a handful of ripe currants only to snag my hand onto some hideous unseen bramble branch winding its way through the bush. And try as I might, I can't obliterate the stuff from my plot. Even with thick leather gloves on, the thorns can get through, or the stems can swing round and whip me across the face as I try to pull them out. Year after year it grows back despite my efforts.
They are ugly plants too when they invade other shrubbery. Garden hedges interwoven with bramble branches quickly start to look like something more suited to surrounding Sleeping Beauty's castle. The bramble that grows through my neighbour's hedge that overhangs the road scratches my car every time I drive past and threaten to take my eye out when I cycle past. The brambles that grow along the redways grow so quickly and so menacingly that I have been know to carry secateurs especially to chop them off and make the redways safe again.
But just at the point when I'm ready to declare out and out war on this weed, September arrives and the bramble breaks out into fruit and all is forgiven. Suddenly it seems to remind us all that it does deserve a place on the planet after all and out we go with our plastic bags and pick. Blackberrying must be the only form of foraging that every kid in the country as been introduced to at some point. They are the only wild berry that everyone can safely identify. And no autumn would be complete without an apple and blackberry crumble.
This year has been a particularly abundant year for blackberries so there are plenty for everyone. No excuse, get out there and pick yourself some and take advantage of this free food. You may as well because it won't be long before all we are left with are the horrible, invasive, spiky weeds that we all hate.
Just remember to take care because the blackberry may produce lovely fruit but it doesn't give them up without a fight.
Apple & Blackberry Crumble
2 lb (900 g) apples – peeled and sliced
1 oz (25g) soft light brown sugar
1 teaspoon cinnamon
3 oz (85g) blackberries
2 tablespoons water
4 oz (110g) wholemeal flour
4 oz (110g) oats
4 oz (110g) light brown sugar
1 teaspoon baking powder
3 oz (85g) butter
Place the apples, sugar, cinnamon, blackberries and water in a large pan and cook with the lid on for twenty minutes until fluffy – stir occasionally. In the meantime, preheat oven to 180°C (gas 4). In a bowl, add the flour, oats, sugar, baking powder and butter and use finger tips to rub into crumbs. Spoon the apple mix into a suitable ovenproof dish and layer the crumble mix on top. Level it off then bake in the oven for 30 minutes until golden brown. Serve with custard.
Thursday, 5 September 2013
Putting the currant into Eccles cakes
When you grow a glut of something, you find yourself coming up with more and more inventive ways of using that particular fruit or vegetable to make the most of it and avoid becoming sick of it. I remember once, when faced with a glut of plums, racking my brains for new ideas for using them up. Having already made Plum Jam, Plum & Cinnamon Jam, Plum & Mulled Wine Jam, Plum & Orange Mincemeat, plum flapjacks, plum crumble and plum upside down cake I was beginning to struggle. Hmmm... what about plum pudding? Little Jack Horner sat in a corner, eating his pudding and pie. He stuck in this thumb and pulled out a plum and said, "What a good boy am I?". Plum pudding, a dish as old as the hills... but sadly, not made with plums it turned out on further research - just dried mixed fruit.
On another matter, I happen to be a huge fan of Eccles cakes. Always have been, even the ones you can buy in supermarkets (which are actually rather good). The other day when delivering some jam to Woodstocks Artisan Bakery, Matt asked, "Do you want to get anything whilst you're here." Silly question! And as they had Eccles cakes for sale the choice wasn't that difficult.
Then later, having polished those off I found myself fancying some more - well, you would, wouldn't you? But it was August and I usually only make Eccles cakes in the autumn when I can grate some apples or pears into the filling and neither of these fruits were ready. However, I was up to my eyes in a blackcurrant glut at the time so, hey, why not put some actual currants into them - not just those shriveled up grape things that call themselves currants.
And you know what? It really worked. Just 2 oz of blackcurrants was all that was needed to add to the dried fruit mixture and, my god, what a flavour revolution! Distinctly blackcurranty but not too much so, adding a depth of flavour not possible with dried fruit alone. I'm pleased to say that it made a large batch and I was able to freeze some so I have been enjoying them all over again this week and will certainly be making some more with the glut of frozen blackcurrants in my freezer.
So, that's the currants into Eccles cakes sorted... just need to crack the plum in plum pudding now the plums are ready...
Blackcurrant Eccles Cakes (makes 18)
1 oz (25g) butter
9 oz (250g) mixed dried fruit
4 oz (110g) light muscovado sugar
1 teaspoon ground cinnamon
1 teaspoon ground ginger
1/2 teaspoon ground all spice
Juice of one small lemon
2 oz (55g) blackcurrants
1 block of ready-made puff pastry
Egg
Demerara sugar
Preheat oven to 220°C, gas 8 and grease a baking tray. Melt the butter in a pan then stir in the blackcurrants and cook for 10 minutes until the juices are running. Add the dried fruit, sugar, spices and lemon juice and cook for a another 10 minutes then leave to cool completely. On a floured surface roll out the pastry. Use a large biscuit cutter (about 10cm in diameter) to cut out circles in the pastry. Place a teaspoon of filling into the centre of each pastry circle then bundle the pastry up over the filling. Turn the pastry bundle over and flatten with a rolling pin to make a thick oval biscuit of pastry with the fruity filling just showing beneath the surface. Slash the biscuit 3 times with a sharp knife then brush with beaten egg and scatter with Demerara sugar. Gather up the pastry trimmings and repeat until all the pastry is used up. Place the Eccles cakes on the baking tray and cook for about 20 minutes until golden brown. Alternatively, place the Eccles cakes on a tray and freeze raw. Can be cooked from frozen for about 25 minutes.
To make pear or apple Eccles cakes, substitute the blackcurrants with 2 whole fruit, peeled and grated into the dried fruit mixture.
On another matter, I happen to be a huge fan of Eccles cakes. Always have been, even the ones you can buy in supermarkets (which are actually rather good). The other day when delivering some jam to Woodstocks Artisan Bakery, Matt asked, "Do you want to get anything whilst you're here." Silly question! And as they had Eccles cakes for sale the choice wasn't that difficult.
Then later, having polished those off I found myself fancying some more - well, you would, wouldn't you? But it was August and I usually only make Eccles cakes in the autumn when I can grate some apples or pears into the filling and neither of these fruits were ready. However, I was up to my eyes in a blackcurrant glut at the time so, hey, why not put some actual currants into them - not just those shriveled up grape things that call themselves currants.
And you know what? It really worked. Just 2 oz of blackcurrants was all that was needed to add to the dried fruit mixture and, my god, what a flavour revolution! Distinctly blackcurranty but not too much so, adding a depth of flavour not possible with dried fruit alone. I'm pleased to say that it made a large batch and I was able to freeze some so I have been enjoying them all over again this week and will certainly be making some more with the glut of frozen blackcurrants in my freezer.
So, that's the currants into Eccles cakes sorted... just need to crack the plum in plum pudding now the plums are ready...
Blackcurrant Eccles Cakes (makes 18)
1 oz (25g) butter
9 oz (250g) mixed dried fruit
4 oz (110g) light muscovado sugar
1 teaspoon ground cinnamon
1 teaspoon ground ginger
1/2 teaspoon ground all spice
Juice of one small lemon
2 oz (55g) blackcurrants
1 block of ready-made puff pastry
Egg
Demerara sugar
Preheat oven to 220°C, gas 8 and grease a baking tray. Melt the butter in a pan then stir in the blackcurrants and cook for 10 minutes until the juices are running. Add the dried fruit, sugar, spices and lemon juice and cook for a another 10 minutes then leave to cool completely. On a floured surface roll out the pastry. Use a large biscuit cutter (about 10cm in diameter) to cut out circles in the pastry. Place a teaspoon of filling into the centre of each pastry circle then bundle the pastry up over the filling. Turn the pastry bundle over and flatten with a rolling pin to make a thick oval biscuit of pastry with the fruity filling just showing beneath the surface. Slash the biscuit 3 times with a sharp knife then brush with beaten egg and scatter with Demerara sugar. Gather up the pastry trimmings and repeat until all the pastry is used up. Place the Eccles cakes on the baking tray and cook for about 20 minutes until golden brown. Alternatively, place the Eccles cakes on a tray and freeze raw. Can be cooked from frozen for about 25 minutes.
To make pear or apple Eccles cakes, substitute the blackcurrants with 2 whole fruit, peeled and grated into the dried fruit mixture.
Friday, 30 August 2013
So what on earth are mirabelles?!
This week I made my first every batch of Mirabelle Jam and what a delight it is too. The fruit cooked beautifully into jam-consistency mush in just a few minutes, it came to a delightful set with ease, it had a beautiful colour and the flavour is just gorgeous. But when I proudly tell people I have made Mirabelle Jam I'm mainly met with blank expressions and queries of, "What's that?".
I have to admit that until about two years ago I didn't know what mirabelles were either. As many of you know, I'm always keen to take surplus fruit and veg off people's hands in exchange for a jar of something yummy from the Jammy Cow stores. And it was in a conversation with someone offering me plums from their tree that I was introduced to mirabelles. They lived in Loughton and said there were lots of mirabelles growing in the hedgerow and that I really should come and pick some for jam making. Unfortunately, I was away on holiday just at the critical harvesting moment and I never managed to get to Loughton to pick them. Still, I had by this point Googled mirabelles and discovered they are a member of the prunus family so related to plums, cherries, gages, peaches and apricots.
Having had mirabelles brought to my attention back in 2011, the following year I once again found myself wondering about visiting Loughton for some mirabelle picking. But with the picking season falling within the school holidays I somehow never made it out there but I did begin to wonder if the yellow fruits along gridroads could in fact be mirabelles and not some sort of weird yellow cherries after all.
This year I was determined to crack the whole mirabelle mystery and became progressively convinced that the yellow fruits I was seeing absolutely everywhere were mirabelles. Not only to be found in Loughton, I realised! So, at the weekend I took my girls out for a short cycle ride, with telescopic picking tool strapped to my crossbar, with the intention of picking mirabelles. I knew where I was going because I had seen the bright fruit from the car all week. And sure enough, there they were, glowing yellow and so ripe they jumped eagerly off the tree with the slightest touch. Soon we had a bagful and could head home, to chop and remove the stones ready for jamming.
The fruit looked beautiful before I started but I had no idea they would create such a lovely jam. I gave my girls a taste the day I made the jam and they liked it so much they requested it on their toast for breakfast the next day. I gave a friend a spoonful to try and she took a jar home with her. It looks like it should taste like marmalade but instead it is sweet and fruity and nearly plum-like but altogether different. It is fantastic on toast but I can see it would work well between sponge cakes or instead of apricot jam under marzipan or icing on a cake.
I quickly realised I needed to go out and pick some more but sadly the mirabelle season is short and is now over but be sure I shall be raiding the hedgerow again next year.
I have to admit that until about two years ago I didn't know what mirabelles were either. As many of you know, I'm always keen to take surplus fruit and veg off people's hands in exchange for a jar of something yummy from the Jammy Cow stores. And it was in a conversation with someone offering me plums from their tree that I was introduced to mirabelles. They lived in Loughton and said there were lots of mirabelles growing in the hedgerow and that I really should come and pick some for jam making. Unfortunately, I was away on holiday just at the critical harvesting moment and I never managed to get to Loughton to pick them. Still, I had by this point Googled mirabelles and discovered they are a member of the prunus family so related to plums, cherries, gages, peaches and apricots.
Having had mirabelles brought to my attention back in 2011, the following year I once again found myself wondering about visiting Loughton for some mirabelle picking. But with the picking season falling within the school holidays I somehow never made it out there but I did begin to wonder if the yellow fruits along gridroads could in fact be mirabelles and not some sort of weird yellow cherries after all.
This year I was determined to crack the whole mirabelle mystery and became progressively convinced that the yellow fruits I was seeing absolutely everywhere were mirabelles. Not only to be found in Loughton, I realised! So, at the weekend I took my girls out for a short cycle ride, with telescopic picking tool strapped to my crossbar, with the intention of picking mirabelles. I knew where I was going because I had seen the bright fruit from the car all week. And sure enough, there they were, glowing yellow and so ripe they jumped eagerly off the tree with the slightest touch. Soon we had a bagful and could head home, to chop and remove the stones ready for jamming.
The fruit looked beautiful before I started but I had no idea they would create such a lovely jam. I gave my girls a taste the day I made the jam and they liked it so much they requested it on their toast for breakfast the next day. I gave a friend a spoonful to try and she took a jar home with her. It looks like it should taste like marmalade but instead it is sweet and fruity and nearly plum-like but altogether different. It is fantastic on toast but I can see it would work well between sponge cakes or instead of apricot jam under marzipan or icing on a cake.
I quickly realised I needed to go out and pick some more but sadly the mirabelle season is short and is now over but be sure I shall be raiding the hedgerow again next year.
Subscribe to:
Posts (Atom)