I saw an advert for a popular brand of biscuits in the back of a magazine the other day that included the phrase, "made with love." To me, this has become one of the most overused phrases of modern times, and consequently, one of the most meaningless. I have to question how anything mass produced in a factory can possibly be "made with love". Love not an ingredient, to be shoveled in, on demand, somewhere along a conveyor belt. The occasional required human along the production line is not there to transfer warm, fuzzy feelings into the biscuits as they zip by. Whatever their role, they are there because they are being paid to do a job and even if they happen to love their job (seems unlikely), they cannot possibly be feeling any kind of love for you, the unknown, future purchaser of this brand of biscuits.
It seems to me that there is a direct relationship between the length of the production chain and the amount of care that goes into the end product. I remember pondering on this point last year as we drove down the A9 from the north coast of Scotland. Whilst staying up there we had seen, daily, logging trucks thundering past our little cottage, loaded up with freshly cut down trees. We were staying only a few miles away from the pine forests which were currently being harvested and the freshly cut logs were being taken off to, presumably, a sawmill for the next stage of processing. On the A9, several hundred miles from these pine forests, the trucks we were stuck behind as we ground our way south, were loaded not with logs but planks cut from the logs. This, it seemed to me was the next step in the production line.
So, in my head, I fast-forwarded to where the end of the line would be and thought of the pieces of wood that we sometimes find ourselves in need of purchasing from our local DIY store. In the interest of saving space and packing in as much stock as possible, the long strips of wood are stood on their ends in store so, inevitably, with time they warp. This is something that causes Steve to curse as he sorts through the buckled pieces of wood, looking for the pieces that are least bent. It seems such a shame that so much effort was required from the point of planting the trees to putting it out on sale and yet the end product has been wrecked by a lack of care. It is obvious why this happens when there are so many steps in the chain from creation to end product and so many people involved so that they person who finally blips the barcode really doesn't give a stuff whether the piece of wood is straight or not.
I'm sure you'll agree that claiming that these planks of wood were "made with love" would be farcical, yet how is this different from factory produced biscuits?
Now, when you shorten the chain from producer to customer to just two people (the producer and the customer), you can start to make some sort of claim about the amount of "love" that went into the making of the product. But I shall make a shocking revelation now, I don't make my products with love! I do make them with care, however. I care about the sourcing and quality of ingredients, I care about the recipe and the way that it is cooked, I care about the labeling and storage conditions and I care that the customer's expectations are met. It is lovely then to be able to discuss my products with the customer, establish their needs and likes and hand over a product that I know intimately.
Honestly, when I think about the rigid trading standards requirement for labeling products correctly, what with ingredients, allergens, weight etc., it makes me wonder how sticking the words "made with love" on a label is even allowed. Maybe that in itself further demonstrates how meaningless these words really are. As consumers we are urged to read food labels carefully so as to better understand the ingredients, the number of food miles, the carbon footprint, the calorie content, the product's place in our daily allowance, and so on. I would add to that the importance of assessing the amount of "care" that has gone into the product. Not always easy when misleading wording can be added without censure and mass produced foods can be packaged to look homemade.
Next time you are at a craft fair or a food event and the person who made the product puts it in a bag for you, feel satisfied that you have been handed a product "made with care". Next time you cook up something special in your own kitchen for a relative or friend, thinking about them as you do so, then you'll know what something "made with love" is all about. And next time you see those words on a label perhaps you'll be regard them with the same kind of indifference as the person who put them on the label in the first place.
A range of handmade preserves made in Milton Keynes from fruit & vegetables grown in Milton Keynes.
JamMK header
Thursday, 19 February 2015
Wednesday, 22 October 2014
Prawn Toast
As you know, I am all in favour of eating with the seasons and wish that supermarket stocks would reflect the seasons more than they do. Having said that, there is one food item that disappears from the supermarket shelves for several months of the year that I wish would be available all year round. That food is prawn toast. It first appears in January, in time for the Chinese new year and stays on the shelves until the barbecue season, when it disappears to make way for barbecue meat. Then Christmas fare replaces the barbecue foods, preventing the prawn toast from reappearing until January.
As you may have realised, I like prawn toast and it makes a nice little addition to our home cooked Chinese meal that we have probably about once a fortnight. It is therefore a little annoying not to be able to buy it all the time. So, the other day when I was thinking that I really fancied a couple of triangles of it, I wondered how hard could it be to make my own. To be honest, I didn't have much of a clue as to what might go into it, other than bread, prawns and sesame seeds. Still, a short internet search soon gave me some ideas and various recipes. Most of them used 8 slices of bread, making a whopping 32 triangles... I only wanted 8!
So, I jotted down a few ideas for ingredients, quartering what had been suggested and then went off into the kitchen to give it a go. It is at times like this that it is really handy to have homegrown garlic and shallots available because they come in all sorts of different sizes and I just needed one tiny shallot and one tiny garlic clove for my scaled down recipe. The other consideration was that, when cooking a stirfry, the last few minutes of the meal preparations can become a bit hectic when you feel as if you need about 4 arms as everything is on the go at once. So, ideally, I wanted to just pop my prawn toast into the oven to reheat - like the frozen ones I usually buy - rather than having to create them in addition to everything else I would be doing. I decided, therefore, to make them in advance, leave them to cool and just pop them back into the oven to reheat before serving. I figured too that this would probably give them the nice crisp texture that I like.
The recipe was surprisingly straightforward to make - really just an exotic fried bread. They reheated perfectly too and, as for the flavour, let's just say I won't be bothering with the shop bought ones anymore!
Prawn Toast (makes 8 triangles)
50g cooked prawns (thawed if frozen)
A little egg white - about 2 teaspoons
1 tiny clove of garlic
1 tiny shallot
3/4 tsp soy sauce
1/2 tsp sweet chilli sauce (optional)
1 tsp cornflour
2 pinches of five spice powder
2 slices of bread
Sesame seeds
Put the prawns and other ingredients (except for the bread and sesame seeds) into a blender and blend briefly until a slightly lumpy paste forms. Cut the crusts off the bread then spread the paste over the 2 slices. Heavily sprinkle over the sesame seeds and press down lightly. Cut each slice of bread into 4 triangles. Heat some oil in a frying pan and shallow fry the bread for about 2-3 minutes on each side then set aside on a baking tray (or serve at this point). Reheat in an oven at 180C, gas 4 for 5 minutes then serve hot with a Chinese-style meal.
As you may have realised, I like prawn toast and it makes a nice little addition to our home cooked Chinese meal that we have probably about once a fortnight. It is therefore a little annoying not to be able to buy it all the time. So, the other day when I was thinking that I really fancied a couple of triangles of it, I wondered how hard could it be to make my own. To be honest, I didn't have much of a clue as to what might go into it, other than bread, prawns and sesame seeds. Still, a short internet search soon gave me some ideas and various recipes. Most of them used 8 slices of bread, making a whopping 32 triangles... I only wanted 8!
So, I jotted down a few ideas for ingredients, quartering what had been suggested and then went off into the kitchen to give it a go. It is at times like this that it is really handy to have homegrown garlic and shallots available because they come in all sorts of different sizes and I just needed one tiny shallot and one tiny garlic clove for my scaled down recipe. The other consideration was that, when cooking a stirfry, the last few minutes of the meal preparations can become a bit hectic when you feel as if you need about 4 arms as everything is on the go at once. So, ideally, I wanted to just pop my prawn toast into the oven to reheat - like the frozen ones I usually buy - rather than having to create them in addition to everything else I would be doing. I decided, therefore, to make them in advance, leave them to cool and just pop them back into the oven to reheat before serving. I figured too that this would probably give them the nice crisp texture that I like.
The recipe was surprisingly straightforward to make - really just an exotic fried bread. They reheated perfectly too and, as for the flavour, let's just say I won't be bothering with the shop bought ones anymore!
Prawn Toast (makes 8 triangles)
50g cooked prawns (thawed if frozen)
A little egg white - about 2 teaspoons
1 tiny clove of garlic
1 tiny shallot
3/4 tsp soy sauce
1/2 tsp sweet chilli sauce (optional)
1 tsp cornflour
2 pinches of five spice powder
2 slices of bread
Sesame seeds
Put the prawns and other ingredients (except for the bread and sesame seeds) into a blender and blend briefly until a slightly lumpy paste forms. Cut the crusts off the bread then spread the paste over the 2 slices. Heavily sprinkle over the sesame seeds and press down lightly. Cut each slice of bread into 4 triangles. Heat some oil in a frying pan and shallow fry the bread for about 2-3 minutes on each side then set aside on a baking tray (or serve at this point). Reheat in an oven at 180C, gas 4 for 5 minutes then serve hot with a Chinese-style meal.
Sunday, 5 October 2014
Dried Tomato Focaccia
We have had a bumper crop of tomatoes this year. I usually sow lots of tomato seeds which readily grow into numerous tomato plants. However, sometime in August blight usually strikes and that is the end of that. A good excuse to make green tomato chutney but a bit of a shame in terms of getting lovely ripe red ones. When you realise that blight flourishes when the temperature doesn't drop below 10°C and the humidity is high, it is hardly surprising it usually arrives in August, along with the thunderstorms. However, this year, August was cool and September was the driest on record and so blight has had pretty much no impact on my tomato harvest. So, all the tomato plants have cropped nicely... abundantly actually!
I have made several batches of various tomato chutneys so far and have also shoved some tomatoes in the freezer and generated 24 pints of puree! Now I have harvested all the tomatoes, ahead of any frosts likely to arrive in October. I have strung the trusses up in the greenhouse to continue to ripen. , However, I'm in no hurry for more ripe tomatoes right now as my freezers are groaning under the weight of the tomatoes already in them.
So, when my new food dehydrator was delivered this week I wondered if dried tomatoes would be a nice thing to create. Would make a change from chutney or puree, I thought. I sliced one large tomato thinly, arranged the slices on a rack of the dehydrator and seasoned them with "pizza and pasta seasoning" then set the dehydrator off for hours for the magic to work.
Wow! What a taste sensation - bursts of flavour in the mouth, several of them, in turn, and all intense.
So, having created these wonders of flavour, what could I do with them?
The next morning I set off a batch of focaccia dough in the bread machine, chopped up the dried tomatoes with some scissors and threw that in whilst it was kneading. A couple of hours later we were tucking in to some amazingly tasty, freshly baked bread, which, honestly, you could not have bought in a shop or gourmet restaurant.
With new found enthusiasm, I sliced up 10 of the largest ripe tomatoes from the greenhouse and restacked the dehydrator. Mmm... looking forward to lots of yummy bread now!
Dried Tomato Focaccia (makes 8 individual ones)
240ml (8 fl oz) water
2 tbsp olive oil
450g (1lb) strong white flour
1 tsp salt
1 1/2 tsp sugar
1 1/2 tsp yeast
4 tbsp (approx. 1/2 oz) dried tomatoes, chopped (sundried tomatoes could be used)
Coarse sea salt
Put the water and oil into the bread machine pan then add the flour, salt, sugar and yeast and set the machine to dough. After 10 minutes of kneading, add the dried tomato pieces to the machine. Once the dough is ready, take out the dough and knock it back and divide it equally into 8 pieces. Roll into a ball then flatten each piece and place on a greased baking tray. Cover with oiled clingfilm and leave for half an hour. Preheat oven to 200°C/gas 6. Poke the surface of each piece of bread with the end of a wooden spoon to indent all over. Drizzle over a little olive oil and sprinkle with coarse sea salt. Bake for 20-25 minutes until golden and serve hot or cold.
We ate these hot the first day but had some left over so the next day I placed them under the grill with some grated cheese on and had them as a very tasty cheese on toast.
I have made several batches of various tomato chutneys so far and have also shoved some tomatoes in the freezer and generated 24 pints of puree! Now I have harvested all the tomatoes, ahead of any frosts likely to arrive in October. I have strung the trusses up in the greenhouse to continue to ripen. , However, I'm in no hurry for more ripe tomatoes right now as my freezers are groaning under the weight of the tomatoes already in them.
So, when my new food dehydrator was delivered this week I wondered if dried tomatoes would be a nice thing to create. Would make a change from chutney or puree, I thought. I sliced one large tomato thinly, arranged the slices on a rack of the dehydrator and seasoned them with "pizza and pasta seasoning" then set the dehydrator off for hours for the magic to work.
Wow! What a taste sensation - bursts of flavour in the mouth, several of them, in turn, and all intense.
So, having created these wonders of flavour, what could I do with them?
The next morning I set off a batch of focaccia dough in the bread machine, chopped up the dried tomatoes with some scissors and threw that in whilst it was kneading. A couple of hours later we were tucking in to some amazingly tasty, freshly baked bread, which, honestly, you could not have bought in a shop or gourmet restaurant.
With new found enthusiasm, I sliced up 10 of the largest ripe tomatoes from the greenhouse and restacked the dehydrator. Mmm... looking forward to lots of yummy bread now!
Dried Tomato Focaccia (makes 8 individual ones)
240ml (8 fl oz) water
2 tbsp olive oil
450g (1lb) strong white flour
1 tsp salt
1 1/2 tsp sugar
1 1/2 tsp yeast
4 tbsp (approx. 1/2 oz) dried tomatoes, chopped (sundried tomatoes could be used)
Coarse sea salt
Put the water and oil into the bread machine pan then add the flour, salt, sugar and yeast and set the machine to dough. After 10 minutes of kneading, add the dried tomato pieces to the machine. Once the dough is ready, take out the dough and knock it back and divide it equally into 8 pieces. Roll into a ball then flatten each piece and place on a greased baking tray. Cover with oiled clingfilm and leave for half an hour. Preheat oven to 200°C/gas 6. Poke the surface of each piece of bread with the end of a wooden spoon to indent all over. Drizzle over a little olive oil and sprinkle with coarse sea salt. Bake for 20-25 minutes until golden and serve hot or cold.
We ate these hot the first day but had some left over so the next day I placed them under the grill with some grated cheese on and had them as a very tasty cheese on toast.
Monday, 22 September 2014
Blackberry Fruity Oat Bars
Last week I asked my youngest daughter if she fancied using some blackberries to make some Blackberry Fruity Oat Bars. She'd just come home from school and was pretty tired and she clearly hadn't planned to do baking with her mum when she got home so she wasn't overwhelmingly enthusiastic. Still, her big sister was at an after school club so we had about an hour of one-to-one time if she wanted it and that clearly appealed to her. She also loves getting her fingers messy, rubbing fat to flour and this recipe started with that. She's also pretty keen on anything involving fruit so the recipe ticked that box too. In fact, she loved the part of the recipe that involved squashing the blackberries and decided that her fingers were the best tools for this job. She said that being allowed to squish blackberries with her fingers felt really naughty.
Ultimately, it worked out well We had some quality time together, we made good use of a small quantity of seasonal fruit and the end result tasted good too. So, this week, when her sister was again at her club and the biscuit tin was in need of refilling, I asked her if she fancied making them again. This time she was enthusiastic from the start and was particularly looking forward to squashing the blackberries again!
With blackberries readily available right now, this is the perfect recipe to make with children. It doesn't need a huge quantity of blackberries, which is handy if enthusiasm for picking quickly wanes. Best of all, it doesn't matter if the fruit gets squashed!
Blackberry Fruity Oat Bars (makes 12)
4 oz (110g) plain flour
3½ oz (100g) oats
4½ oz (125g) butter
3 oz (85g) caster sugar
2 oz (55g) chopped pecans
4½ oz (125g) soft fruit
Preheat oven to 190°C (gas 5) and grease a small tin. Using fingertips, rub the butter into the flour and oats until it forms a sticky breadcrumb consistency. Add the sugar and pecans and mix with fingers. Spread half of this mix into the bottom of the tin. Layer the blackberries on top and squash them gently then sprinkle over the remaining mix and press down lightly. Bake for 40 to 45 minutes until golden. Cut into bars whilst still hot and allow to cool completely in the tin.
Ultimately, it worked out well We had some quality time together, we made good use of a small quantity of seasonal fruit and the end result tasted good too. So, this week, when her sister was again at her club and the biscuit tin was in need of refilling, I asked her if she fancied making them again. This time she was enthusiastic from the start and was particularly looking forward to squashing the blackberries again!
With blackberries readily available right now, this is the perfect recipe to make with children. It doesn't need a huge quantity of blackberries, which is handy if enthusiasm for picking quickly wanes. Best of all, it doesn't matter if the fruit gets squashed!
Blackberry Fruity Oat Bars (makes 12)
4 oz (110g) plain flour
3½ oz (100g) oats
4½ oz (125g) butter
3 oz (85g) caster sugar
2 oz (55g) chopped pecans
4½ oz (125g) soft fruit
Preheat oven to 190°C (gas 5) and grease a small tin. Using fingertips, rub the butter into the flour and oats until it forms a sticky breadcrumb consistency. Add the sugar and pecans and mix with fingers. Spread half of this mix into the bottom of the tin. Layer the blackberries on top and squash them gently then sprinkle over the remaining mix and press down lightly. Bake for 40 to 45 minutes until golden. Cut into bars whilst still hot and allow to cool completely in the tin.
Saturday, 20 September 2014
Hazelnut Harvest
Regular readers of my facebook page will know that I have been doing battle with squirrels this year. No sooner had I removed all my cherries from the tree in order to keep the birds from having them all than the squirrel arrived in the hazel tree to start pinching the hazelnuts. Fearful that I would lose them all, I started to collect any hazelnuts that fell from the tree. I think the squirrel helped with this, dislodging some in his haste to feast.
However, some of these "nuts" shriveled to nothing on my windowsill so I cracked open some of the fresher ones I'd picked up and found that there was no nut inside. However, as this was still June/July, it seemed likely that this was the hazelnut version of the "June drop", dropping the duff nuts. So, I had to wait patiently for the nuts to develop... although the squirrel was not so patient and continued to raid my tree. I think too, that he was fully aware that some of them were empty and was discarding them, dropping them onto my patio to tease me.
Eventually, towards the end of August I became increasingly fed up with the squirrel. Every time I was sat at the table, I saw him coming to the tree to collect more nuts. He was brazen too and not at all easily put off. Opening the back door was not sufficient to scare him off and on one occasion I went right up to where he was sat in the tree and he leapt over my head and into the cherry tree to escape. I think he scare me on that occasion more than I scared him! It stood to reason to that he must be in the tree on many occasions when I wasn't aware of it. At this rate there would be no hazelnuts left.
I thought about this for a while and tried to think of some way to stop him getting the hazelnuts. As inventive as I am, I couldn't think of a sensible and humane way to put him off. So, instead, I decided to put monkey nuts out in the garden. I figured that he would come along and find the monkey nuts first, eat these and leave. And you know what, it worked too! Over the next couple of days I topped up the monkey nuts two to three times a day in order to keep my hazelnuts safe. However, after a couple of days of this I decided it would just make a whole lot more sense to harvest what was left on the tree and bring them safely inside to finish ripening.
Of course, out of this little collection of nuts, I had no idea how many of them were empty and how many contained nuts. So this weekend I decided it was time ti find out how big the 2014 harvestnut harvest really was. I armed my daughter with a nutcracker and set her on a mission to reveal our hazelnuts. Off she went with the enthusiasm of... well, a child armed with a nutcracker and soon all our nuts were de-shelled. All 50g of them!
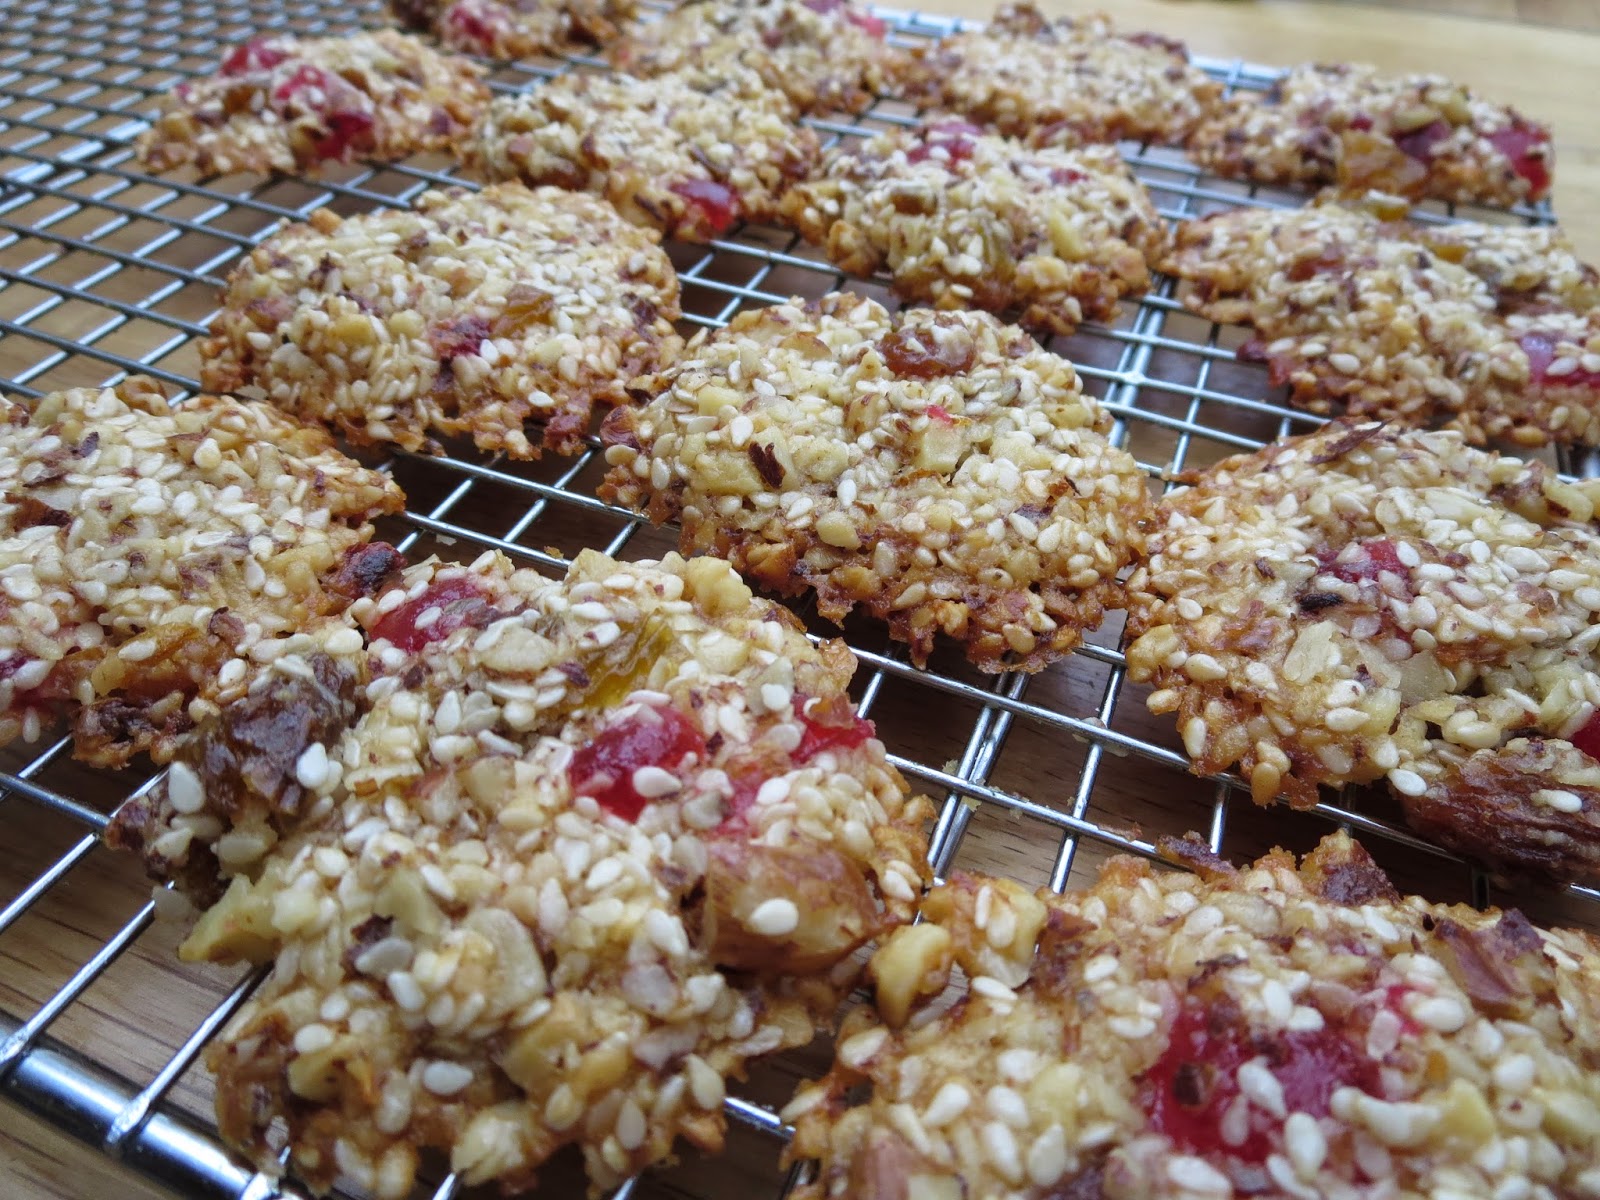
There was nothing more for it than to turn them into Hazelnut & Sesame Florentines; a recipe I had devised 5 years ago when we got our first hazelnut harvest (30g on that occasion). A tasty, simple recipe that very nicely makes use of our piffling hazelnut harvest. And you know what... I have no intention of sharing them with the squirrel!
1 1/2 oz (40g) unsalted butter
1 1/2 oz (40g) golden syrup
1/2 oz (15g) plain flour
1 1/2 oz (40g) chopped hazelnuts
1 1/2 oz (40g) sesame seeds
1 oz (25g) glace cherries
1 oz (25g) dried mixed fruit
Preheat oven to 180°C, gas 4 and line a large baking sheet. Melt together the butter and the syrup in a pan over a gentle heat then remove from the heat and add all the other ingredients. Stir well and leave for 2-3 minutes. Dollop teaspoons of the mixture well spaced out on the baking paper then bake for 5-8 minutes until golden. Cool on the sheet for 2-3 minutes then transfer onto a wire rack to cool completely.
However, some of these "nuts" shriveled to nothing on my windowsill so I cracked open some of the fresher ones I'd picked up and found that there was no nut inside. However, as this was still June/July, it seemed likely that this was the hazelnut version of the "June drop", dropping the duff nuts. So, I had to wait patiently for the nuts to develop... although the squirrel was not so patient and continued to raid my tree. I think too, that he was fully aware that some of them were empty and was discarding them, dropping them onto my patio to tease me.
Eventually, towards the end of August I became increasingly fed up with the squirrel. Every time I was sat at the table, I saw him coming to the tree to collect more nuts. He was brazen too and not at all easily put off. Opening the back door was not sufficient to scare him off and on one occasion I went right up to where he was sat in the tree and he leapt over my head and into the cherry tree to escape. I think he scare me on that occasion more than I scared him! It stood to reason to that he must be in the tree on many occasions when I wasn't aware of it. At this rate there would be no hazelnuts left.
I thought about this for a while and tried to think of some way to stop him getting the hazelnuts. As inventive as I am, I couldn't think of a sensible and humane way to put him off. So, instead, I decided to put monkey nuts out in the garden. I figured that he would come along and find the monkey nuts first, eat these and leave. And you know what, it worked too! Over the next couple of days I topped up the monkey nuts two to three times a day in order to keep my hazelnuts safe. However, after a couple of days of this I decided it would just make a whole lot more sense to harvest what was left on the tree and bring them safely inside to finish ripening.
Of course, out of this little collection of nuts, I had no idea how many of them were empty and how many contained nuts. So this weekend I decided it was time ti find out how big the 2014 harvestnut harvest really was. I armed my daughter with a nutcracker and set her on a mission to reveal our hazelnuts. Off she went with the enthusiasm of... well, a child armed with a nutcracker and soon all our nuts were de-shelled. All 50g of them!
There was nothing more for it than to turn them into Hazelnut & Sesame Florentines; a recipe I had devised 5 years ago when we got our first hazelnut harvest (30g on that occasion). A tasty, simple recipe that very nicely makes use of our piffling hazelnut harvest. And you know what... I have no intention of sharing them with the squirrel!
Hazelnut and Sesame Florentines (makes 12-16)
1 1/2 oz (40g) unsalted butter
1 1/2 oz (40g) golden syrup
1/2 oz (15g) plain flour
1 1/2 oz (40g) chopped hazelnuts
1 1/2 oz (40g) sesame seeds
1 oz (25g) glace cherries
1 oz (25g) dried mixed fruit
Preheat oven to 180°C, gas 4 and line a large baking sheet. Melt together the butter and the syrup in a pan over a gentle heat then remove from the heat and add all the other ingredients. Stir well and leave for 2-3 minutes. Dollop teaspoons of the mixture well spaced out on the baking paper then bake for 5-8 minutes until golden. Cool on the sheet for 2-3 minutes then transfer onto a wire rack to cool completely.
Monday, 15 September 2014
Appreciating the Moment
My girls don't watch Tom & Jerry. When I was a kid I watched Tom & Jerry at every opportunity I had... which wasn't very often. But that, I think is the whole point. Occasionally, on a Saturday afternoon, I would be inside long enough, with the TV on at just the right moment to catch the 5 minutes of Tom & Jerry filling a space before the next installment of sport or other adult-orientated telly. It was a special moment, one to relish. Tom & Jerry is still on the TV but it no longer holds a special place in children's hearts because if they want to watch some children's telly they can switch to one of many dedicated channels at any point in the day. And it is not just children's TV that it like this. What with themed channels to suit every taste and hobby, "plus one" channels for when you are running late, iplayer for when you missed the episode completely and Netflix for when you missed the entire series, it is now impossible to miss anything. Although, weirdly, despite all these channels, I somehow find it harder now to find anything on that I actually want to watch!
You may be wondering what all this has to do with jam. The way that TV has been turned into something for our own convenience is reflected in other parts of our lives. A similar feel now runs through our food and drink and shopping habits. Rather than living with the seasons, we can buy whatever it is that we fancy whenever we want it. So now, instead of enjoying, say, the strawberry season for the few months of summer, we can eat strawberries whenever we feel like it. And what about picking some apples off a tree... meh! Maybe later... who cares if they all fall to the ground when we can go and buy some instead if that happens.
It is odd really that if asked if you would want things to happen for your convenience you would, of course, say an emphatic yes. Yet, now we have achieved this with so many parts of our lives, I feel we are now missing something. Like a spoilt child, given everything he whims, we have lost interest in what we receive. If strawberries were only available from June to August, would we not wait, with eager anticipation for the start of the strawberry season? If gathering food from trees made the difference between eating or not during the winter, wouldn't we make more of an effort to pick fruit?
I do my best to live with the seasons. I don't buy strawberries out of season and by June my girls are willing the strawberries to ripen. At this time of year I do my best to gather as much as I can of the abundance and get it stored for later use. Even so, when I say to my girls, "Shall we go out for a bit of foraging?" I'm met with a groan of indifference. "Meh! Maybe later."
The weekend before last I managed to persuade them (ok, I insisted) to go out with me to forage from the hedgerow. It does them good on so many levels. It was sunny, the air was fresh, they were learning what is edible and what is not, we were out as a family, away from technology and aware of the season. We picked sloes, blackberries, rosehips, haws, elderberries and crabapples. When they got bored and I wasn't finished, I sent them into the long grass to play with the grasshoppers that were chirping away merrily. They broke off rose thorns and stuck them on their noses to be rhinoceroses, they picked bindweed flowers and imagined the fairies that would wear them as hats. And then we returned home, pink cheeked, pleasantly tired and with bagfuls of fruit.
This morning I went out foraging again. It was a Monday morning, it was chilly and drizzling. I went back to the same spot we had been last week to find that the hedges had been trimmed and the long grass mowed. There was just enough sloes left for the recipe I had in mind but not the easy bounty of the previous week. Everything was different actually: the weather, the company (or lack of), the smells, sounds and outcomes. As pleasant as it was to start my week in this gentle way, it was not the same as the way I had ended the previous week. To me it demonstrated the need to just get out there when things are happening rather than putting things off, accepting that some things do move on, are not available on "catch-up" or possible to purchase online. And when you are in that moment, enjoying it, take a breath, step back and appreciate it, for next week it will be gone.
The sloes have nearly finished now but if you are quick you can still get out there in time to pick enough to make some sloe gin. Don't think that you'll do it later or you'll miss the moment and come Christmas, when the weather is cold, the trees are bear and you fancy a special tipple to sip you'll wish you'd done it!
You may be wondering what all this has to do with jam. The way that TV has been turned into something for our own convenience is reflected in other parts of our lives. A similar feel now runs through our food and drink and shopping habits. Rather than living with the seasons, we can buy whatever it is that we fancy whenever we want it. So now, instead of enjoying, say, the strawberry season for the few months of summer, we can eat strawberries whenever we feel like it. And what about picking some apples off a tree... meh! Maybe later... who cares if they all fall to the ground when we can go and buy some instead if that happens.
It is odd really that if asked if you would want things to happen for your convenience you would, of course, say an emphatic yes. Yet, now we have achieved this with so many parts of our lives, I feel we are now missing something. Like a spoilt child, given everything he whims, we have lost interest in what we receive. If strawberries were only available from June to August, would we not wait, with eager anticipation for the start of the strawberry season? If gathering food from trees made the difference between eating or not during the winter, wouldn't we make more of an effort to pick fruit?
I do my best to live with the seasons. I don't buy strawberries out of season and by June my girls are willing the strawberries to ripen. At this time of year I do my best to gather as much as I can of the abundance and get it stored for later use. Even so, when I say to my girls, "Shall we go out for a bit of foraging?" I'm met with a groan of indifference. "Meh! Maybe later."
The weekend before last I managed to persuade them (ok, I insisted) to go out with me to forage from the hedgerow. It does them good on so many levels. It was sunny, the air was fresh, they were learning what is edible and what is not, we were out as a family, away from technology and aware of the season. We picked sloes, blackberries, rosehips, haws, elderberries and crabapples. When they got bored and I wasn't finished, I sent them into the long grass to play with the grasshoppers that were chirping away merrily. They broke off rose thorns and stuck them on their noses to be rhinoceroses, they picked bindweed flowers and imagined the fairies that would wear them as hats. And then we returned home, pink cheeked, pleasantly tired and with bagfuls of fruit.
This morning I went out foraging again. It was a Monday morning, it was chilly and drizzling. I went back to the same spot we had been last week to find that the hedges had been trimmed and the long grass mowed. There was just enough sloes left for the recipe I had in mind but not the easy bounty of the previous week. Everything was different actually: the weather, the company (or lack of), the smells, sounds and outcomes. As pleasant as it was to start my week in this gentle way, it was not the same as the way I had ended the previous week. To me it demonstrated the need to just get out there when things are happening rather than putting things off, accepting that some things do move on, are not available on "catch-up" or possible to purchase online. And when you are in that moment, enjoying it, take a breath, step back and appreciate it, for next week it will be gone.
The sloes have nearly finished now but if you are quick you can still get out there in time to pick enough to make some sloe gin. Don't think that you'll do it later or you'll miss the moment and come Christmas, when the weather is cold, the trees are bear and you fancy a special tipple to sip you'll wish you'd done it!
Sloe Gin Recipe (courtesy of Good Food Magazine)
Ingredients
- 450g/1lb sloes
- 225g/8oz caster sugar
- 1 litre/1¾ pint gin
Preparation method
- Prick the tough skin of the sloes all over with a clean needle and put in a large sterilised jar.
- Pour in the sugar and the gin, seal tightly and shake well.
- Store in a cool, dark cupboard and shake every other day for a week. Then shake once a week for at least two months.
- Strain the sloe gin through muslin into a sterilised bottle.
Friday, 5 September 2014
Corn on the Cob - My new favourite microwave food
My sweetcorn is now ready for harvesting and of all the things I grow, this has got to be my favourite. I have always loved sweetcorn and eat it pretty much every day but corn on the cob is my favourite way to eat it and freshly picked, home grown corn is beyond comparison.
There are lots of good reasons to eat sweetcorn, with flavour having to be high up on the list. However, there are a few downsides too - such as, having to pick it out of your teeth afterwards! It is also a bit fiddly to prepare, especially removing all those "silks", which inevitably end up all over the kitchen floor. And when you grow lovely long corns, finding a pan big enough to boil them in can be a bit tricky.
Recently, I came across a tip on the internet for cooking corn that took away some of the hassle associated with preparing and cooking corn and now I love corn on the cob as much for its convenience factor as for its flavour. So now corn on the cob is my favourite microwave food.
Firstly, having freshly picked your sweetcorn, leave it wrapped up in its greenery. You need only trim off the bottom and top of the leafy jacket so that it fits more easily into the microwave. Our corn is lovely and long this year and I can only fit 2 into my microwave at a time.
Simply place them on the plate and microwave them for 5 minutes then take them out and leave them wrapped up in their leafy coat for a few minutes to keep warm and to continue cooking. When ready to serve, split open the leaves and pull them and the silks away from the hot corn. You may need to protect your hands from the heat whilst you do this and you may need to trim off the base from the corn with a sharp knife but removing the leaves and silks come away easily.
This done, put a spike in the base end and serve hot with salted butter or olive oil and black pepper.
There are lots of good reasons to eat sweetcorn, with flavour having to be high up on the list. However, there are a few downsides too - such as, having to pick it out of your teeth afterwards! It is also a bit fiddly to prepare, especially removing all those "silks", which inevitably end up all over the kitchen floor. And when you grow lovely long corns, finding a pan big enough to boil them in can be a bit tricky.
Recently, I came across a tip on the internet for cooking corn that took away some of the hassle associated with preparing and cooking corn and now I love corn on the cob as much for its convenience factor as for its flavour. So now corn on the cob is my favourite microwave food.
Firstly, having freshly picked your sweetcorn, leave it wrapped up in its greenery. You need only trim off the bottom and top of the leafy jacket so that it fits more easily into the microwave. Our corn is lovely and long this year and I can only fit 2 into my microwave at a time.
This done, put a spike in the base end and serve hot with salted butter or olive oil and black pepper.
Subscribe to:
Posts (Atom)