When my daughters were in their first school, mushroom stroganoff was offered on the hot dinner menu and my youngest particularly liked it. However, for years now they have been in a school where this isn't on the lunchtime menu and she misses it. I have looked around for a suitable recipe so I could make it at home but they all seem to contain white wine, which I'm pretty sure a dinner in a primary school wouldn't have done. Anyway, recently I came across a recipe that didn't include wine so I thought I would give it a go.
Last week my husband announced that he would like to eat less meat each week so it seemed like a good time to dig out that mushroom stroganoff recipe. However, he finds diary products difficult to digest so I thought it would be best to substitute the suggested soured cream for soya cream. It also called for Worcester sauce (or vegetarian alternative). Well, then, that could mean only one thing... my homemade Worcester sauce - or Moo-ster Sauce as I call it. And so, there we had it, not only a vegetarian meal but a vegan one too!
It was a very tasty and satisfying meal I'm pleased to say and one that sat so calmly on my husband's stomach that he asked if we could have a non-meat meal again the following day. Can't be bad.
Mushroom Stroganoff (serves 2)
Olive oil for frying
1 onion, finely chopped
2 teaspoons paprika
1 garlic cloves, crushed (or a spoonful of Wild Garlic Pesto if you have it!)
300g mushrooms, sliced
Half pint vegetable stock
1 tablespoon Moo-ster Sauce
3 tablespoons of cream (or soya alternative)
Heat the oil in a large non-stick frying pan and fry the onions for about 5 minutes until soft. Add the paprika and garlic and cook for one more minute. Add the mushrooms and cook on high heat for 5 minutes. Pour in the stock and Moo-ster Sauce and bring back to the boil. Simmer for 5 minutes or so until the sauce reduces and thickens. Remove from the heat and stir through the cream. Serve with rice and fresh vegetables.
A range of handmade preserves made in Milton Keynes from fruit & vegetables grown in Milton Keynes.
JamMK header
Thursday, 25 April 2013
Saturday, 20 April 2013
Wild Garlic
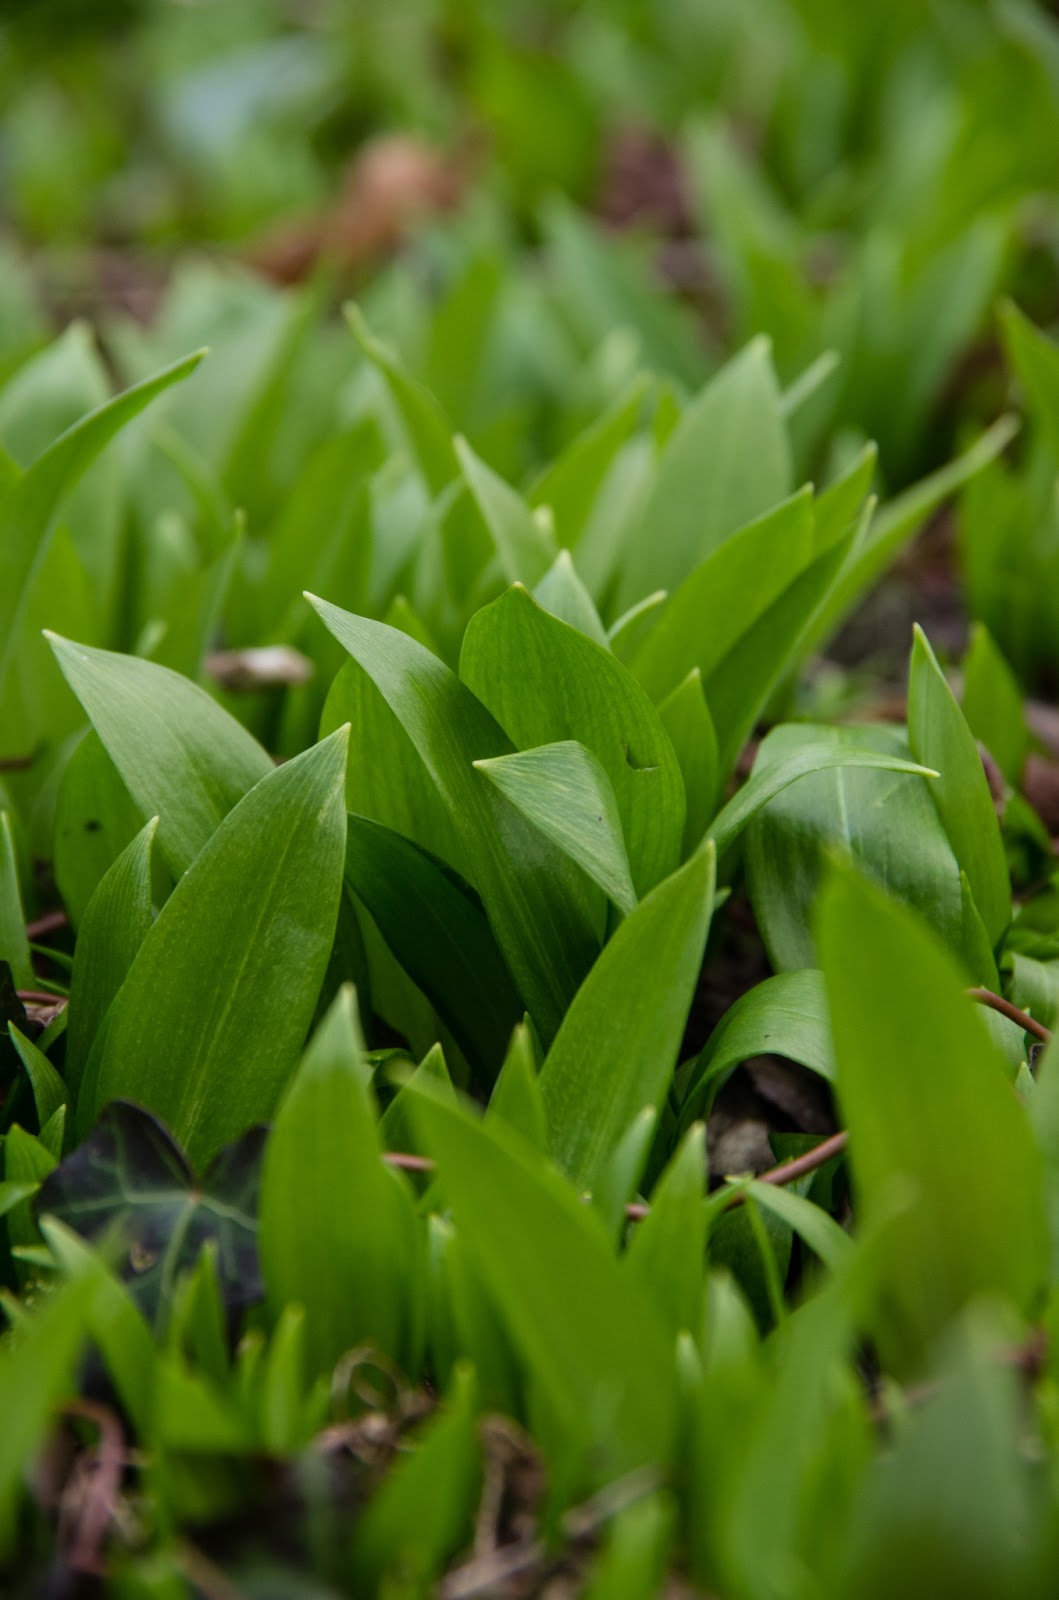
Itching to get the season started despite winter’s reluctance to release its grip, I was pleased to come across a recipe for wild garlic pesto during March. Wild garlic really comes into season from the end of January to April so it was something I could forage when everything in the hedgerow was still sleeping.
Wild garlic tends to grow in damp woodland, often under oak or beech trees. Indeed, it is something I've always come across at Easter when we go up to Lancashire to visit my mother-in-law, where it grows in abundance. When walking through woodland, you become aware of it first because you suddenly find yourself enveloped in the garlicky aromas of the newly emerged leaves. Then, a few weeks after the leaves first appear, hundreds of tiny white flowers cover the woodland floor.
Knowing that it grows in abundance in Lancashire meant that I was somewhat surprised when I asked my husband where in Milton Keynes would be a good place for us to go and pick some. He looked at me blankly and said he didn't know. Then, searching around the internet, I discovered that wild garlic, or ransoms as they are also known, are in fact locally rare in Buckinghamshire. I’m not entirely sure why this should be the case – probably a matter of underlying geology and soil type. However, it gave me pause for thought. If it was rare, should I pick it at all?
Usually, the types of things I forage are in huge abundance – dandelions, elderflowers, blackberries and crabapples. Taking a few of these for my own use seems perfectly fine because it doesn’t make a dent in their supplies and there are plenty left for anyone else who would wish to forage too. I wouldn’t dream of taking anything if I thought it would spoil the enjoyment of others.
So what to do?
Well, I reviewed the law of foraging on the internet and discovered that I was within my rights to take any non-protected species of fungus, foliage, fruit or flower from open access, non-protected, land for non-commercial consumption. Indeed, it is a matter of common sense – you don’t take the whole plant and you don’t take all that is there.
With a bit more determined search I discovered that wild garlic does indeed grow in a small number of locations within Milton Keynes. One of these is a protected wildlife site so taking from there would not be acceptable but in the other areas the ransoms grow in abundance and to such an extent that it’s just not possible to pick the whole lot even if you wanted to. So, on Good Friday, we went for a family walk and filled two small sandwich bags with leaves (the 100g required for the recipe), and later I made the pesto. Then the next day, following the idea from the Tiny Bakery, I mixed a small amount of it into bread dough to make wild garlic bread – delicious. As only a small amount of pesto is required in any recipe, I think my jar full will last for quite a few weeks and I can confidently say that I left plenty still growing should anyone else get the urge to go foraging!
Wild Garlic Pesto
100g freshly picked wild garlic leaves
50g shallot
50g pine nuts
200 ml olive oil
50-60g finely grated Parmesan
1 teaspoon sea salt
½ teaspoon sugar
Place the wild garlic, shallot and pine nuts in a food processor along with 150 ml oil. Blitz for about a minute until finely chopped. Fold in the grated cheese, salt and sugar. Pack into a clean jar, pressing down firmly with the back of a spoon then top up with oil so that it is fully submerged beneath the oil. Place in the refrigerator. It will keep for several weeks if you top up with a covering of oil each time you use it. It can also be frozen in small batches.
It can be used in any recipe where you might use garlic. A few teaspoonfuls can be added to bread dough at the knocking back stage to make wild garlic bread. Half a tablespoon mixed with cubed pieces of bread and then baked for 10 minutes make very tasty croutons. It can also be added to pizzas and pasta. This week I mixed a teaspoonful into the dough for our family-sized pizza, and tonight I mixed half a teaspoon into some mushrooms to make garlic mushrooms. It is proving to be a very handy ingredient.
Saturday, 6 April 2013
Jam filled croissants
My girls like freshly baked croissants for their lazy Sunday breakfast. Well, who wouldn't?! I do have a recipe for making croissants in my bread making recipe book and wow, what a palaver that is! When reading it I have visions of French bakers getting up at 3am in order to ensure they can get them made in time for their customers' breakfast. Delia Smith once said that life is too short to stuff a mushroom. Well, I do stuff mushrooms but life is definitely too short to make croissants from scratch!
I feel the same way about making puff pastry. Short crust pastry, yes, I can and do make that because it is simple, quick and tastes better than the ready-made stuff. Puff pastry, no, it's time consuming and fiddly and doesn't turn out as nicely as the shop-bought stuff. So for this I turn to a block of Jus-Rol. It was whilst re-stocking the puff pastry that I stumbled upon the whole range of other stuff that Jus-Rol now do, including croissants.
I remember as a kid buying an apple turnover kit in a similar cardboard tube and how when I began to unwrap the tube it suddenly popped its seams under dough pressure. It amused me then and I figured it would amuse my two girls too. So now, Sunday breakfast usually starts with the popping of a tube of dough. Then, once opened, the girls just need to separate the six pieces of dough and roll each one up before placing them on a baking tray for cooking. 15 minutes later they are tucking into hot croissants.
Then last week we decided to experiment and this time, after separating the pieces of dough, they spread each one with some jam first then rolled them up. 15 minutes later they were tucking into hot jammy croissants! Can't be bad!
I feel the same way about making puff pastry. Short crust pastry, yes, I can and do make that because it is simple, quick and tastes better than the ready-made stuff. Puff pastry, no, it's time consuming and fiddly and doesn't turn out as nicely as the shop-bought stuff. So for this I turn to a block of Jus-Rol. It was whilst re-stocking the puff pastry that I stumbled upon the whole range of other stuff that Jus-Rol now do, including croissants.
I remember as a kid buying an apple turnover kit in a similar cardboard tube and how when I began to unwrap the tube it suddenly popped its seams under dough pressure. It amused me then and I figured it would amuse my two girls too. So now, Sunday breakfast usually starts with the popping of a tube of dough. Then, once opened, the girls just need to separate the six pieces of dough and roll each one up before placing them on a baking tray for cooking. 15 minutes later they are tucking into hot croissants.
Then last week we decided to experiment and this time, after separating the pieces of dough, they spread each one with some jam first then rolled them up. 15 minutes later they were tucking into hot jammy croissants! Can't be bad!
Saturday, 30 March 2013
Unobtrustive Jam
Have you noticed that when jam is required in a recipe as a glue or a glaze, it is always Apricot Jam that is suggested. You know, for using to stick royal icing to a cake or as a glaze on sticky buns. The reasons for this are obvious, of course. Apricot Jam is unobtrusive in both flavour and colour. These are occasions when the jam is not the star, merely a helpful tool so something like Blackcurrant or even Raspberry Jam would just not be appropriate.
I don't make Apricot Jam due to a lack of apricots. I did plant an apricot tree about 3 years ago. I knew it would be a challenge to grow apricots because we don't really have the climate for it. For two years, it blossomed nicely, formed little fruitlets and then all but about 2 of the fruits would fall off. Of course, the weather in recent years hasn't really been ideal for apricot growing but it matters little as last year my apricot tree died completely when the root stock suddenly started to grow instead of the grafted tree on top. Unfortunately, I didn't realise what was happening straight away and by the time I did, the vigorous root stock tree (whatever that was) had smothered the more delicate apricot graft part of the tree.
So, with no Apricot Jam to hand, what do I do when a recipe calls for it? Well, there are several jams that can be readily substituted as they too have a pleasant but not domineering flavour and little colour. The most obvious choice is Apple Jam, although Apple & Ginger Jam can also be used. Pear and Vanilla is also excellent. This week, when looking for a jam to glaze my batch of hot cross buns, I discovered that Greengage Jam can also fit the bill nicely. So, as sad as the loss of my apricot tree is, at least there are other jams willing to fill its role.
Hot Cross Buns (makes 12)
250ml (9 fl oz) milk at room temperature
1 egg, beaten
450g (1lb) strong white bread flour
1 tsp mixed spice
1 tsp cinnamon
1/4 tsp grated nutmeg
1 tsp salt
2 tbsp caster sugar
55g (2oz) butter, diced
1 1/2 tsp yeast
110g (4 ox) mixed dried fruit
Finely grated zest of 1 lemon
1 tbsp water
1 tbsp milk
1 tbsp flour
Jam to glaze
Put the milk and egg into the bottom of the bread pan of a bread machine and cover with the flour. Place the spices, salt, sugar, butter and yeast in separate hollows in the flour. Set the machine to dough. 5 minutes before the kneading cycle finishes, add the dried fruit and lemon zest. Once finished, knock back the dough on a floured surface and cut into 12 equal pieces. Roll each piece of dough into a ball and space out on a large, greased baking tray. Cover with greased clingfilm and leave to double in size. In the meantime, pre-heat the oven to 190°C, gas 5 and mix together the milk, flour and water and decant into a food bag. Snip the corner off the bag and pipe a cross on top each bun. Place in the oven and bake for 15-20 minutes until cooked. Transfer the buns onto a wire rack to cool, but whilst still warm, brush each bun with a little warmed jam to glaze. Serve hot, cold or toasted with butter (and jam).
I don't make Apricot Jam due to a lack of apricots. I did plant an apricot tree about 3 years ago. I knew it would be a challenge to grow apricots because we don't really have the climate for it. For two years, it blossomed nicely, formed little fruitlets and then all but about 2 of the fruits would fall off. Of course, the weather in recent years hasn't really been ideal for apricot growing but it matters little as last year my apricot tree died completely when the root stock suddenly started to grow instead of the grafted tree on top. Unfortunately, I didn't realise what was happening straight away and by the time I did, the vigorous root stock tree (whatever that was) had smothered the more delicate apricot graft part of the tree.
So, with no Apricot Jam to hand, what do I do when a recipe calls for it? Well, there are several jams that can be readily substituted as they too have a pleasant but not domineering flavour and little colour. The most obvious choice is Apple Jam, although Apple & Ginger Jam can also be used. Pear and Vanilla is also excellent. This week, when looking for a jam to glaze my batch of hot cross buns, I discovered that Greengage Jam can also fit the bill nicely. So, as sad as the loss of my apricot tree is, at least there are other jams willing to fill its role.
Hot Cross Buns (makes 12)
250ml (9 fl oz) milk at room temperature
1 egg, beaten
450g (1lb) strong white bread flour
1 tsp mixed spice
1 tsp cinnamon
1/4 tsp grated nutmeg
1 tsp salt
2 tbsp caster sugar
55g (2oz) butter, diced
1 1/2 tsp yeast
110g (4 ox) mixed dried fruit
Finely grated zest of 1 lemon
1 tbsp water
1 tbsp milk
1 tbsp flour
Jam to glaze
Put the milk and egg into the bottom of the bread pan of a bread machine and cover with the flour. Place the spices, salt, sugar, butter and yeast in separate hollows in the flour. Set the machine to dough. 5 minutes before the kneading cycle finishes, add the dried fruit and lemon zest. Once finished, knock back the dough on a floured surface and cut into 12 equal pieces. Roll each piece of dough into a ball and space out on a large, greased baking tray. Cover with greased clingfilm and leave to double in size. In the meantime, pre-heat the oven to 190°C, gas 5 and mix together the milk, flour and water and decant into a food bag. Snip the corner off the bag and pipe a cross on top each bun. Place in the oven and bake for 15-20 minutes until cooked. Transfer the buns onto a wire rack to cool, but whilst still warm, brush each bun with a little warmed jam to glaze. Serve hot, cold or toasted with butter (and jam).
Saturday, 9 March 2013
Belgium Buns for Red Nose Day
If you ever find yourself singing "Five currant buns in a bakers shop" what is the mental image of those buns? I realised the other day that my mental image is probably a Belgium bun and at the same time I realised I had never attempted to make them. A quick search on the internet confirmed that they are indeed very much like a Chelsea buns but with icing and a cherry on top. As I am no stranger to making Chelsea buns, I concluded that Belgium buns would also be fairly straightforward so I gave it a go.
Often when I make Chelsea buns I make a plain sweet bread then use some of my Jammy Cow mincemeat within the whirl to add the fruity yumminess. The Belgium bun recipes, however, often seem to feature a smearing of something like Lemon Curd with a scattering of currants within the whirl. Well, I don't make fruit curds. Two reasons: 1) I can't grow citrus fruit in Milton Keynes, 2) the use of egg within curds only give a 6 week shelf-life. I do, however, have a variety of lemon-themed marmalade in my cupboard right now so I thought a smearing of Honey & Lemon Marmalade would do the job nicely.
Having successfully made a batch of these cheery buns it occurred to me that with their silly cherry topping, they would make the ideal bake for a Red Nose cake stall so thought I should share my recipe. With Red Nose day a week away, stock up on some bread flour and some glace cherries and get ready to bake.
Belgium Buns (makes 12)
100ml milk
1 egg
225g strong white flour
½ tsp salt
2 tbsp caster sugar
55g butter, diced
1 tsp fast-action dried yeast
2-3 tbsp Lemon Marmalade (or curd)
A scattering of currants or other dried fruit
100g of icing sugar
12 glace cherries
Whisk together the milk and the egg and put into the bread machine pan. Put the flour on top to form a complete layer. Put the salt, sugar and butter into separate corners of the pan and the yeast in the centre. Set the machine for dough. Once the machine has finished, remove the dough from the pan and place on a floured surface. Knock back then roll out until about 1 cm thick. Smear the marmalade over the dough then scattered over the currants, leaving about 1cm around the edges. Start at one edge and roll up completely. Cut the roll into 12 equal slices and place each slice onto a well greased large baking sheet so that the swirl is horizontal. Cover and leave to double in size. Bake in a pre-heated over at 190°C, gas mark 5 for 20-25 minutes until risen and golden. Remove from the tin onto a wire rack and allow to cool completely. In the meantime, mix the icing sugar with a small amount of water to make a sloppy icing. Spoon icing onto the top of each bun and finish with a glace cherry in the centre. Leave in the air until the icing has crusted over.
Often when I make Chelsea buns I make a plain sweet bread then use some of my Jammy Cow mincemeat within the whirl to add the fruity yumminess. The Belgium bun recipes, however, often seem to feature a smearing of something like Lemon Curd with a scattering of currants within the whirl. Well, I don't make fruit curds. Two reasons: 1) I can't grow citrus fruit in Milton Keynes, 2) the use of egg within curds only give a 6 week shelf-life. I do, however, have a variety of lemon-themed marmalade in my cupboard right now so I thought a smearing of Honey & Lemon Marmalade would do the job nicely.
Having successfully made a batch of these cheery buns it occurred to me that with their silly cherry topping, they would make the ideal bake for a Red Nose cake stall so thought I should share my recipe. With Red Nose day a week away, stock up on some bread flour and some glace cherries and get ready to bake.
Belgium Buns (makes 12)
100ml milk
1 egg
225g strong white flour
½ tsp salt
2 tbsp caster sugar
55g butter, diced
1 tsp fast-action dried yeast
2-3 tbsp Lemon Marmalade (or curd)
A scattering of currants or other dried fruit
100g of icing sugar
12 glace cherries
Whisk together the milk and the egg and put into the bread machine pan. Put the flour on top to form a complete layer. Put the salt, sugar and butter into separate corners of the pan and the yeast in the centre. Set the machine for dough. Once the machine has finished, remove the dough from the pan and place on a floured surface. Knock back then roll out until about 1 cm thick. Smear the marmalade over the dough then scattered over the currants, leaving about 1cm around the edges. Start at one edge and roll up completely. Cut the roll into 12 equal slices and place each slice onto a well greased large baking sheet so that the swirl is horizontal. Cover and leave to double in size. Bake in a pre-heated over at 190°C, gas mark 5 for 20-25 minutes until risen and golden. Remove from the tin onto a wire rack and allow to cool completely. In the meantime, mix the icing sugar with a small amount of water to make a sloppy icing. Spoon icing onto the top of each bun and finish with a glace cherry in the centre. Leave in the air until the icing has crusted over.
Wednesday, 20 February 2013
Growing Peanuts
I wrote this article for my contribution to the bi-monthly lifestyle ezine Time Aside. There are 5 of us who got together to create this email magazine and we are now on our 15th issue. It is a great mix of subject matters with my gardening/recipe slot, Mrs Paintbrush's home decorating tips, Gareth's fitness advice, Clare's look at how to achieve what you really want from life, Mark's film reviews and Angela's reiki and crystal healing perspective. We honestly write it for the love of our subjects, it's completely free to receive and there is no advertising associated with it so if 6 times a year you would like to receive a chatty and informative email please sign up here http://timeaside-ezine.blogspot.co.uk/p/subscribe-now.html
There is very little that can be done in the garden in February. Every now and then the sun comes out and I find myself getting prematurely excited by the prospect of spring. Then the next moment I find myself cycling home with stinging rain being lashed into my face by a north wind. And then I remember that it is still winter and I need to hold my horses.
Having said that, there are 3 jobs I usually try to get done sometime around the February half-term. I usually sow a few leek seeds in trays as they are incredibly slow to grow and if I don’t start early they won’t be big enough to plant out by summer. The second is to sow 4 or 5 tomato seeds in pots to get a head start and hopefully provide me with a few early tomatoes in the summer. And the last job is to sow a few peanuts.
The British weather is not really suitable for growing peanuts it has to be said and for the last couple of years the weather has been particularly unhelpful. However, I like a challenge and have been giving it ago for the past 4 years. Originally, I bought my peanut seeds from a seed catalogue, for which I would receive 3 monkey nuts, containing 6 or often only 5 peanuts. At £1.65 per pack they were quite pricey and not the sort of thing you would want to waste. Sadly, however, I often found the germination rate was poor and the seeds were prone to rotting if over watered, or drying out if under watered. So last year I decided to see if it was possible to grow any old monkey nuts and bought myself a bag of unroasted (obviously!) monkey nuts from the supermarket. At £1.50 for about 200 seeds it was at least a good deal cheaper!
From my 400g bag, I shelled 3 monkey nuts and planted 6 peanuts and a week later 5 of them had germinated. I had to keep the seedlings on my windowsill until the weather was warm enough in June. They do, however, make rather attractive houseplants whose leaves fold in on themselves every night as the light fades. During the summer the plants produce small yellow flowers very similar in shape to pea flowers. This is not surprising as peas and peanuts are related, both belonging to the legume family. If the flowers are pollinated then, unlike any other plant I know, a long stem grows out of the dying flower and heads downwards until it finds the soil. There it buries itself and in due course a new monkey nut forms underground - hence the other name: "ground nut". As an adult I found this whole process fascinating but my kids loved it!

To be honest, I have never yielded more peanuts from my plants than the number of peanuts I started with but I love trying and I’m always optimistic. Surely, this year we are due a proper summer!
As for the rest of the bag of unroasted monkey nuts, these I roast as a single layer on a large baking tray in a preheated oven at 180°C, gas 4 for 25 minutes. My husband declared these the freshest and tastiest roasted monkey nuts he'd ever tasted! Well, hopefully only until we harvest our own bumper crop in the summer!
There is very little that can be done in the garden in February. Every now and then the sun comes out and I find myself getting prematurely excited by the prospect of spring. Then the next moment I find myself cycling home with stinging rain being lashed into my face by a north wind. And then I remember that it is still winter and I need to hold my horses.
Having said that, there are 3 jobs I usually try to get done sometime around the February half-term. I usually sow a few leek seeds in trays as they are incredibly slow to grow and if I don’t start early they won’t be big enough to plant out by summer. The second is to sow 4 or 5 tomato seeds in pots to get a head start and hopefully provide me with a few early tomatoes in the summer. And the last job is to sow a few peanuts.
The British weather is not really suitable for growing peanuts it has to be said and for the last couple of years the weather has been particularly unhelpful. However, I like a challenge and have been giving it ago for the past 4 years. Originally, I bought my peanut seeds from a seed catalogue, for which I would receive 3 monkey nuts, containing 6 or often only 5 peanuts. At £1.65 per pack they were quite pricey and not the sort of thing you would want to waste. Sadly, however, I often found the germination rate was poor and the seeds were prone to rotting if over watered, or drying out if under watered. So last year I decided to see if it was possible to grow any old monkey nuts and bought myself a bag of unroasted (obviously!) monkey nuts from the supermarket. At £1.50 for about 200 seeds it was at least a good deal cheaper!

To be honest, I have never yielded more peanuts from my plants than the number of peanuts I started with but I love trying and I’m always optimistic. Surely, this year we are due a proper summer!
As for the rest of the bag of unroasted monkey nuts, these I roast as a single layer on a large baking tray in a preheated oven at 180°C, gas 4 for 25 minutes. My husband declared these the freshest and tastiest roasted monkey nuts he'd ever tasted! Well, hopefully only until we harvest our own bumper crop in the summer!
Tuesday, 12 February 2013
Pancake Cake
Today it was pancake day and it was my birthday so I was left with the dilemma of deciding whether to cook pancakes or make a birthday cake. Or was it possible to combine the two?
I first contemplated this a couple of weeks ago and asked around a bit to see if anyone had ever tried to make a "cake" from pancakes. I was quickly presented with a few links to recipes on the internet and it was obvious that this in fact was not a new idea. It seemed quite common to stack pancakes up, interlayed with creamy stuff, often including chocolate.
I mulled these recipes over for a few days but wasn't sure. After all, what I (and the rest of my family) particularly like about pancake day are the crepe-type pancakes as opposed to American or Scotch-type pancakes, and, of course, the combination of lemon and sugar. I thought my family would be extremely disappointed if I deprived them of their annual pancake experience, so what to do...?
In the end, I found a Jamie Oliver recipe for pancake cake which used what seems to be a slightly thicker than normal crepe recipe, stacked up with chocolate, cream and hazelnuts. From this I took the pancake part of the recipe and then substituted in my dead easy lemon cheesecake filling. So I managed to maintain the traditional pancake texture and flavour.
After blowing out my birthday candles, I sliced the stack as you would any other cake and served them to my eager audience with a splash of single cream. My daughter commented that the crunchy texture of granulated sugar was missing so maybe a sprinkling of this when serving could be added but other than that it was the perfect fusion of birthday- and pan- cake.
Lemon Pancake Cake
375g self-raising flour
A pinch of salt
720ml milk
3 large eggs
A little oil for frying
500g mascarpone cheese
2 lemons
75g icing sugar
Orange & Lemon segment jelly decorations
Sift the flour and salt into a large bowl. Whisk the eggs and combine with the milk. Gradually mix the liquid into the flour until a batter forms. Heat the oil in a suitable frying pan - the pancakes should be 15-20cm in diameter. Add a ladle-full of batter to the pan and swirl around. Fry on one side for a couple of minutes then flip over the cook the other side. Cool on a wire rack and repeat until all the batter is used (should yield 12 pancakes). Next, put the cheese in bowl then add the grated zest and juice from the lemons and then the icing sugar and beat well until smooth. Now stack 8 of the pancakes up, spreading each one with lemon cheese mixture as you go. Finish with a coating the cheese mixture and decorate with the jellies. Cut into wedges to serve.
I first contemplated this a couple of weeks ago and asked around a bit to see if anyone had ever tried to make a "cake" from pancakes. I was quickly presented with a few links to recipes on the internet and it was obvious that this in fact was not a new idea. It seemed quite common to stack pancakes up, interlayed with creamy stuff, often including chocolate.
I mulled these recipes over for a few days but wasn't sure. After all, what I (and the rest of my family) particularly like about pancake day are the crepe-type pancakes as opposed to American or Scotch-type pancakes, and, of course, the combination of lemon and sugar. I thought my family would be extremely disappointed if I deprived them of their annual pancake experience, so what to do...?
In the end, I found a Jamie Oliver recipe for pancake cake which used what seems to be a slightly thicker than normal crepe recipe, stacked up with chocolate, cream and hazelnuts. From this I took the pancake part of the recipe and then substituted in my dead easy lemon cheesecake filling. So I managed to maintain the traditional pancake texture and flavour.
After blowing out my birthday candles, I sliced the stack as you would any other cake and served them to my eager audience with a splash of single cream. My daughter commented that the crunchy texture of granulated sugar was missing so maybe a sprinkling of this when serving could be added but other than that it was the perfect fusion of birthday- and pan- cake.
Lemon Pancake Cake
375g self-raising flour
A pinch of salt
720ml milk
3 large eggs
A little oil for frying
500g mascarpone cheese
2 lemons
75g icing sugar
Orange & Lemon segment jelly decorations
Sift the flour and salt into a large bowl. Whisk the eggs and combine with the milk. Gradually mix the liquid into the flour until a batter forms. Heat the oil in a suitable frying pan - the pancakes should be 15-20cm in diameter. Add a ladle-full of batter to the pan and swirl around. Fry on one side for a couple of minutes then flip over the cook the other side. Cool on a wire rack and repeat until all the batter is used (should yield 12 pancakes). Next, put the cheese in bowl then add the grated zest and juice from the lemons and then the icing sugar and beat well until smooth. Now stack 8 of the pancakes up, spreading each one with lemon cheese mixture as you go. Finish with a coating the cheese mixture and decorate with the jellies. Cut into wedges to serve.
Subscribe to:
Posts (Atom)