JamMK header

JamMK header

Saturday 15 July 2017

Putting a Sizzle into Burgers

Recently I have been working with Chris from Sizzlers Burger Shack to produce some relishes for his burgers. Chris is a man passionate about creating the perfect burger and he thinks long and hard about the flavour combinations that go into the different burgers on his menu.


Having already made some onion relish for him, he came back and asked if I could make a jalapeno relish. As you might imagine, this turned out to be somewhat on the hot side... still, some people like that sort of thing so he added it to a special burger on his menu.


A short while later he asked if I could make bacon jam. After a play around and a sample batch, he was happy enough to order 6 catering size jars of the stuff. So off I duly went to the butchers and purchased the necessary 8 kg of bacon required and got busy in the kitchen.  Once the order was complete I was left with a small quantity of the stuff to experiment with. Yes, obviously it is great in a burger but I soon discovered that it works well in an omelette, as a pizza topping and even just stirred into some fried mushrooms. Anywhere that a bit of salty smokiness with a hint of sweetness and heat would enhance the flavour, bacon jam is what you need.

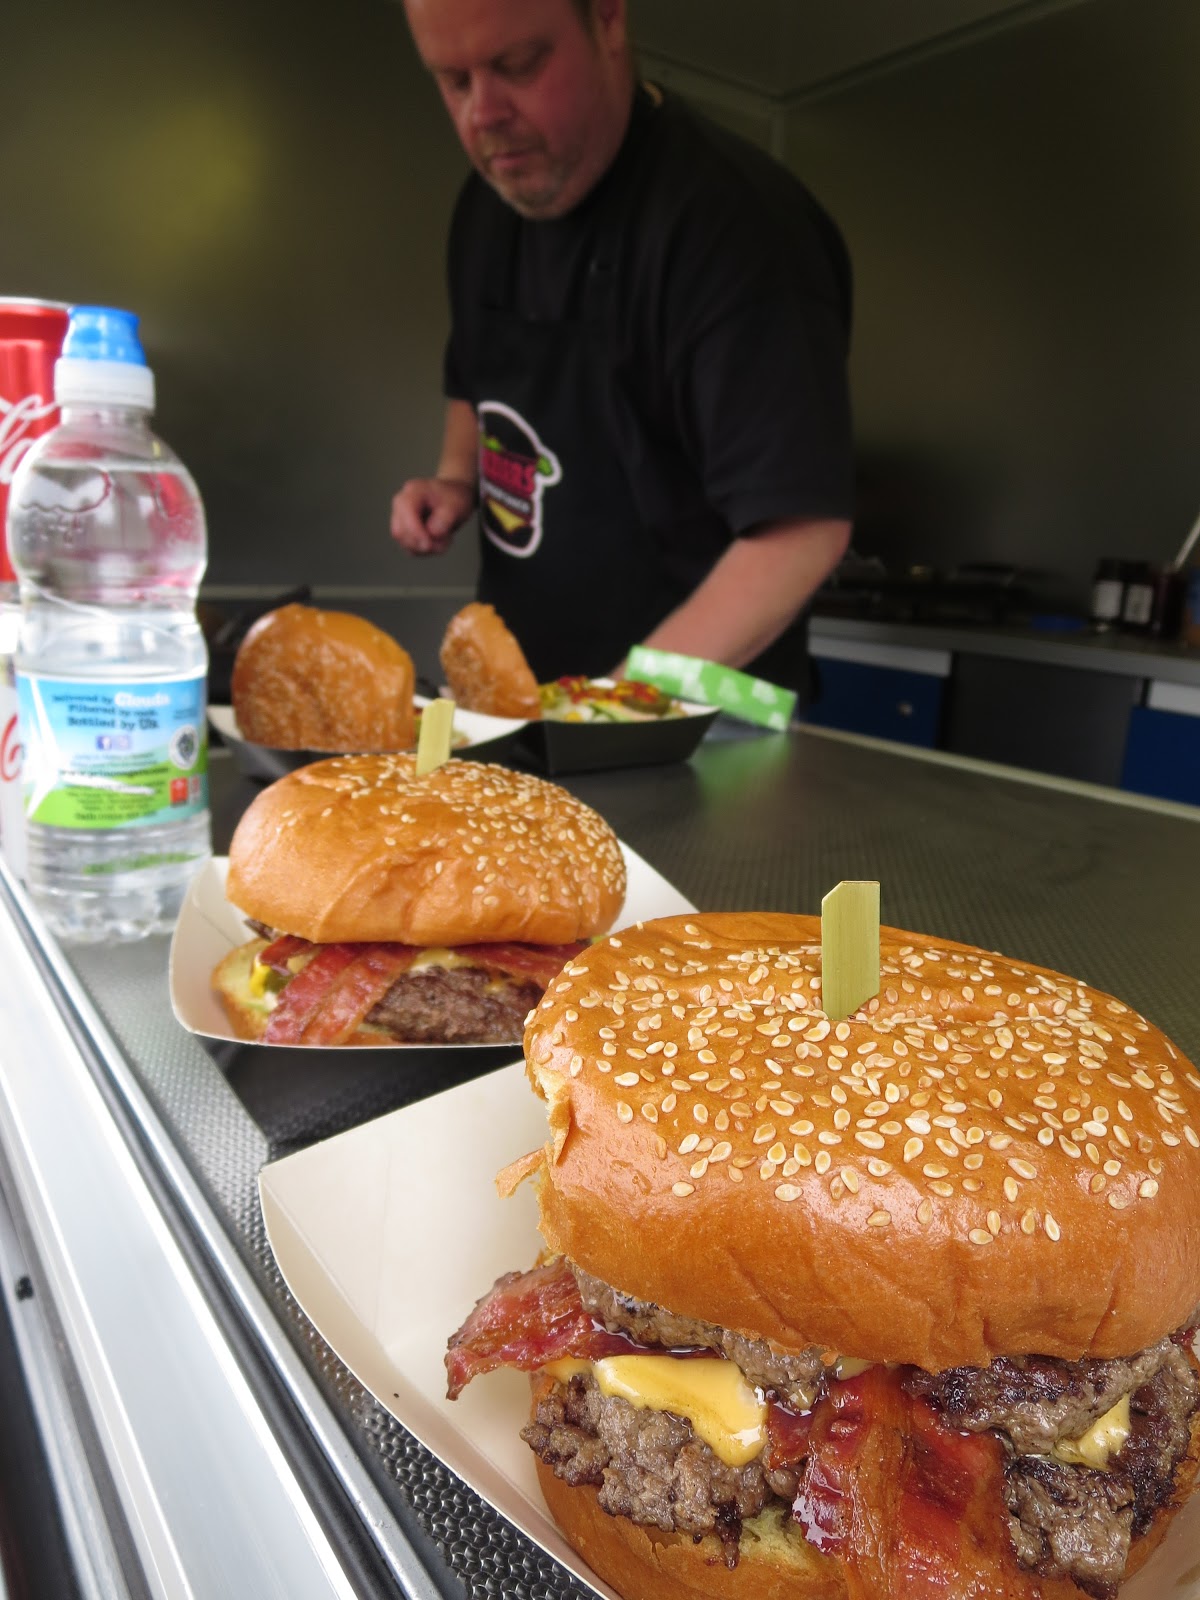
Having made these relishes for Chris and spent time listening to him explaining the finer points of burger menu creation, it seemed only logical that I should actually try one of his burgers. With the local street food scene enjoying something of a boom currently, there are plenty of opportunities to catch Sizzlers and the other local street food vendors at work. I caught up with him at Eat Street at The Buszy and purchased the Route 66.

As an aside, I was reading The Dish magazine the other day and it was doing a special on burgers. On the front cover was a photo of a classic burger. The sort of burger you always imagine and hope you will be served at a fast food restaurant but sadly it fails to deliver. The sort of burger, indeed, that looks like its lettuce has been carefully teased into place with a pair of tweezers. Perhaps the same food photographer was employed for this photo-shoot as for the likes of McDonalds and Burger King.


That is the thing with burgers generally. You get lured in with an attractive photograph and description of a tasty burger but when your order is delivered it is a sad flat thing, lacking colour, soggy in texture and with less fillings than promised. It is such a common phenomenon that you reach a point where you don't even expect the reality to match the marketing. However, I have to say that the Route 66 that sat in my burger box didn't fall into that category. Maybe it was because there had been no photos to order from or maybe it was just a plump, tasty looking burger.


Having passed the visual appeal test, the real proof would be in the eating. And this one delivered on that front too. Bite after bite of meatiness with the complimentary flavours of sauces, bacon and pickles and all of it holding together to the last mouthful rather than disintegrating into a pulpy mass.

So, today, when I found myself with a stall at the same event as Sizzlers it was a no brainer where I would get my lunch. A read of the menu made it hard to decide what to try this time but in the end I went for a State Side and my daughter went for a Double Double. The State Side is a classic burger with lettuce, sauce, mustard, bacon and pickles. I picked it from the description, just as last time, but later I remembered Chris had said something about the Route 66 and the State Side being pretty much the same thing so clearly that classic combination must really appeal to me. The Double Double is a double burger with double cheese and, having been allowed to sample my daughter's lunch, it was super tasty too.


With fast food burger chains and burger vans being so common and often failing to live up to expectation, it is perhaps easy to dismiss Sizzlers as yet another greasy spoon burger van, that will serve up a thin slab of some hard to identify meat with limp salad, over-vinegary sauce in a cotton-wool bun. This is probably particularly true when at a street food event. Here, faced with other vans offering something a little more exotic or novel sounding you might be tempted to overlook the van selling "just burgers", thinking you can pick something similar up at McDonalds at a convenient later date. But that would be a mistake. A burger when done right is a joy to look at and a pleasure to eat and having one that lives up to all your expectations is such a rare moment that is it an opportunity that should not be passed up when presented.


Monday 10 July 2017

Raspberry & Lemon Celebration Drip Cake

It was my daughter's 13th birthday on Sunday. She is actually a pretty undemanding child when it comes to birthday expectations. However, she does insist that her birthday cake is more spectacular than last year's cake. Oh, and that it contains fresh fruit and no royal icing.

Her 11th birthday cake was a strawberries and cream pinata cake - concealing a hidden stash of fresh strawberries in the middle.


Her 12th birthday cake was some ridiculous strawberry layer cake affair, stacked with meringues, chocolate bark, fruit and shortbread biscuits.


So what next?

With the soft fruit season a couple of weeks earlier that usual this year, I was pretty sure the homegrown strawberries would be over before her birthday but that the raspberries would still be in abundance so I started working on that as a theme. I also asked Rebecca from the Blue Whisk Bakery if she had any ideas for spectacular cakes that didn't involve royal icing and she suggested I looked up "drip cakes" for inspiration as they were tall and could be stacked up with anything on top. As an aside, she had also asked me if I could make her some raspberry curd for a cake. I'd never made raspberry curd before but it sounded tasty and like something I might include in my daughter's cake.

A bit of web searching later and I was beginning to piece together an idea, taking inspiration from that cake recipe and this icing recipe until I committed myself to a plan by sketching it on a napkin as I talked through it with my daughter.

The preparation for the cake making started a few days before with the making of a fresh batch of lemon curd. This is something we enjoy in yoghurt and rice-pudding so I always have a batch on the go. Then I fiddled with the recipe and tried raspberry curd. I had always assumed that my homemade raspberry jam was the best thing ever... but it turns out it is actually raspberry curd. Tasting like a beautifully smooth raspberry ice-cream, it was hard not to just spoon it straight into my mouth. Another get ahead job was to slice a lemon and boil it up in some sugar syrup for a while to create some candied lemons for decoration. Then the last bit of prep was to puree some raspberries. I normally puree raspberries before making them into jam as many people prefer their jam without the seeds so this is something I do all the time and I have a useful kitchen gadget for it. However, it can easily be done by mashing up fresh raspberries then working them through a sieve.

Then it was a case of making the cakes - my normal lemon layer cake and a Victoria sandwich cake, adapted to be raspberry flavoured instead of vanilla using some of my raspberry puree.


For my birthday my mum had given me a handy devise for slicing a cake horizontally. It's not something I would have bought for myself but it has actually proved useful on occasions. So, the sandwich tin cakes were sliced in half to make a total of eight layers.


These I stacked up with alternate layers of lemon curd and raspberry curd.


 Once stacked, I then made a batch of butter icing and flavoured that with more raspberry puree to create something with an impressive colour and flavour with no need for artificial augmentation.


After spreading this around the cake, I put the cake in the fridge to chill whilst I made the white chocolate and lemon gauche.


Whilst waiting for that to reach the right dripping consistency, I popped outside for some fresh fruit and a collection of edible flowers to put on top.

I didn't expect people to eat the flowers but it is handy to know they they weren't going to transfer any unpleasant flavours or poisons to the top of the cake. On this occasion I used calendula, nasturtiums, marigolds, borage and gherkin flowers to match my colour scheme. Then I added the soft fruit - raspberries (of course), some strawberries dipped in white chocolate, redcurrants, jostaberries and gooseberries.


Given that I had never made a drip cake before and that decorative cake making isn't really my forte, I was pretty pleased with what I had achieved and my daughter was super excited to see it when she came back in from her dance lesson. Personally I think the most important part of any cake is its flavour and I particularly hate cutting into a highly-decorated cake to find a dull, over-processed sponge cake beneath. This cake, I was sure, was going to eat well.


Later, after a tasty meal, with the family assembled, we lit the candles, sung the song and cut the cake. Despite thin slices, each slice was of epic proportion and difficult to finish but it was undeniably raspberry and lemon flavoured and my daughter was satisfied that I had indeed produced a cake more spectacular than last year's.

Raspberry & Lemon Drip Cake

For the lemon cake

225g soft margarine
225g caster sugar
4 medium eggs
1 lemon - zest and juice
225g self-raising flour
1 teaspoon baking powder
Pinch of salt

For the raspberry cake

225g soften butter
225g caster sugar
4 medium eggs
3 tablespoons raspberry puree
225g self-raising flour
Pinch of salt

For the raspberry buttercream

350g soften butter
600g icing sugar
3 tablespoons raspberry puree

For the white chocolate and lemon gauche

150 white chocolate
100g lemon curd

You will also need lemon curd, raspberry curd and decorations for the top.

Preheat oven to 180°C, gas 4 and grease and line two 20cm circular sandwich cake tins. Both the lemon and raspberry cakes can be made in the same way. Cream together the fat with the sugar then stir in the eggs, one at a time. Add the fruit component and stir then add the flour and salt (and raising agent) and stir until well combined and smooth. Spoon the batter equally between the two cake tins and level off. Bake for 20 minutes until springy to the touch and text with a skewer. Cool in the tin for 5 minutes then remove onto a wire rack to cool completely.

Once cooled, cut the cakes horizontally so that there are a total of 8 slices of cake. Choose a suitable presentation plate and place the first layer of cake on it. Spoon curd onto the cake and spread evenly over it. Next place a layer of the other flavour of cake on top and spoon the other curd flavour onto that. Continue, alternating the flavours, until the last layer of cake is placed on top.

Use the butter icing to completely coat the cake - sides and top. Use a straight sided spatula to smooth out the icing. Place the cake in the fridge to cool. Next melt the white chocolate. You might like to dip some fruit into the white chocolate at this stage. Once slightly cooled, stir in the lemon curd then leave to cool until it is a suitable consistency for dripping. Spoon into a piping bag and carefully pipe on the drips then cover the top with a layer of the gauche and level off. Whilst the gauche is still slightly soft, push your decorative items into it or use blobs of leftover butter icing or gauche to act like glue.


Tuesday 11 April 2017

Get Growing this Easter

I realised recently that I have been growing plants for 30 years now. Having said that, some of you may now imagine me to be a woman in her "mature" years but in fact I started seriously growing plants at the age of 12. I can't really remember what started it - maybe a friend giving me a "baby" from her spider plant - but with the aid of a good book on house plants, my bedroom very quickly started to resemble a jungle. It was a rewarding hobby, perhaps a substitute for not being allowed a pet, and something I was able to get on with without adult assistance and within the realms of my pocket money.


These days I don't deliberately grow houseplants. Not that you would be able to tell if you came to my house as every available windowsill has plants on it and I recently went out to buy vertical shelving units to make use of the big window space offered by my patio doors. All the plants, however, are edible and are either destined for the garden when the weather warms up or the result of me looking at a kitchen ingredient and wondering: what would happen if I planted that? So currently I have a turmeric plant, a lemongrass plant, root ginger, a sweet potato and a variety of citrus plant that grew from a pip my daughter stuck in a pot about eight years ago.


When growing my spider plants, propagating my begonias and sowing new seedlings I never imagined that it would led to a life-long love of growing and to me growing vast quantities of fruit and vegetables. But once you have success at growing plants it is hard to not continue with it. Even back then when edibles were not my thing, I used to enjoy making mini dessert islands by placing a carrot top on a saucer and watching the top regrow. My friend and I successfully grew avocado plants from stones given to us by her grandma and I even managed to regrow a pineapple top into a healthy houseplant, although it never did bare the mini fruit shown in my handbook.

My own children have grown up with their parents growing the household fruit and vegetables so in some ways they take it for granted and think it normal. They don't really realise that their classmates at school probably couldn't identify vegetable plants from just their leaves and whilst girls are getting hysterical about a wasp my two will calmly know it is only a hoverfly. There is, however, a wonder to teaching children how to grow plants and it is easy to get started. Try the carrot top - that really is simplicity on a plate. Potatoes that have already sprouted are good to throw into a bag of compost too. A clove of garlic will regrow happily into a whole new bulb. More challenging are the likes of pineapple tops, root ginger, monkey nuts, citrus pips and avocado but they are all possible and there is nothing to lose by giving them a go.


Kids do get some opportunities to grow a few things at school and most will experience seeing the germination of a runner bean pressed against the inside of a jam jar with a wad of damp cotton wool. They will also, undoubtedly, grow cress and experience the taste of egg and cress sandwiches. Cress is particularly easy because it is only grown to the seedling stage and then harvested so it only takes a few days and doesn't require potting on.

So with growing cress in mind, here is a lovely activity to do during the Easter holidays that will give your kids a taste of growing. Personally I think growing is fun in itself but the creation of an egg character adds to the enjoyment.


Making a Cress Egg Head

You will need

An empty and clean egg shell (plus spares!)
A toilet roll
Cotton wool
Cress seeds
Felt tipped pens
Googly eyes
Foam/paper hands and feet
Double-sided sticky tape or sticky dots or glue


1) Cut the toilet roll to make a ring shape about 3 cm tall and colour it in to make a body.

2) Stick on the foam or paper hands and feet with double-sided tape, dots or glue.

3) Gently stick the googly eyes carefully onto the eggshell (or draw them on) and draw on the rest of the face. Place the egg head onto its body (note: if your egg slips through the ring place a piece of scrunched up tissue paper in the ring for the egg to rest on).

4) Moisten the cotton wool and place it inside the egg shell then sprinkle on cress seeds.

5) Place on the windowsill and water every day until the cress is ready to eat then give your egg character a hair cut and enjoy your cress in a sandwich or salad.


Sunday 19 March 2017

Teeny tiny cheesecakes

So when is is acceptable to eat four cheesecakes for dessert?

When they are the size of an ice-cube.

There I was absently scrolling through my Instagram feed this morning when I came across the idea for mini cheesecakes made in ice-cube trays. It was one of those moment when I just knew I had to give them ago and, luckily, I happened to have all the required ingredients to hand so by dinner time we were tucking in to the daintiest little desserts you could imagine. Your life is not complete unless you try these!


Mini Cheesecakes (makes 1 tray's worth)

Ice-cube trays vary in size considerably so the size and quantity of your cheesecakes will be dependent on your tray. I would recommend the biggest you have so they are less fiddly to make.

Jam - flavour of your choosing
100g mascarpone cheese
140g cream cheese
70g icing sugar
1/2 tsp vanilla extract or vanilla bean paste
40g melted butter
50g granola
50g digestive biscuits

Cover the bottom of each ice-cube hole with a little jam then place in the freezer whilst you prepare the filling. Mix together the mascarpone, cream cheese, sugar and vanilla. Spoon this mixture into a sandwich bag and cut off the corner so you can use it like an piping bag. Pipe the filling into each cube hole until it is three quarters full. Smooth out with a teaspoon or a wet finger. Place in the freezer for half an hour. In the meantime, blitz the biscuits and granola in a food processor until crumbed then mix with the melted butter. Remove the ice cube tray from the freezer and spread the biscuit mixture over it and lightly press into each hole. Return to the freezer for at least an hour. Remove from the freezer and carefully pop each cheesecake out of the tray. I found that a plastic knife gently pushed down the edge of each cube helped to extract them. Stand each cake on its biscuit base and put in the fridge to thaw out until required.

Thursday 16 March 2017

For the Love of Lemon Curd

As a maker of jam and marmalade, it seems only logical that I should also make fruit curds. And I do, occasionally. But only occasionally. There are a number of reasons for this. Firstly, curds usually involve citrus fruit and these are not something I grow. Secondly, because they contain butter and eggs, they ideally need to be kept refrigerated and consumed within a few weeks so they are not something I make on a whim but instead only when I have an order for them or an event coming up. And finally, they are a bit of a pain to make, requiring slow but frequent stirring and then a kind of magically guesswork to figure out if they have set. Usually I start to lose patience with the whole thing and will it to be set before it properly is, resulting in an unsatisfactorily thin curd.

When made well, home made lemon curd is a beautiful thing. Custard yellow and as thick as trifle, it has a zingy citrus bite that makes my mouth water just thinking about it. It goes beautifully into a lemon layer cake and can be stirred into yoghurt, rice pudding or porridge to transform them into tasty desserts (or breakfasts, or elevenses even).

Recently I discovered that it is possible to make lemon curd in a pressure cooker. It is such a simple thing, requiring the measuring and mixing of ingredients, set up of the pressure cooker and then just the release from the cooker and a good stir at the end. How wonderful it is to able to let it get on with it and not be tied to the endless stirring and wondering if it is done yet. Since discovering this I have had a constant supply of lemon curd in the fridge and it hasn't once failed to turn out beautifully.

So, having turned curd making into an easy and successful process, I now feel confident to offer it as one of my preserves for sale. But with locally sourced ingredients being essential to my products, it didn't seem right to offer a basic lemon curd. I have in the past dabbled with curds that use locally grown ingredients and there is no doubt that Roasted Rhubarb Curd, or Strawberry & Orange Curd, or even Rhubarb & Lemon Curd are tasty but there are, nonetheless, not Lemon Curd - plain and simple. As such, I turned to the other ingredients and decided that if I could source local eggs then we were back in business.


It was my friend Emma who suggested I pop along to Two Mile Ash Farm for my eggs. They don't have a farm shop as such, instead they have a vending machine in their driveway stocked with apple juice, honey and eggs. An odd, yet workable solution. Having put my coins into the slot I was able to open a sliding door to a compartment to take out a box of eggs. With local eggs sourced, it was time to put Lemon Curd onto my list if preserves for sale.


Having announced this, Buskers were keen to order a large jar with their usual jam order and the delivery of the curd was met with an excited shout of, "Get some toast on, the lemon curd has arrived!" I presume there was enough in the jar that there was some left for the customers once the staff had had their fill. Keep an eye out for it there and also at my events in the future. Now that it is back on the menu, you'll not want to miss out and if you don't want to just spoon it out of the jar and into your mouth, here's my lemon layer cake recipe.


Lemon Layer Cake

For the cake:
225g (8 oz) margarine
225g (8 oz) caster sugar
4 medium eggs
1 lemon
225g (8 oz) self-raising flour
1 teaspoon baking powder
Lemon curd

For the icing:
1 lemon
125g (5 oz) icing sugar

Preheat oven to 180°C, gas mark 4 and grease and line 2 circular sandwich cake tins. In a large bowl, cream together the margarine and sugar then stir in the eggs one at a time. Add the juice and zest from the lemon then stir in the flour and baking powder. Spoon the batter fairly between the two cake tins and level out. Bake for 20 minutes then turn out the cakes onto a rack to cool. Once cool you can decide whether to just have lemon curd between the two cakes or if you feel brave enough to attempt to cut the cakes in half to make 4 cake layers. Assemble the cake by putting a layer of lemon curd between each cake layer. To finish, make up the icing by mixing the icing sugar with the zest and juice of another lemon then pour the icing over the cake.


Thursday 9 March 2017

In support of British Sugar

The whole point of Jam Moo Kow is to make jam and chutney from locally grown ingredients. Generally this involves me and my family growing the main ingredients - i.e. the fruit or the vegetables. Indeed, it is the availability of ingredients that determines what is made. Obviously, it is also necessary for me to barter or buy other ingredients. I like to source the beer, cider, cider vinegar, brandy and whisky used in my products from Concrete Cow Brewery and Virtual Orchard. Carol supplies the honey used in my Honey & Lemon Marmalade, and I use local eggs in my curds. But on top of that I need to buy in things such as spices, citrus fruit and, of course, sugar.


As you might imagine, I get through a heck of a lot of sugar so it is important to me to source that as locally as possible. To be honest, this has never been an issue as Silver Spoon make this easy. They grow sugar beet in East Anglia (really not many food miles way) and turn that into granulated sugar that is conveniently sold in all the major supermarkets... Well, actually that is not true. I have always turned my nose up at the huge 20kg bags of granulated sugar that Costco sell as these are Tate & Lyle. Despite Silver Spoon being supported by Waitrose and their products available to buy in store, it is only possible to buy Tate & Lyle sugar when ordering from Ocado. And now, it seems Tesco has turned its back on the brand.

It was the middle of January when I first noticed Tate & Lyle sugar taking the space that Silver Spoon sugar had always occupied in my local Tesco store. I hoped it was merely a supply issue but this week news broke that Tesco have ditched Silver Spoon as a supplier in preference for Tate and Lyle. Their reason for this - to provide their customers with the cheapest products.

So let's take a look at Silver Spoon for a moment. In fact, have a look at their 4 minute explanatory video. Here they describe how sugar beet is grown by East Anglian farmers and processed in a factory in Bury St Edmonds into granulated sugar. The waste from the sugar beet is turned into animal feed and the waste energy is used to grow tomatoes.


For comparison: Tate & Lyle has a long history, going back to 1878 when Tate started processing sugar in London. The company grew and expanded to become Tate & Lyle during the Victorian era. However, in 1981 European restriction on sugar cane led to the closure of one of the London refineries and now forces the company to only run their remaining plant 5 days a week, which unfortunately means it is less energy efficient because of the stop/start. Processing for Tate and Lyle also takes place in other European countries such as Portugal, Germany and Italy. In October 2010 the whole company was taken over and is now owned by American Sugar Holdings. Tate & Lyle sugar uses sugar cane as its crop and this can only be grown in tropical countries. Most of the sugar cane comes from developing countries such as Belize and they do work within Fair Trade rules. Once harvested, the cane is processed locally into raw sugar and then transported by sea to the refineries in London and Europe for further processing and bagging.

As is so often the case, on the face of it, the imported product should work out more expensive but it is in fact cheaper. Tate & Lyle sugar has always been cheaper but now, in the face of a weak pound (which you think would make it more expensive!) and prices across the store going up, Tesco have taken the decision on behalf of its customers to go with the cheaper product to keep prices down.

With so many products available and only a certain amount of store space, I understand that all supermarkets have to make decisions about which products and brands to stock but it does aggravate me that they have decided that price is the most important consideration for shoppers and to take away their choice to support a British industry and limit food mileage.  With wonky veg and overly cheap milk, supermarkets are not looking at all supportive of British farming right now.

Anyway, at least now Tesco have made their sugar choice public and I can vote with my feet. Yesterday I popped along to my local Asda store to stock up on Silver Spoon sugar and I can only hope that they continue to support this British brand. Whatever the supermarkets might think about being the need to be cheapest, sometimes there are things more important to consumers than a few saved pence.

Friday 13 January 2017

MK50 Anniversary Exhibition

Being someone who loves Milton Keynes, I was eager to get down to the MK50 Anniversary Exhibition in Middleton Hall this week to see what I could learn. It is easy to think that you know a place when you live in it but there is so much more to find out. There is history that out-dates even the oldest of residents and plans that never became reality. So even if you think you know everything there is to know about Milton Keynes, think again.


My 12 year old daughter and I carefully went from exhibit to exhibit, making sure we didn’t miss anything. She particularly liked the 3D models in display cases that showed various parts of Milton Keynes. Their toy-like quality and the creation of a 3D space you can view for all angles is probably what appealed to her. After scratching our heads trying to work out which way round the model of The Kingston Centre was, we realised that these models were made during the planning process and not all of them worked out how they were expected. This to me is fascinating and leads on to my favourite part of the exhibition which is the “What Might Have Been” display that talks about things that were planned but never built.  I can’t help thinking that tourists would be flooding to Bletchley to enjoy the Cowcommon Canyon. I would have liked further text to explain why some of these amazing ideas never become reality.


We also enjoyed the maps and boards that went back to the days before Milton Keynes was even conceived and then through the gradual building process. On one aerial photograph we could pick out the field in which our house is now built and we tried to imagine what it was like back then. Throughout the exhibition there was a real mix of the familiar with “oh I had forgotten that,” and “I never knew that.”


As someone who was interested in the first place, this exhibition was a great opportunity to slowly digest and ponder the various forms of information on a variety of different aspects of Milton Keynes life. My daughter was also suitably entertained by it but I can see that not every child would be quite so patient. The organisers have made an effort to make the exhibition accessible for all and to have a variety of different ways of conveying the information to appeal to different ages and types. If reading information boards is not your thing then the models in cases are interesting, as are large objects such as the driverless car or the Triceratops . Alternatively, you can sit and watch an old TV advert or similar at one of the TV screens. There are also a few hands on play areas for younger kids that include building things out of blocks that look like giant Lego or playing a large board game. Give yourself 10 minutes to half an hour to get round it depending on your level of interest and whether you are being nagged but do make the effort to go – after all there’s not going to be another 50th birthday.


The exhibition is in Middleton Hall in the Centre:MK, is free and can be accessed during normal opening hours between now and 23rd January.